Dataset Subscription
To include datasets in your app, you request access to them during the application registration.
You can either request access using your Microsoft Azure account e-mail, or using the Tenant ID and Object ID of your Azure Active Directory user.
See the Application Wizard section for more details.
If you submit the email, you receive an e-mail invitation to Azure Data Share in your inbox. You need an Azure Blob Storage attached to your Azure Account, to store the datasets you receive.
The following section will make help you create of the Blob Storage before accepting the invitation.
Azure Subscription
You need an account on Azure, with a subscription. Use one that your company holds. If you can’t see any subscription or you do not have one yet, navigate to the Subscriptions page on Azure.
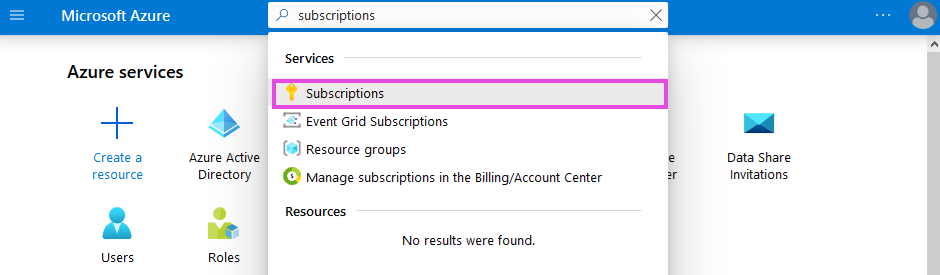
Go to Subscriptions page
Click +Add to add a subscription. This will redirect you to the Azure Subscriptions overview page. Select one that is suitable for you.
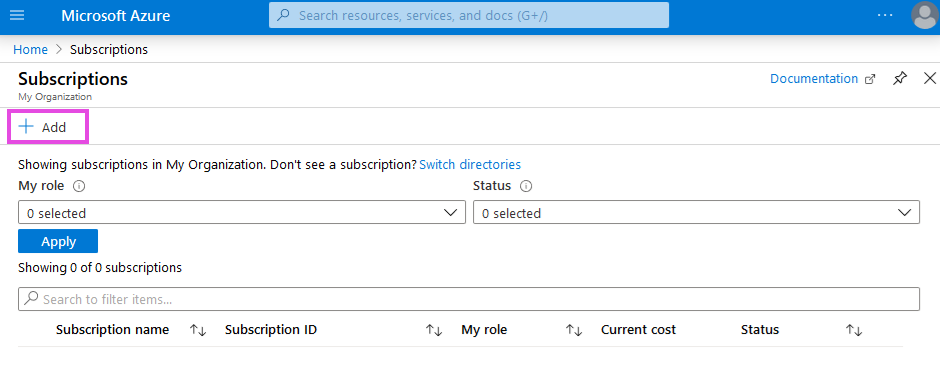
Add a subscription
After refreshing the page, you subscription should appear in the subscription list.
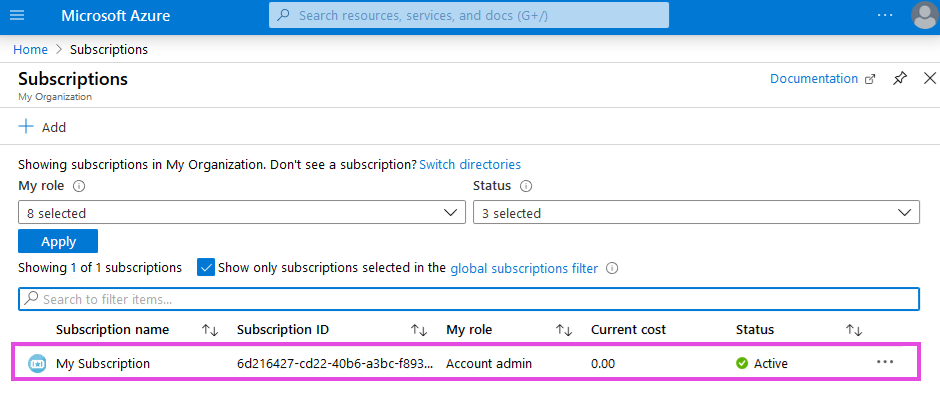
See the subscription list
For more information about how to create a subscription, read the Azure Create Subscription documentation.
Read the Azure Subscription REST API documentation to implement functionality using REST API endpoints.
Azure Roles and Permissions
A subscription comes with certain roles and permissions.
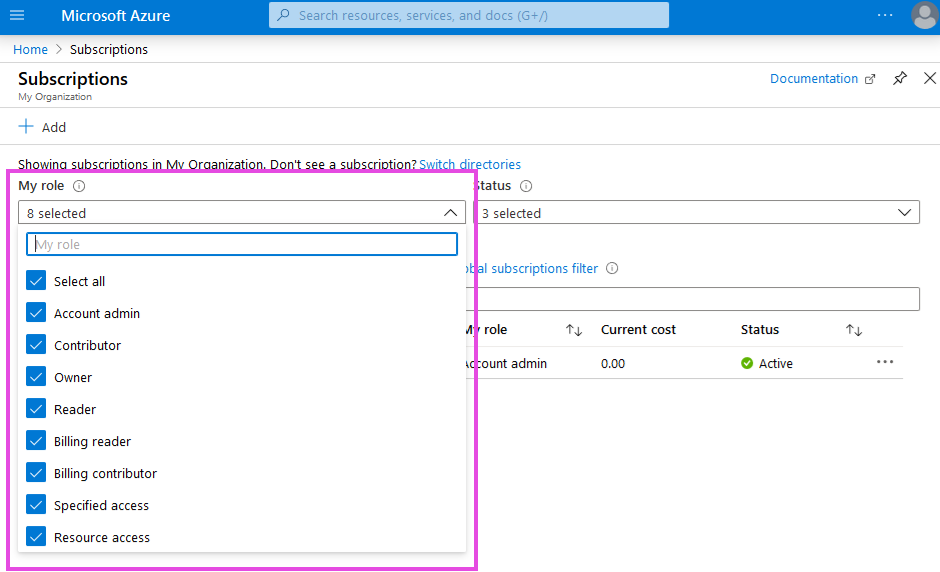
See the roles of your subscription
These roles are important when you want to access the datasets.
Read more about the roles you need to have, and how to activate them in this Azure Roles and Permissions documentation.
Azure Resource Group
Create a resource group, which stores the metadata of your resources.
Navigate to Resource Groups page from the left side menu. Click +Add to add a resource group.
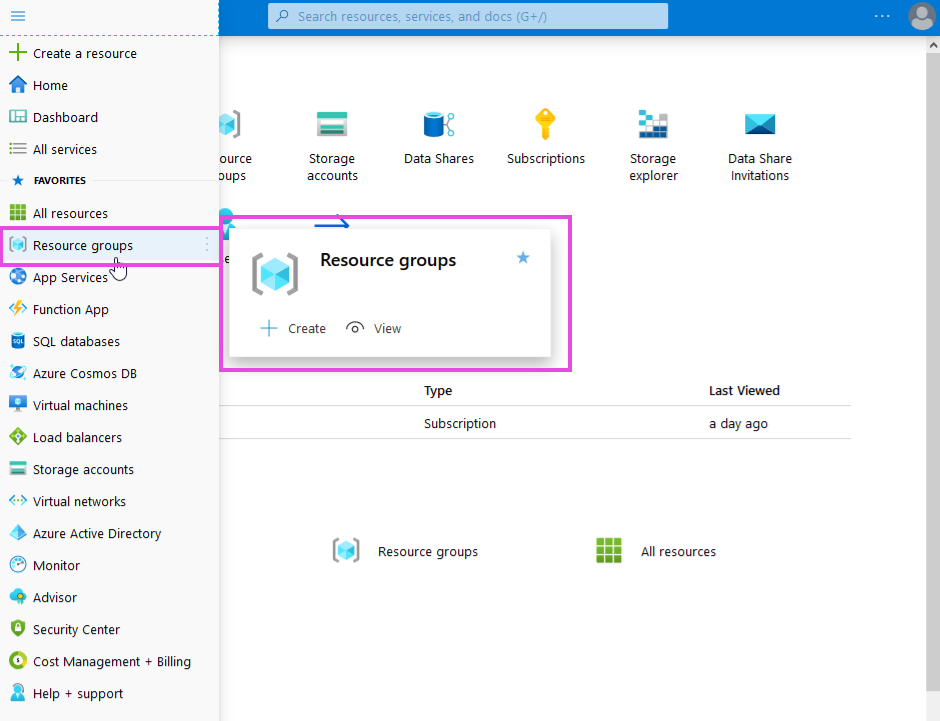
Go to Resource Groups page
This will redirect you to the resource group creation page. Fill in the required fields and create the resource group.
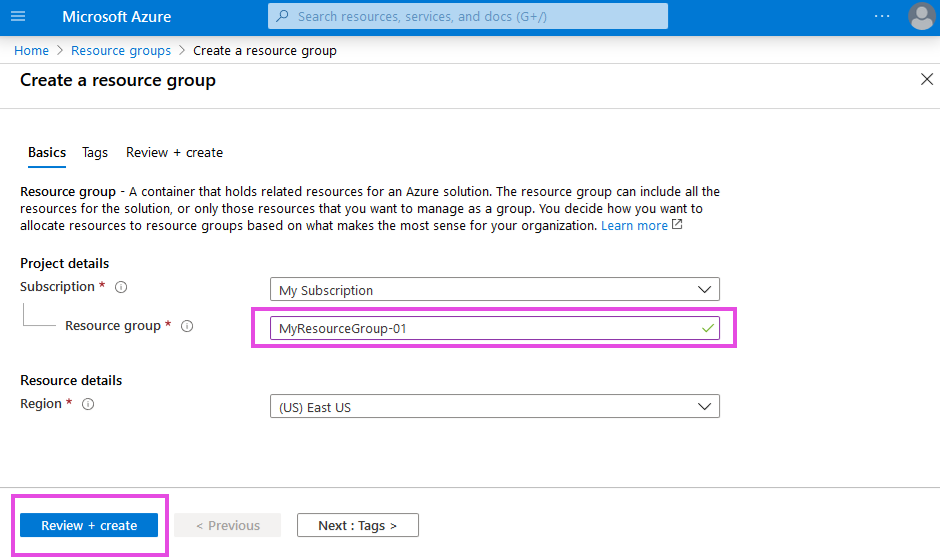
Create a resource group
You see your newly created resource group in the Resource Groups page.
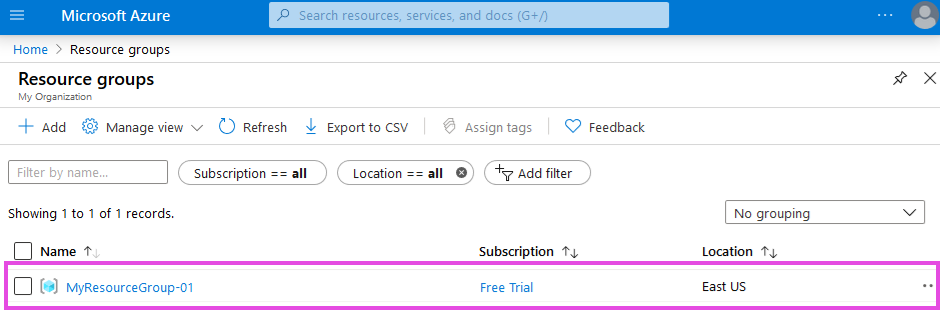
See the new resource group
For more information about what a resource group is and how to create one in this Azure Resource Group documentation.
Read the Azure Resource Group REST API documentation to implement functionality using REST API endpoints.
Azure Blob Storage
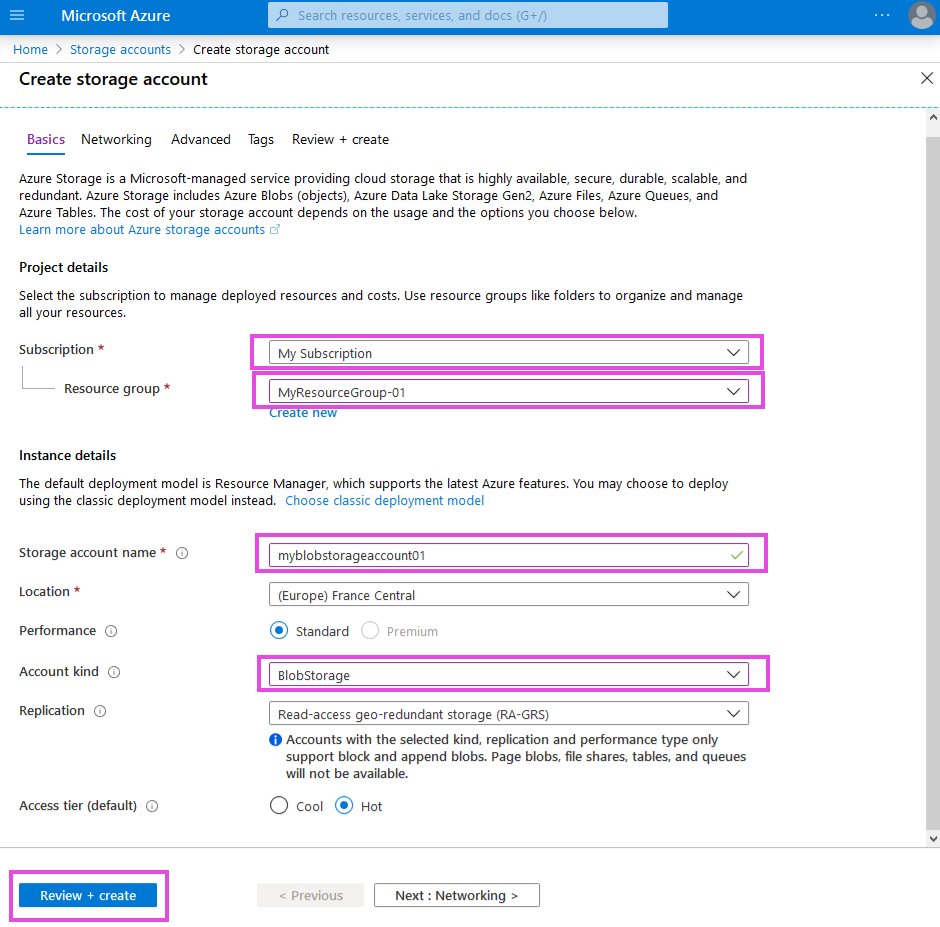
Create the blob storage. Navigate to Storage Accounts page from the left-side menu or type storage accounts in the search bar.
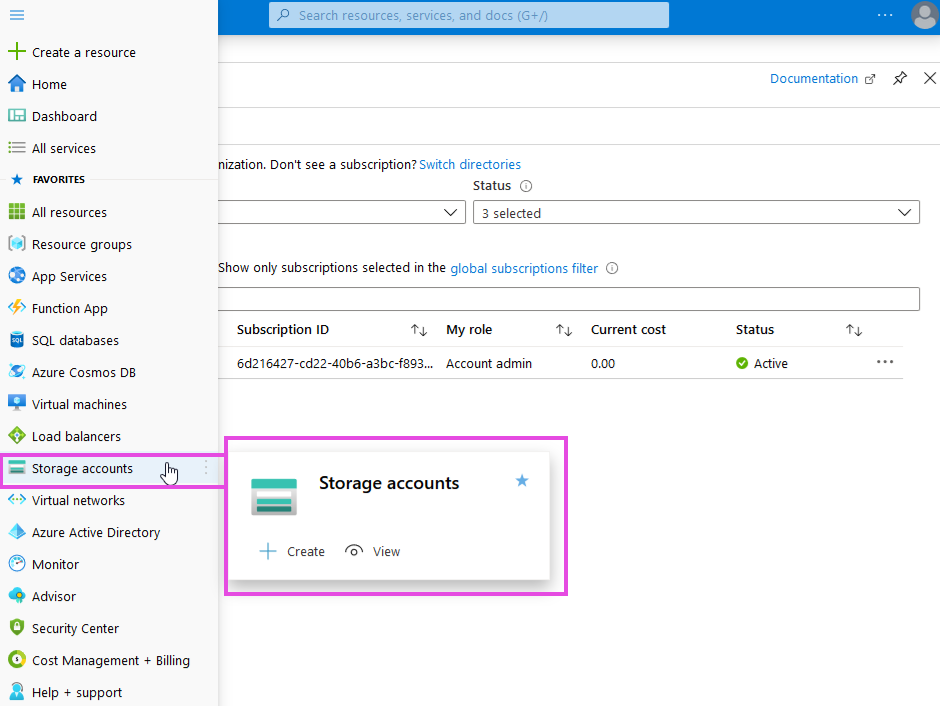
Go to Storage Accounts page
Create a blob storage account by clicking +Add.
Enter the details for your blob storage account:
- select a subscription
- select a resource group from that subscription to associate with the blob storage
- enter a unique name for your blob storage
- select the Account kind as
Blob Storage
Click Review+Create. The rest of the fields may remain as they are by default.
Create a new storage account
This is what to expect after a successful creation of the blob storage account.
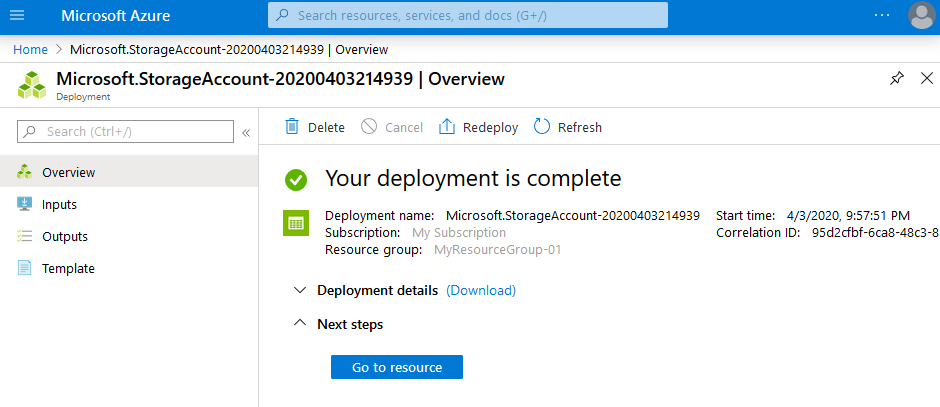
After you create a blob storage
You find your blob storage account and its details in the Storage Accounts page.
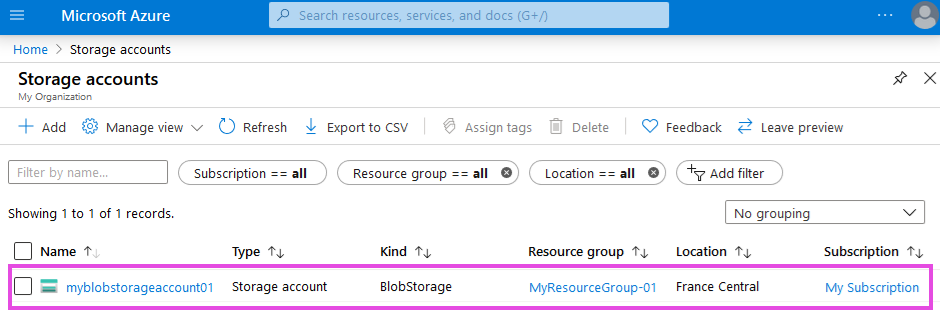
See the new blob storage
For more information about what a blob storage is and how to create an account, read the Azure Blob Storage documentation.
Read the Azure Storage Account REST API documentation to implement functionality using REST API endpoints.
Watch this Azure video on how to create a blob storage account.
Azure Data Share Account
A final step before accepting the invitation is the creation of a data share account.
This enables the sharing between the following entities:
- Provider: the financial institution that grants the access to the subscribed datasets and shares them with the consumer
- Consumer: the partner that requested the access to available datasets during the registration of a FusionFabric.cloud application
Navigate to Data Shares from the search bar by entering data shares.
Click +Add to add a new data share account.
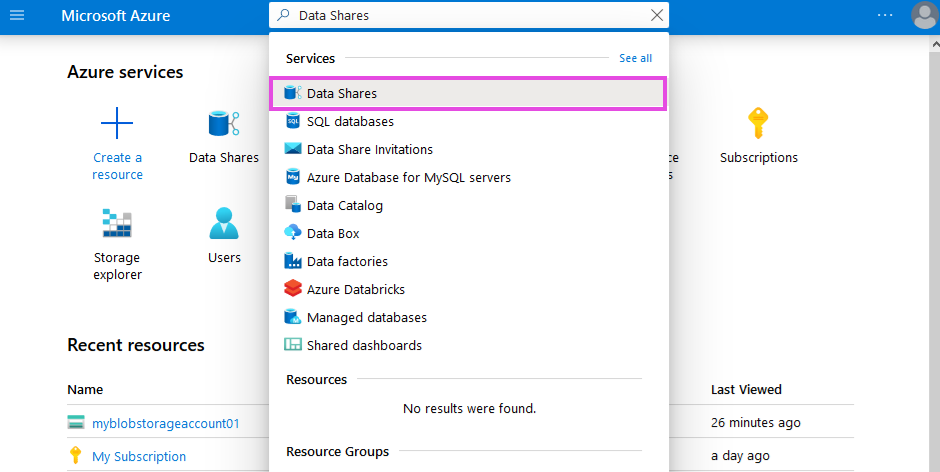
Go to Data Shares page
Fill in the required fields:
- select a subscription
- select a resource group from that subscription
- enter a name for your data share account
Click Review+Create. The rest of the fields may remain as they are by default.
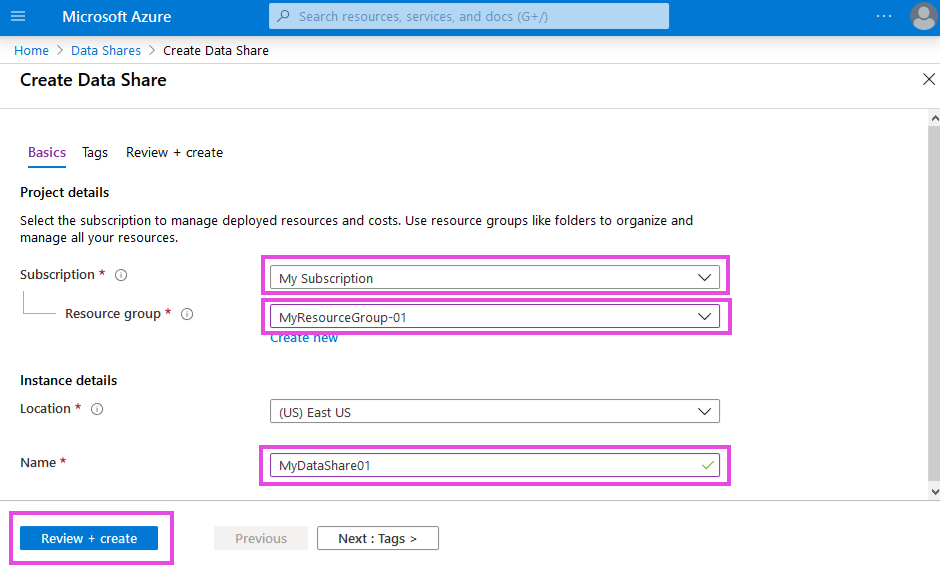
Create a new data share account
This is what to expect after a successful creation of your data share account.
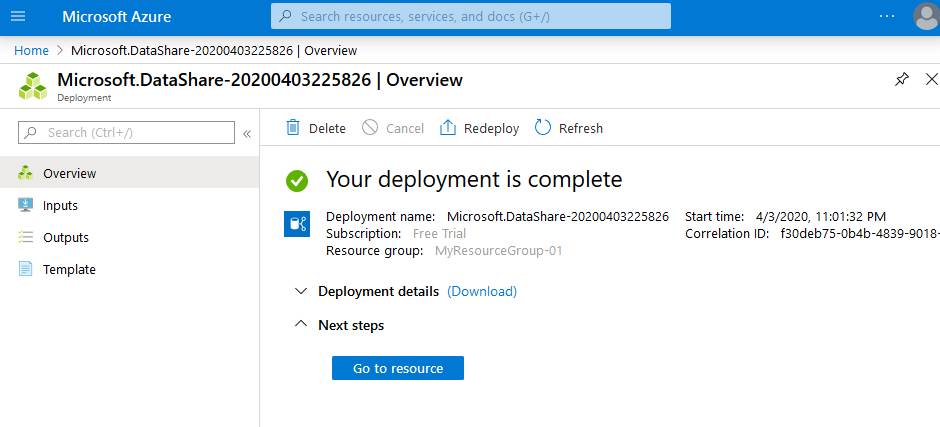
After you create a data share account
You find your data share account and its details in the Data Shares page.
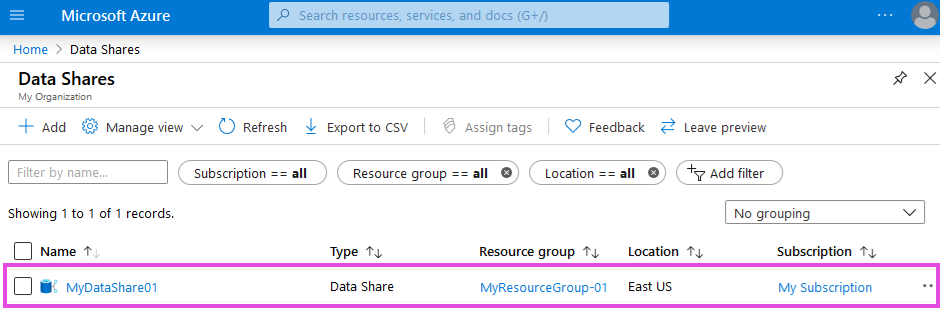
See the new data share account
For more information about what a data share is and how to create an account, read the Azure Data Share documentation.
Read the Azure Data Share REST API documentation to implement the functionality using REST API endpoints.
Accept the Data Share Invitation
Having a Subscription, a Blob Storage account, a Resource Group, and a Data Share account allows you to accept the invitation you received through the e-mail.
Search invitations in the search bar or click the link from the invitation e-mail to be redirected to the Azure Data Share Invitations page.
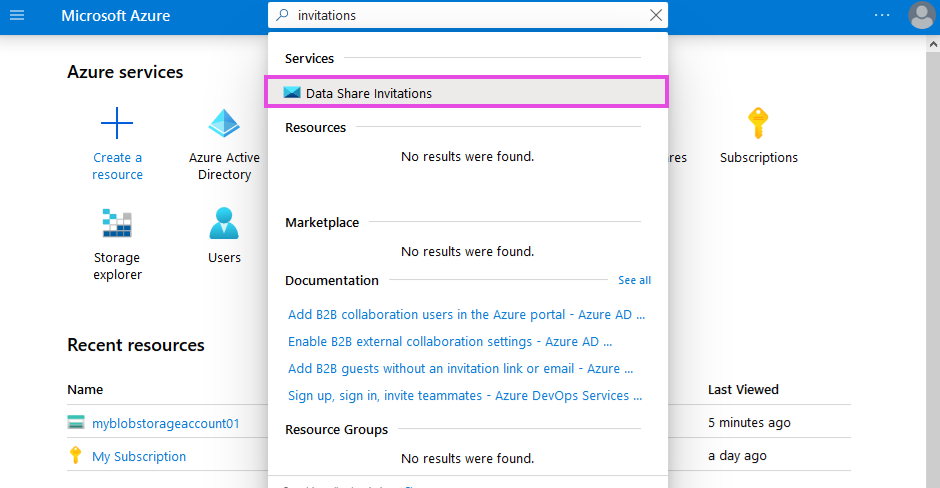
Go to Azure Data Invitations page
Select the invitation you received.
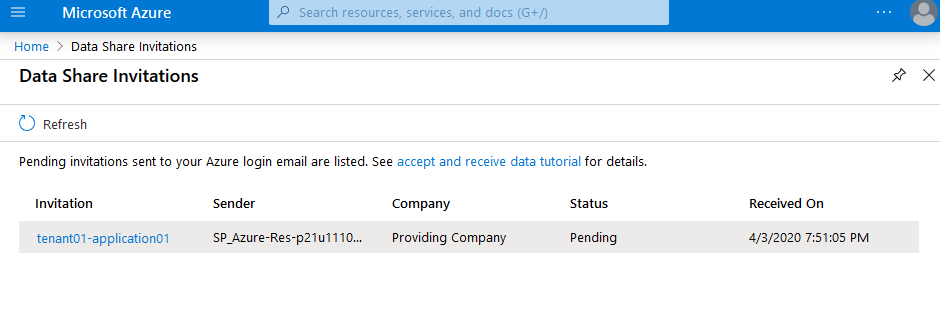
Select the invitation
Accept the terms and conditions.
Fill in the required fields:
- select a subscription
- select a resource group from that subscription
- select a data share account from that resource group
- enter a name for your received share
Accept the invitation.
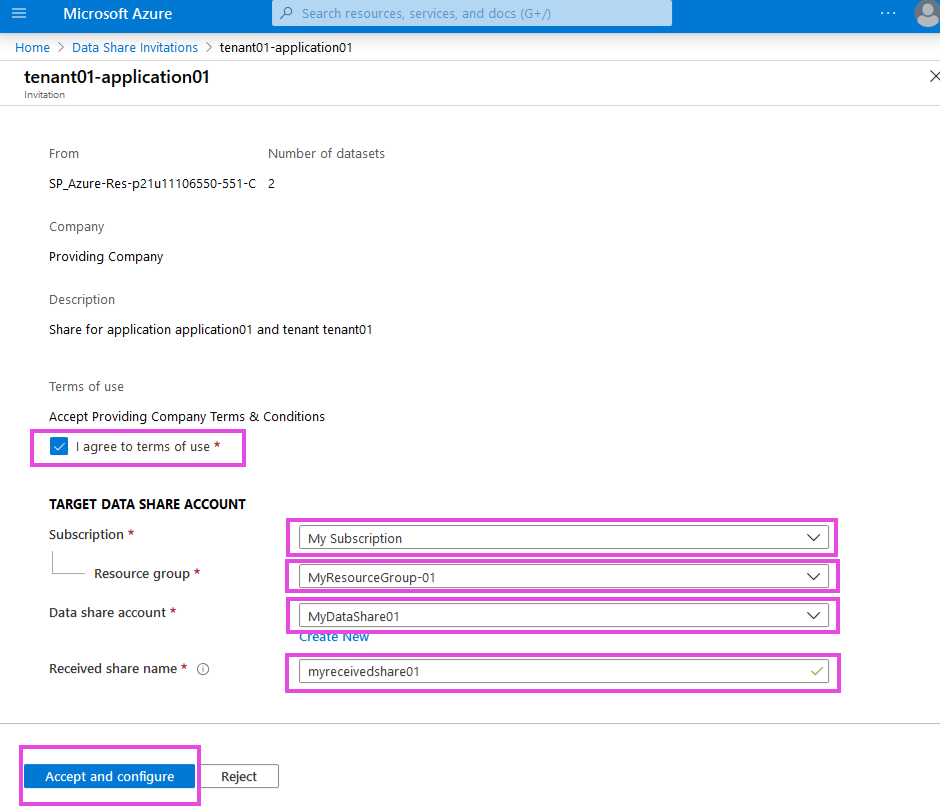
Accept the invitation
In the Received Shares page, you see the Details of the invitation.
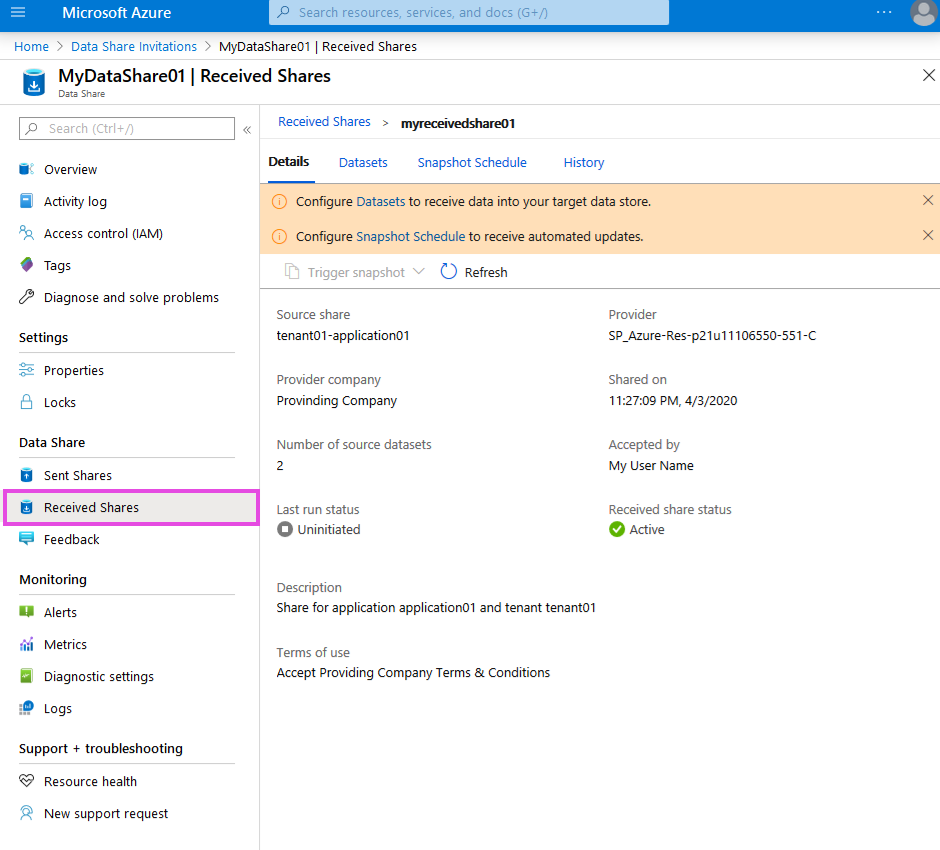
See the recieved share details
For more information about how to accept an invitation from your data provider using Azure Data Share, read the Azure Accept an Invitation documentation.
Read the Azure Consumer Invitation REST API documentation to implement functionality using REST API endpoints.
Watch these Azure video tutorials which explain step by step how to accept the invitation:
Mapping the Datasets
The datasets are now in your blob storage account. To be able to view or download them, you need to map them to a target.
From Received Shares page, switch to Datasets tab to see the datasets you requested the access to use.
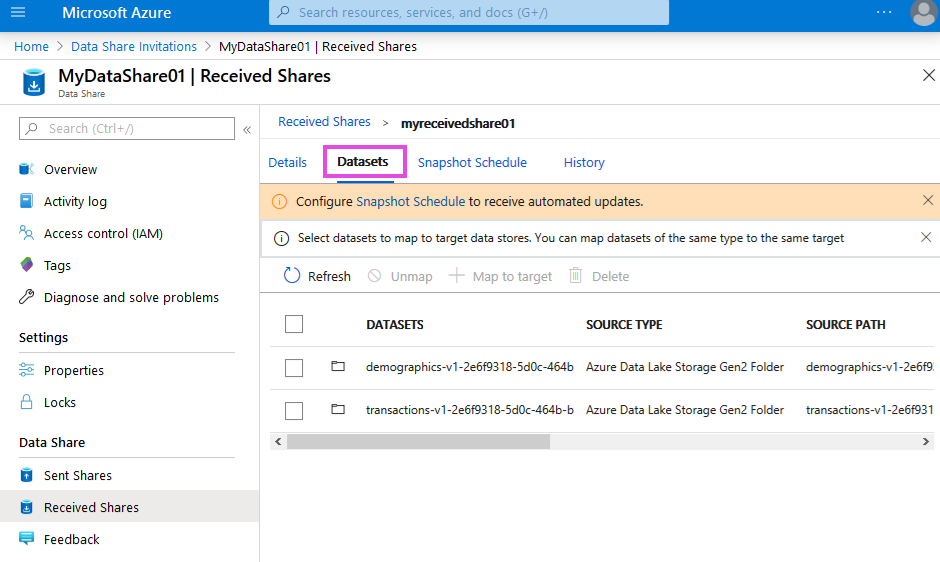
See the datasets
Select the datasets you want to map and click +Map to target.
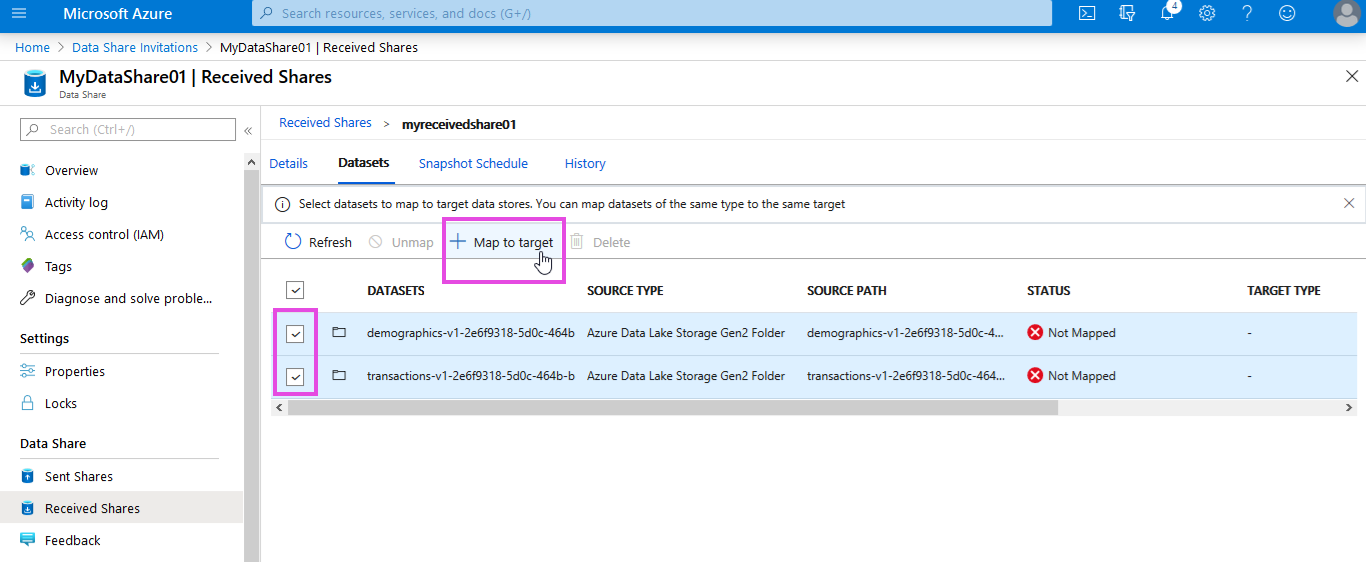
Select datasets to map
Fill in the required data and name the container in which you will store the datasets. Map the datasets to target.
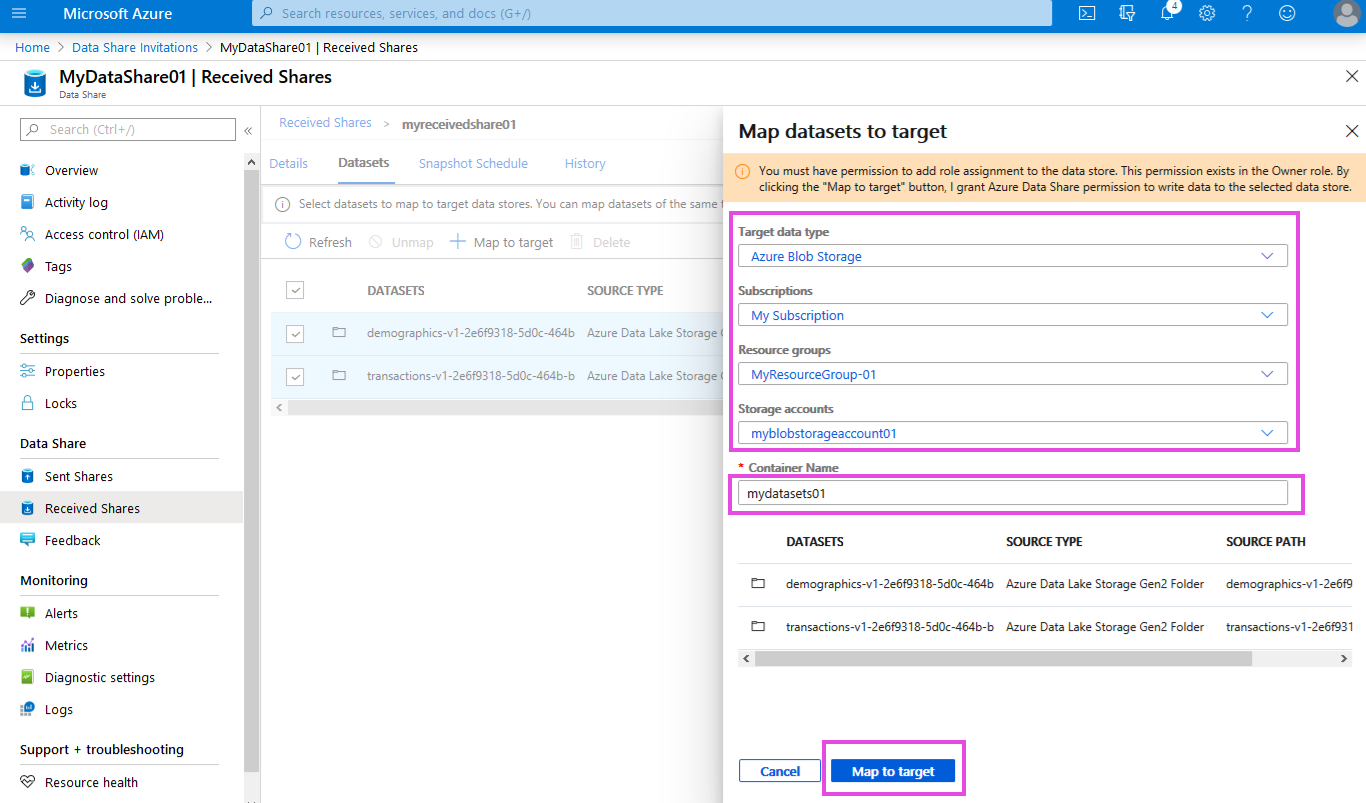
Map the required datasets
You see in your storage account or Received Shares page that the datasets have been mapped.
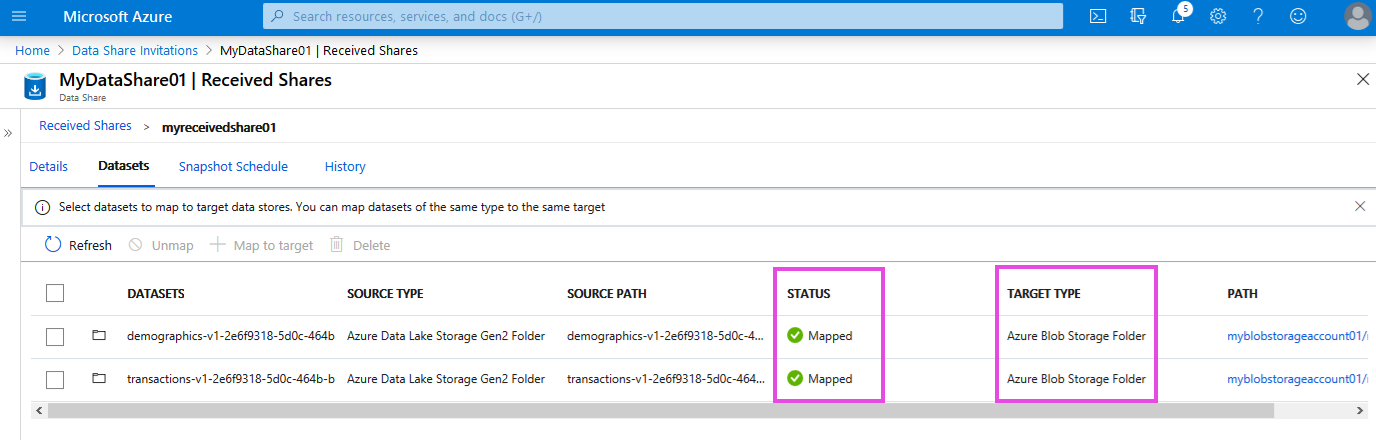
See the mapped datasets
For more information about how to map the datasets, read the Azure Map to Target documentation.
Read the Azure Data Set Mapping REST API documentation to implement functionality using REST API endpoints.
Snapshots for Datasets
After you map your received datasets, you can enable the snapshot update.
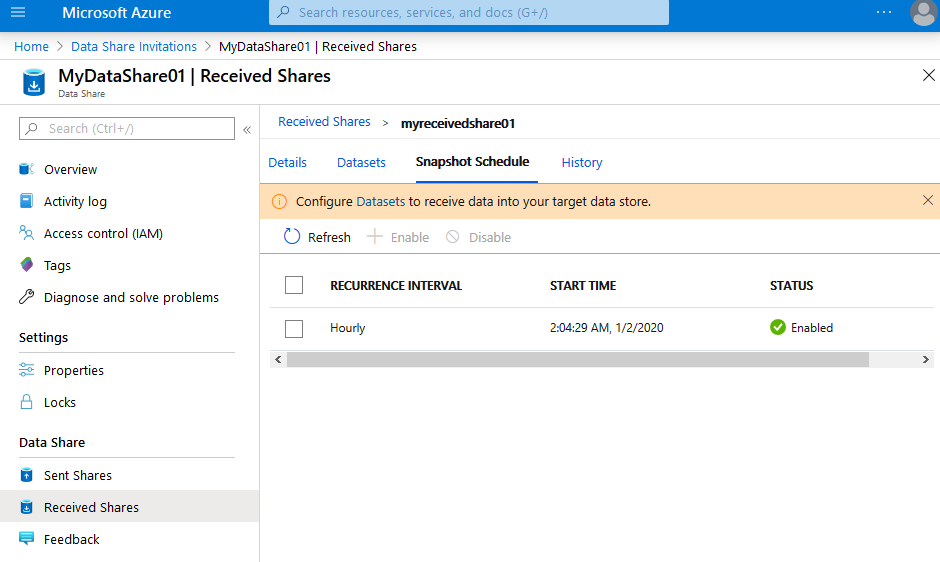
In the Received Shares page, switch to Snapshot Schedule tab.
Select the updating frequency. To enable it, click +Enable.
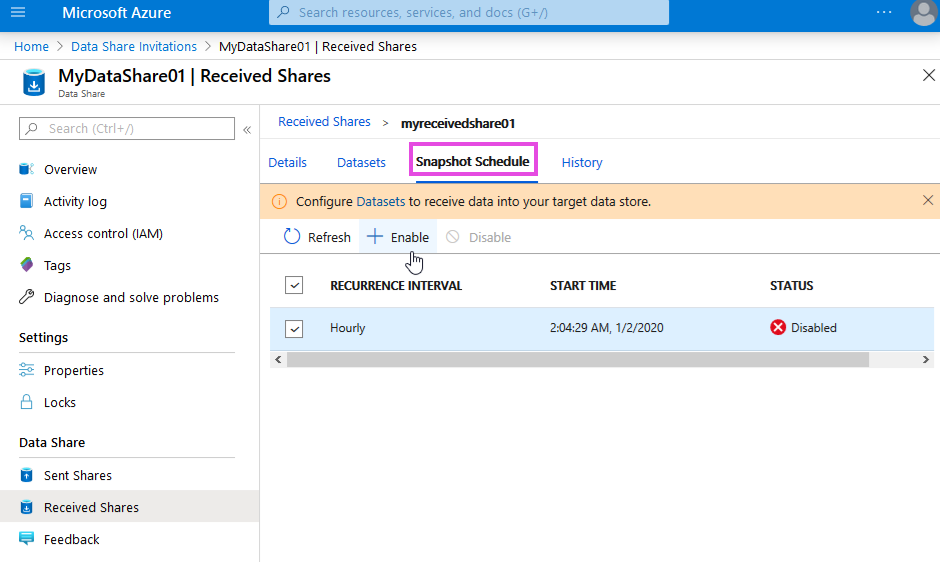
Switch to snapshot schedule
The data is checked for updates at the recurrence interval set up in the snapshot schedule.
If there are any changes were made to the data since your last snapshot, the datasets will be updated and copied to your storage.
Enable the datasets snapshots
You can trigger a snapshot of your datasets from the Details tab of your dataset, that updates your stored dataset copies.
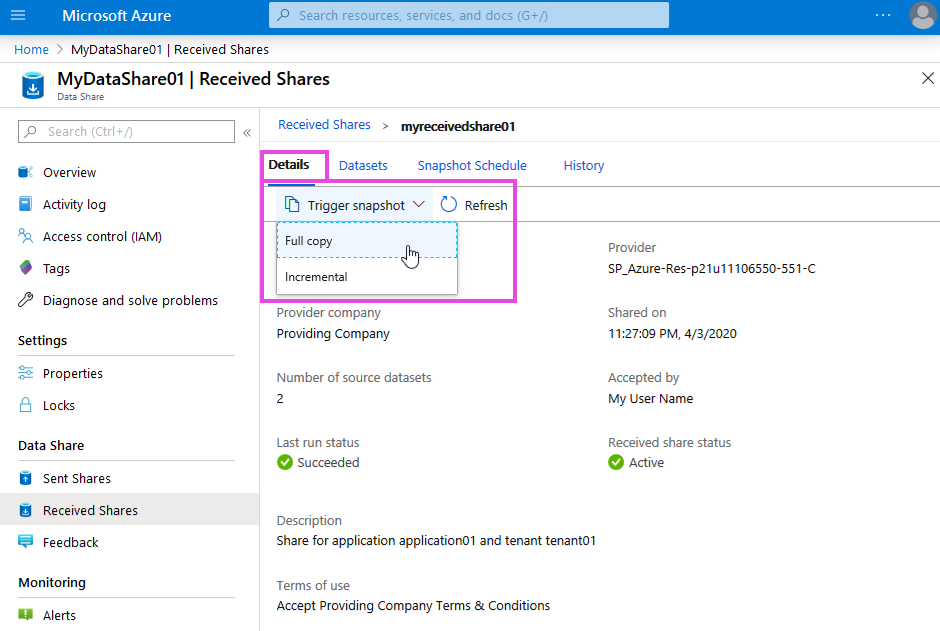
Trigger a dataset snapshot
For more information about what a snapshot is and how it works, read the Azure Terminology.
Read the Azure Create a Snapshot REST API documentation to implement functionality using REST API endpoints.
Download the Datasets
To manually download the datasets to your device, simply follow the path that is displayed in the Received Shares - Dataset tab.

Path to dataset
This redirects you to the container page in which you store the datasets. Select the container.
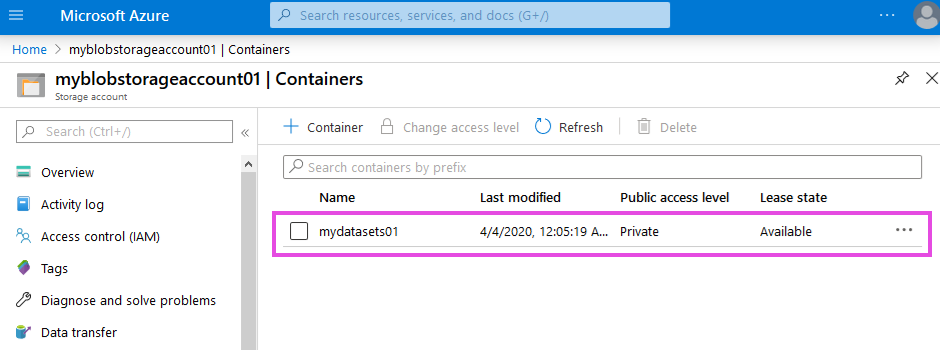
Select the dataset container
Here you see the available datasets folders. Select the one you want to download.
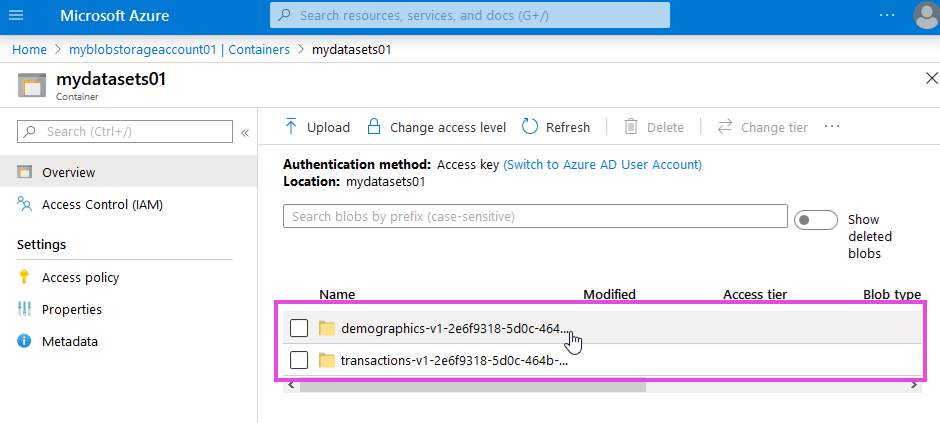
Select the desired dataset
The dataset in csv format is available for download. Select it to view its details.
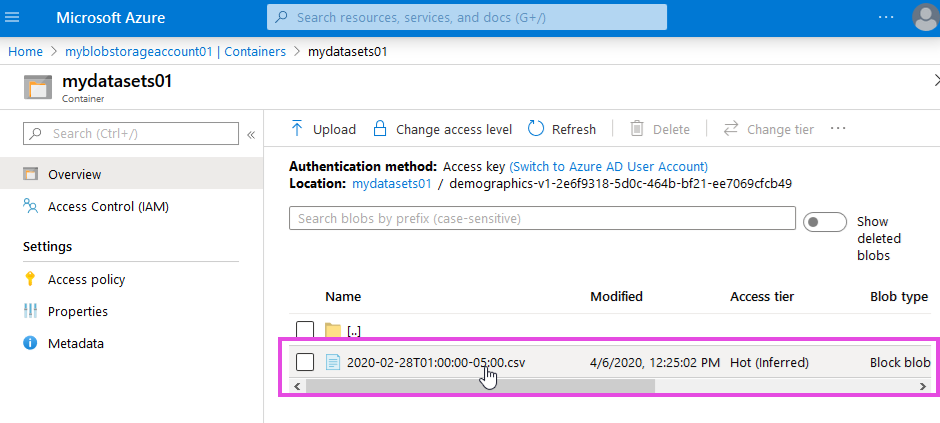
Select csv dataset
The details of the dataset csv file are displayed. Now you can download them by clicking Download.
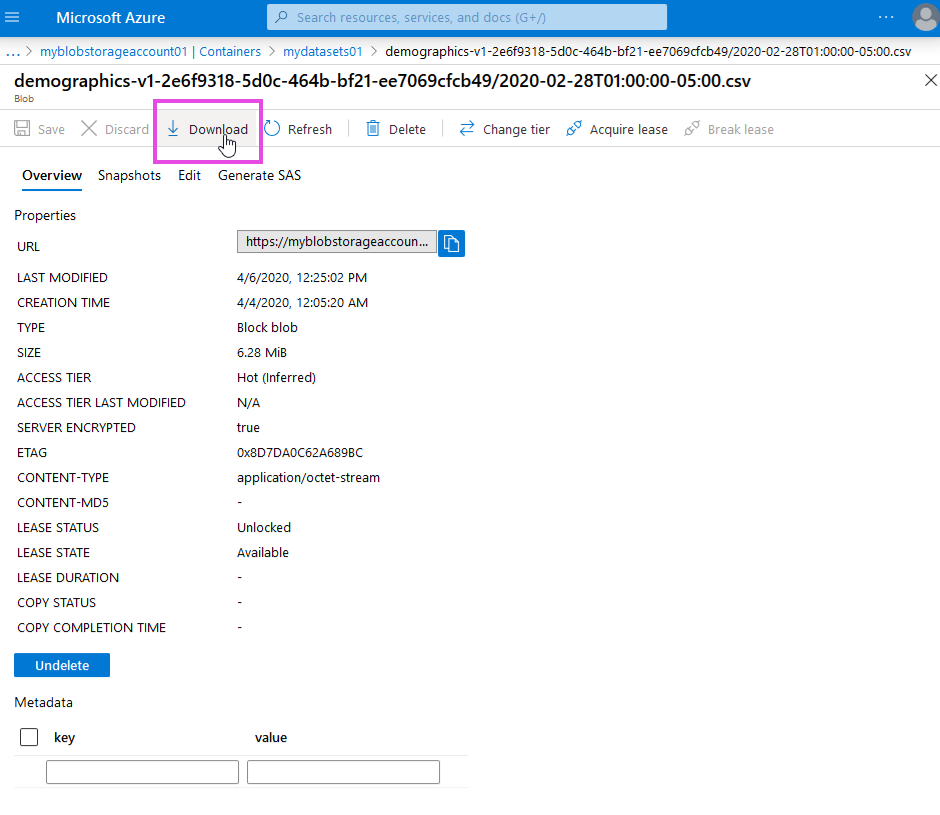
View dataset details and download it
Use Storage Explorer to download the datasets
There is another method to download the received datasets, by using the Storage Explorer.

Go to Storage Explorer
Navigate to your dataset container using the left side menu, and select the desired dataset for download.
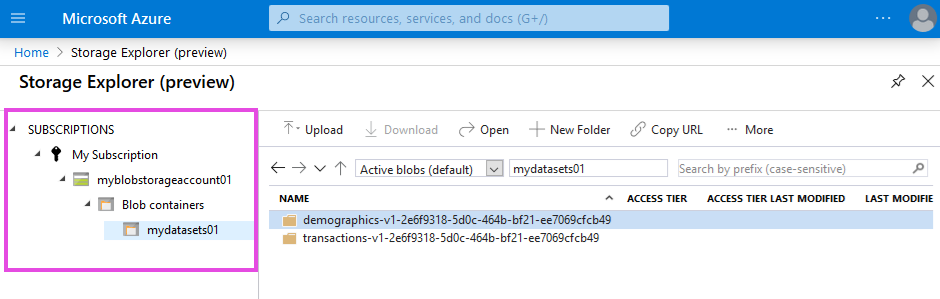
Select the dataset
Download the dataset in csv format to your device.
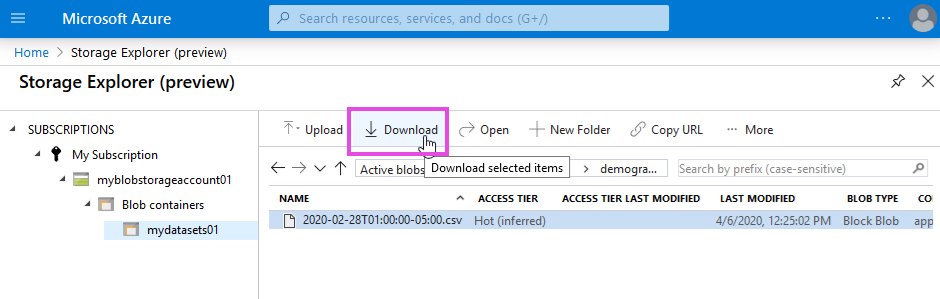
Download the dataset
For more information, read the Azure Storage Explorer documentation.
If you want to be notified every time the data you subscribed to is modified, read the Azure documentation about Reacting to Blob storage events or Events Hub.
A video about creating events is also available from Azure.
Use the Data
You are now ready to use the data from your Blob Storage.
For further details on how to use the blob data using code, refer to Azure Blob Storage documentation.
In the Examples guide, you are provided with a sample client application tutorial - Deep Learning Dataset tutorial to help you learn more about how to use the datasets in an application.