My Dashboard
Your dashboard is where you find all your applications and register new ones.
To register new applications click the Register Application button or the Register a new application card to open the application wizard and follow the registration steps.
If the Register Application button or card is not available, you are not entitled to register an application. Read more on User Entitlements section.
To manage an application hover your mouse to its card and click one of the following options:
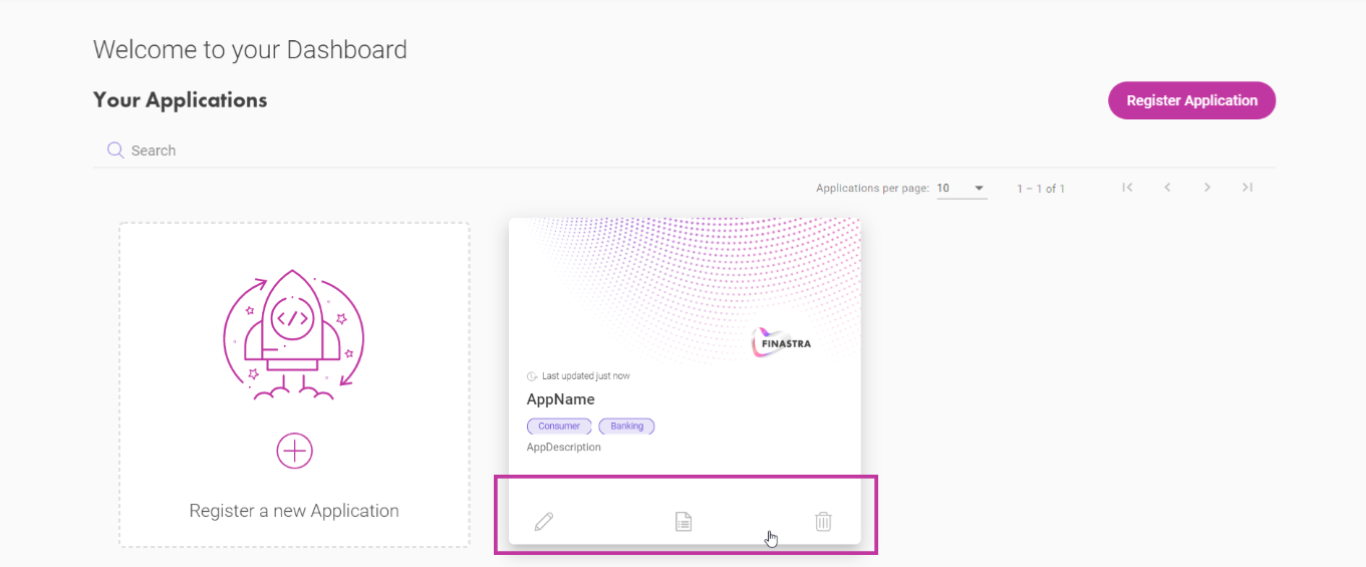
The options to manage an application.
- Edit application - go through all the registration steps again to edit the application.
- Application details - see the promotion stage of the application, the tokens and key for each API channel, and the registered APIs/ datasets and events. For more details, see the next sections.
- Delete application - remove the application from your dashboard.
Application Name and ID
Your application is identified by its name and by the unique ID that is given at registration time. Edit any of your application details that you entered during the application wizard by clicking the Edit application details icon.
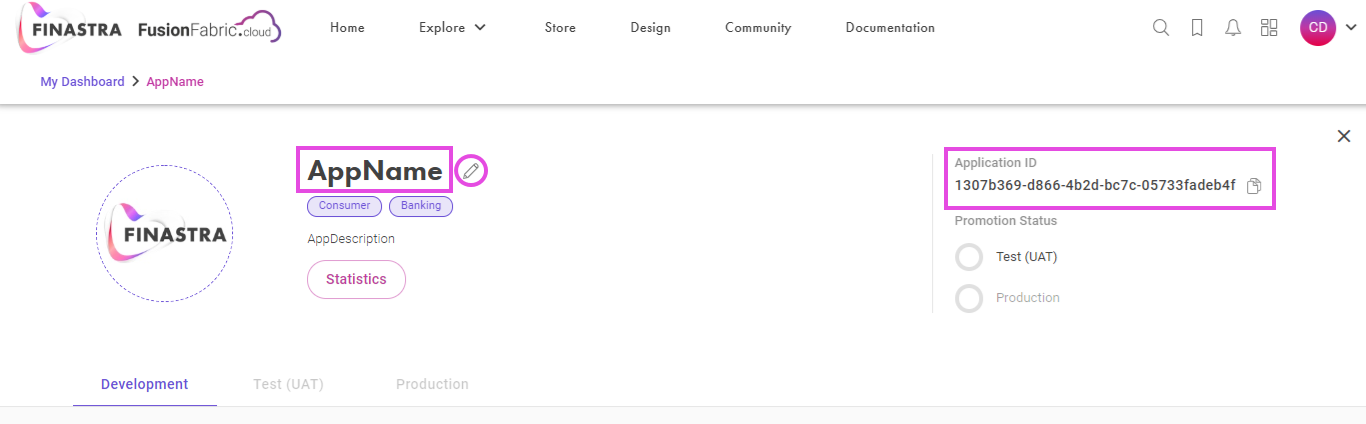
Update the application details and note its ID.
Application Statistics
A usage report is available for you to see how the APIs from your application are being called. Click Statistics to access it.
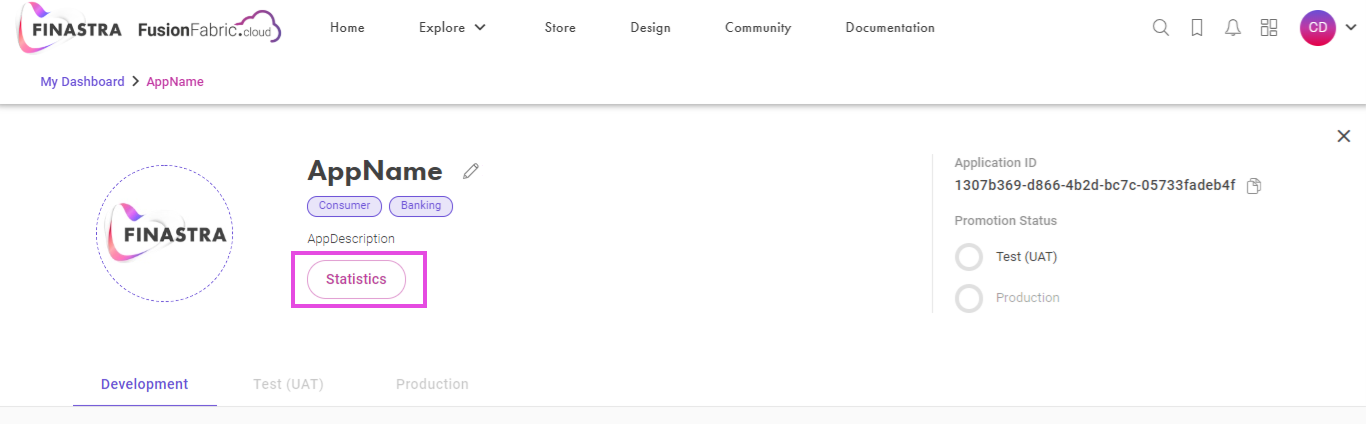
Statistics button for application usage
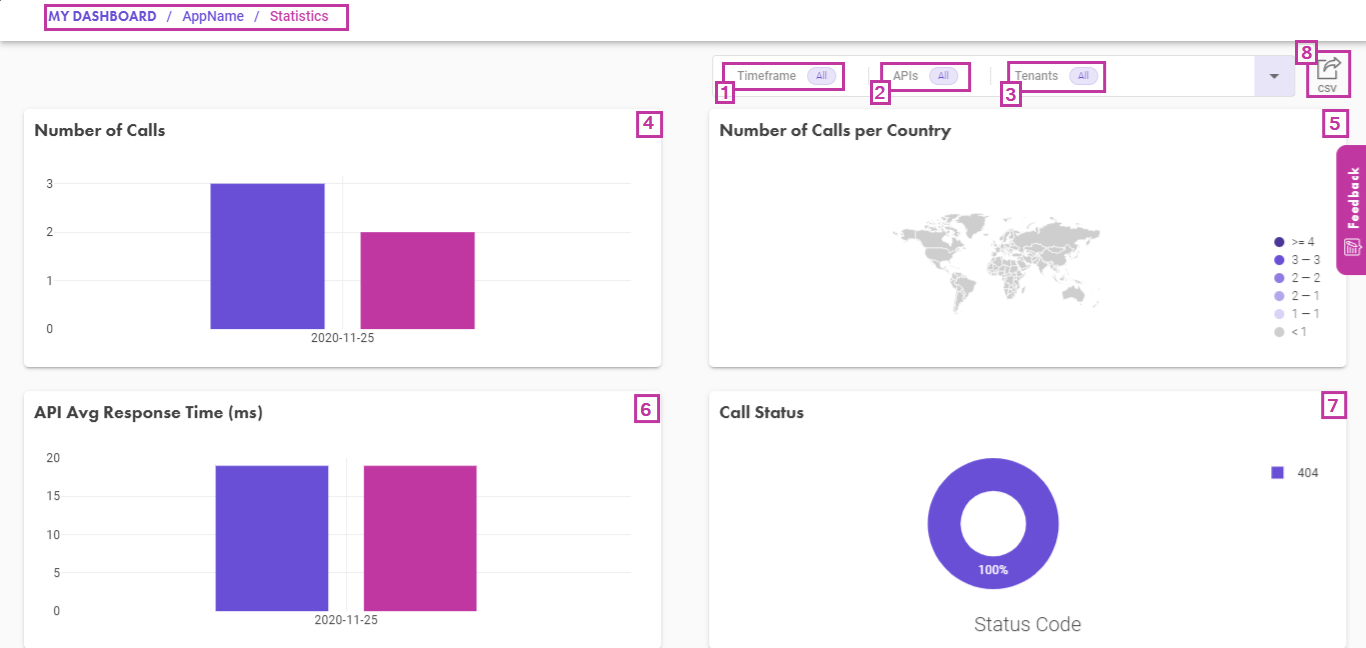
The report is made of several charts and it shows the calls by timeframe, by API and by tenant:
- The timeframe that you can select to see the usage for a particular period.
- The APIs used in your application. Select an API from the dropdown menu to see its usage statistics.
- The tenants that expose the data of the API endpoints in 2. Select a tenant from the dropdown menu to see the usage statistics.
- The Number of Calls chart for the selected API and tenant, as a time series.
- The Number of Calls per Country chart for the selected API and tenant, as a world map.
- The API Avg Response Time (ms) chart for the selected API and tenant, as a time series.
- The Call Status chart for the selected API and tenant, as a percentage doughnut chart.
- The Export data to CSV button which allows you to export your usage statistics as a CSV file.
Application Usage
Consent Acknowledgement
FusionFabric.cloud is a multitenant platform. While the tenants are implemented at the FusionFabric.cloud platform level, the data resides in financial institutions’ core systems. This data represents the resource that you are consuming through the endpoints of the APIs.
Specific consent is granted to each client applications developed with the APIs exposed by FusionFabric.cloud.
A financial institution must grant you with consent for your application before being able to use the app that you developed and published to FusionStore.
As an application owner, you must acknowledge these consents by clicking Consents. Here, you can see the complete list of consent acknowledgment requests.
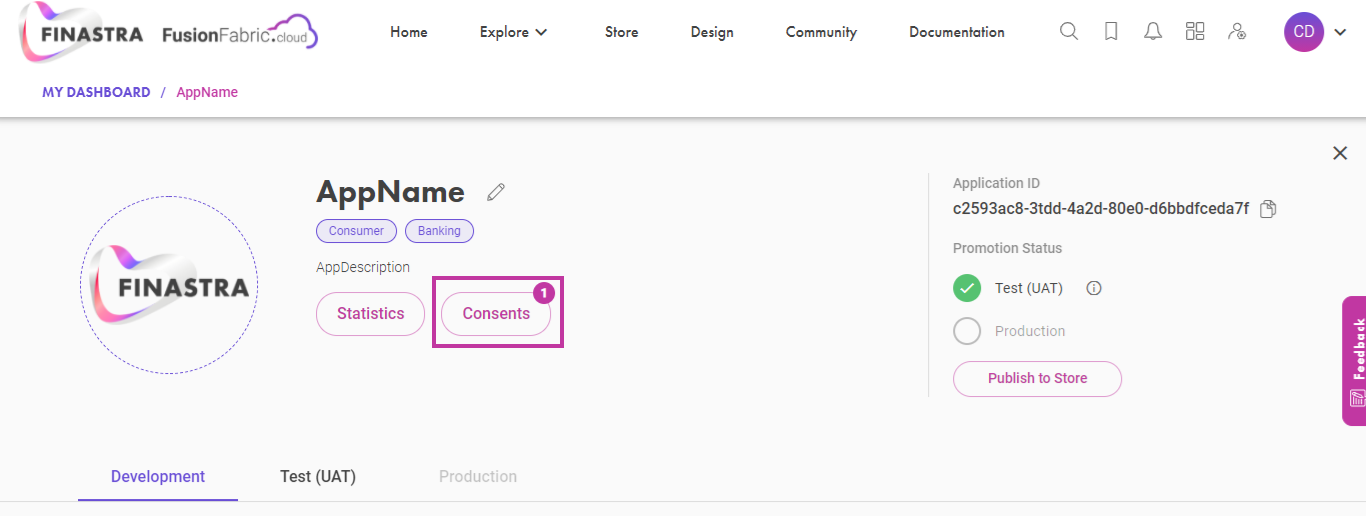
Click Consents to get the list of consent aknowledgement requests for your application.
A table is retrieved and it contains the following:
- A list of consent acknowledgments requested by financial institutions - name of the financial institution, name of the tenant, request date.
- Status of the consent: Active/Inactive
- Status of the acknowledgment: Acknowledged/Waiting for acknowledgment
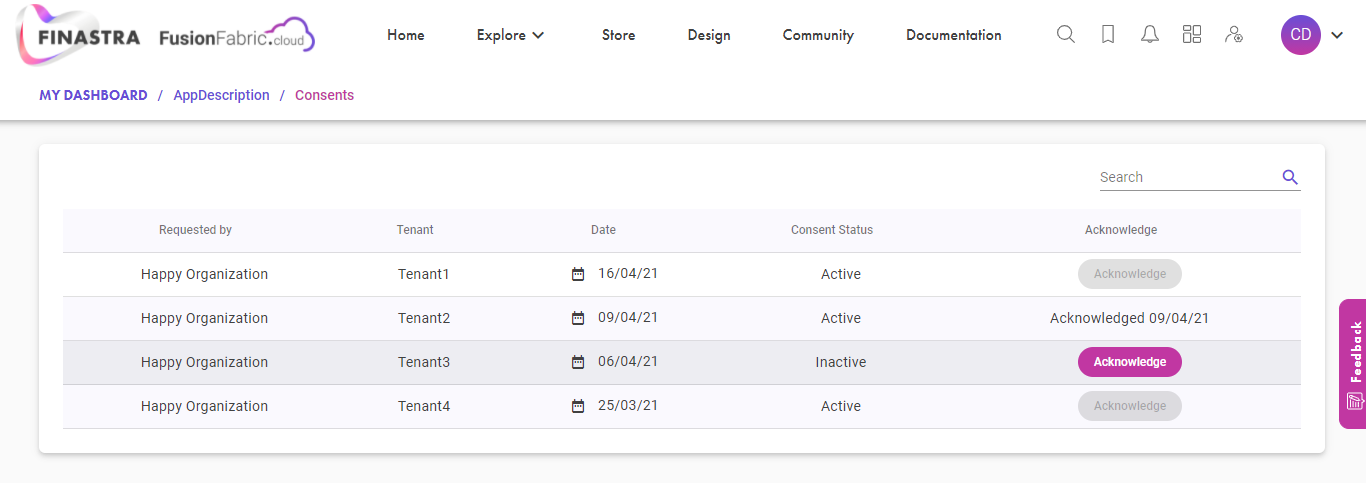
The list of aknowledgments consents for your application.
You are notified every time a consent acknowledgment request is sent to your application. The consent request can be acknowledged by clicking Acknowledge.
By acknowledging consent, you are informing your application users that all the configuration is completed on your side to make the application work with the tenant that it was granted access to.
Credentials by API Channel
FusionFabric.cloud provides three types of APIs: B2B (Business-to-Business), B2E (Business-to-Employee), and B2C (Business-to-Customer). These types are called API Channels.
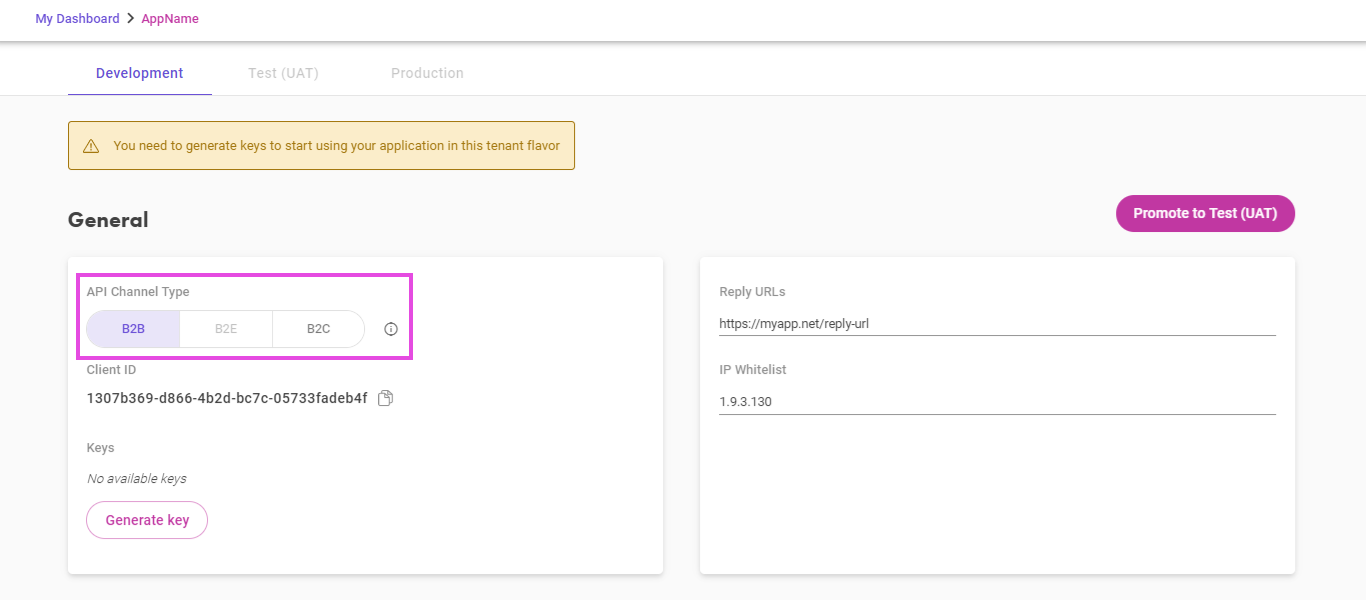
Select the appropriate channel to generate the coresponding credentials.
Each API Channel has its own set of credentials, meaning that a token retrieved for the B2B channel type only works for B2B APIs. This is the way an application that uses multiple types of APIs, must use a different token for each API channel. This feature allows to have better security checks when mixing B2B and B2C APIs.
Secret Key
After you register an application, you need to generate a secret key to be able to connect to FusionFabric.cloud APIs through standard OAuth2 authorization grant flows. If you prefer an enhanced authentication, use a JSON Web Key instead.
To generate a key
From your Dashboard, open the Application Details of the application of interest.
Select an API Channel and click Generate to create a secret key for the respective API channel.
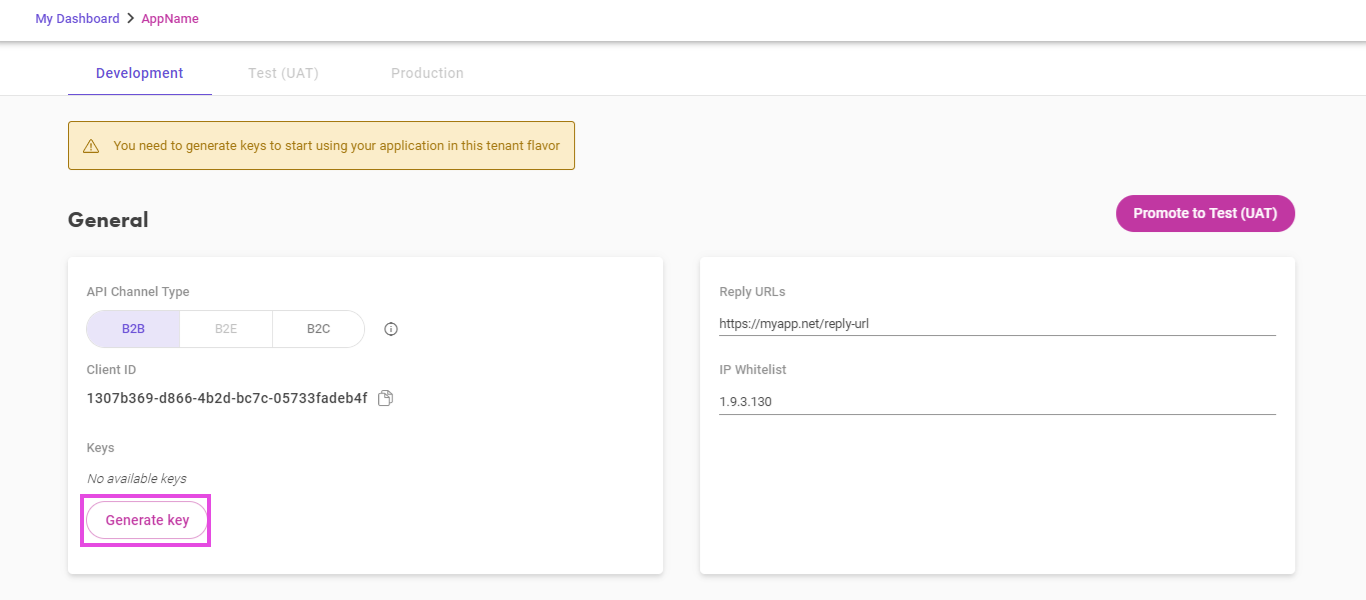
Generate a secret key for a specific API channel.
- In the Generate a new key dialog, note the Key Type is set to Secret Key. Add a relevant Description to help you keep track of your secret keys and click Confirm.
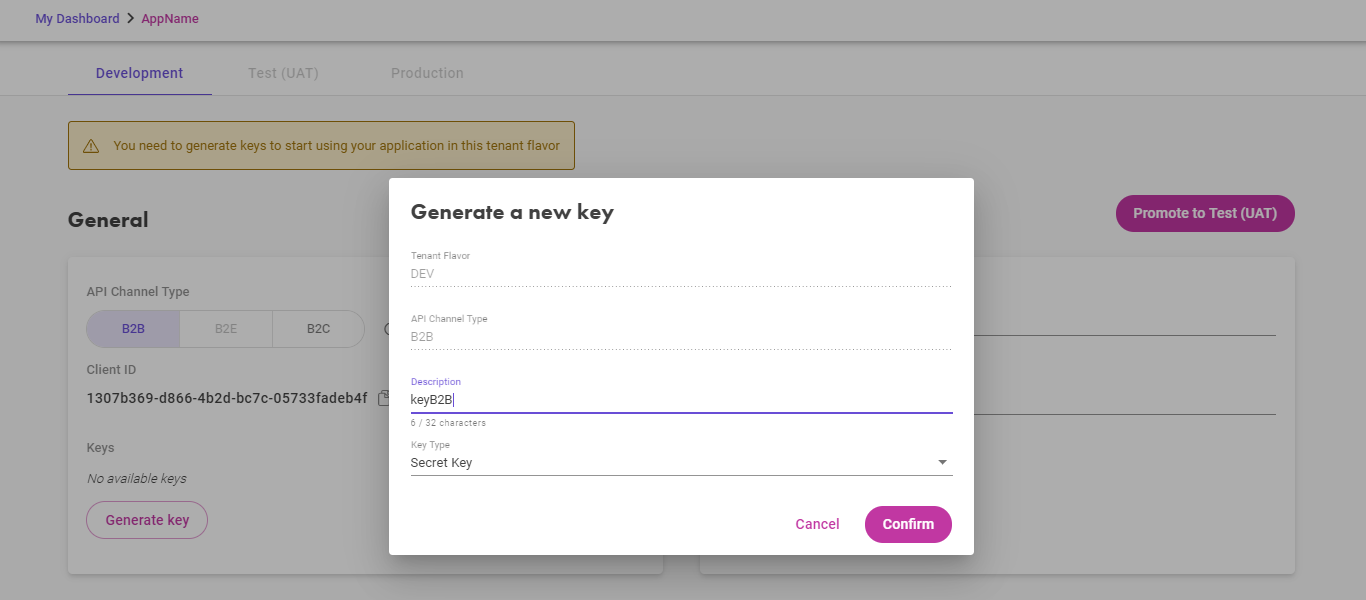
Add a description to your secret key.
- Your key is now generated. Copy the secret value to a safe place since it is visible only once, when displayed in the modal. Then check the acknowledge to Close the modal.
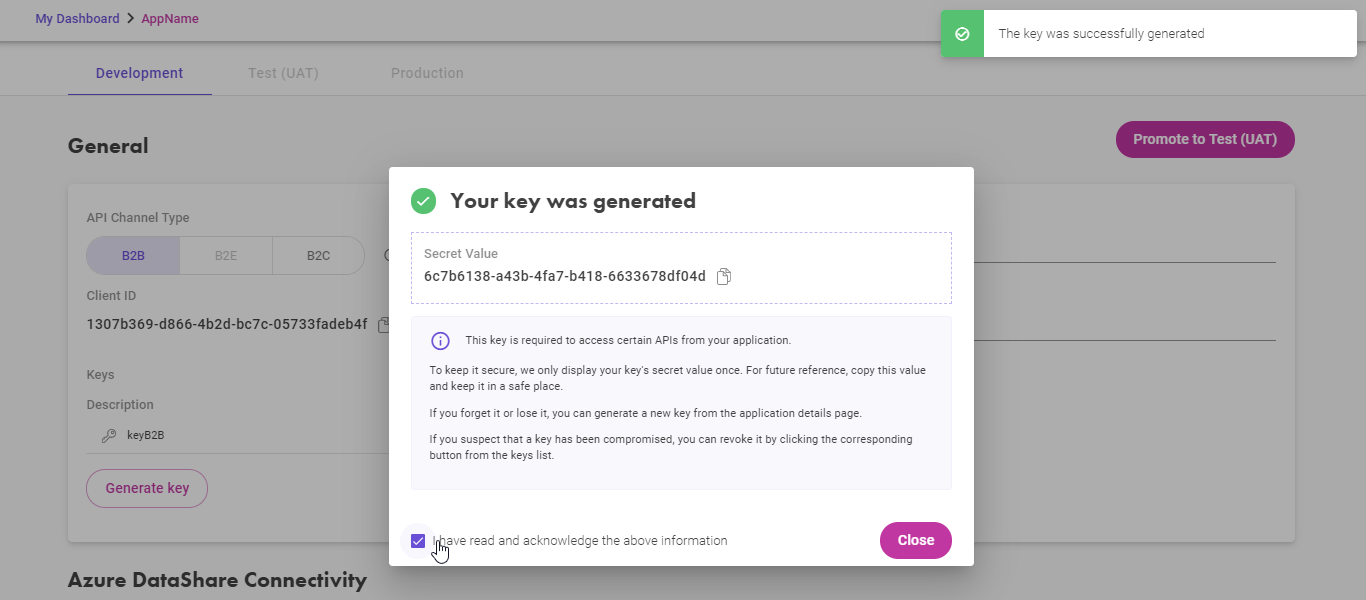
Copy the secret value to a safe place.
Your key is now available in the Keys area. If you happen to lose or forget it, however, you can always generate a new key and delete the old ones.
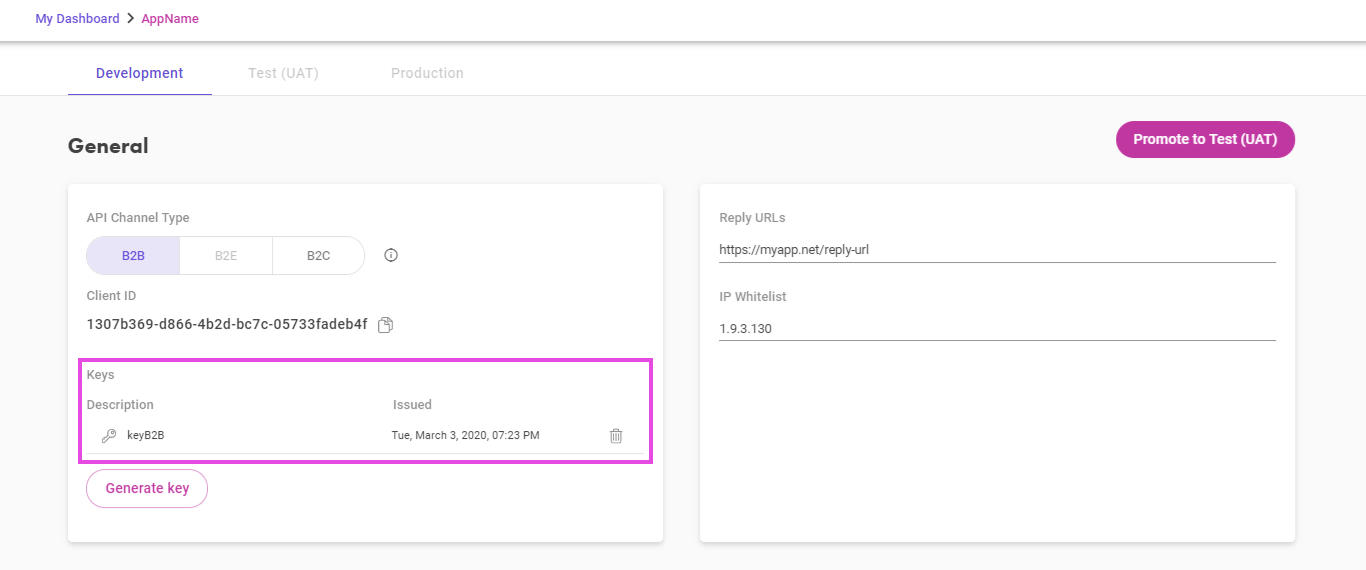
Your keys are displayed in the dedicated area.
JSON Web Key
The JSON Web Key enables you to use a stronger authentication method that allows you to authenticate your client application without exchanging the client secret through the network.
To find out more about private key authentication, see the section about OAuth2 Authorization.
To use a JSON Web Key
- From your Dashboard, open the Application Details of the application of interest.
- Select an API Channel and click Generate to create a key.
- In the Generate a new key dialog, set the Key Type to JSON Web Key and then click Upload public key. If you need more details on the JSON Web Key format, click the information icon next to the uploading button.
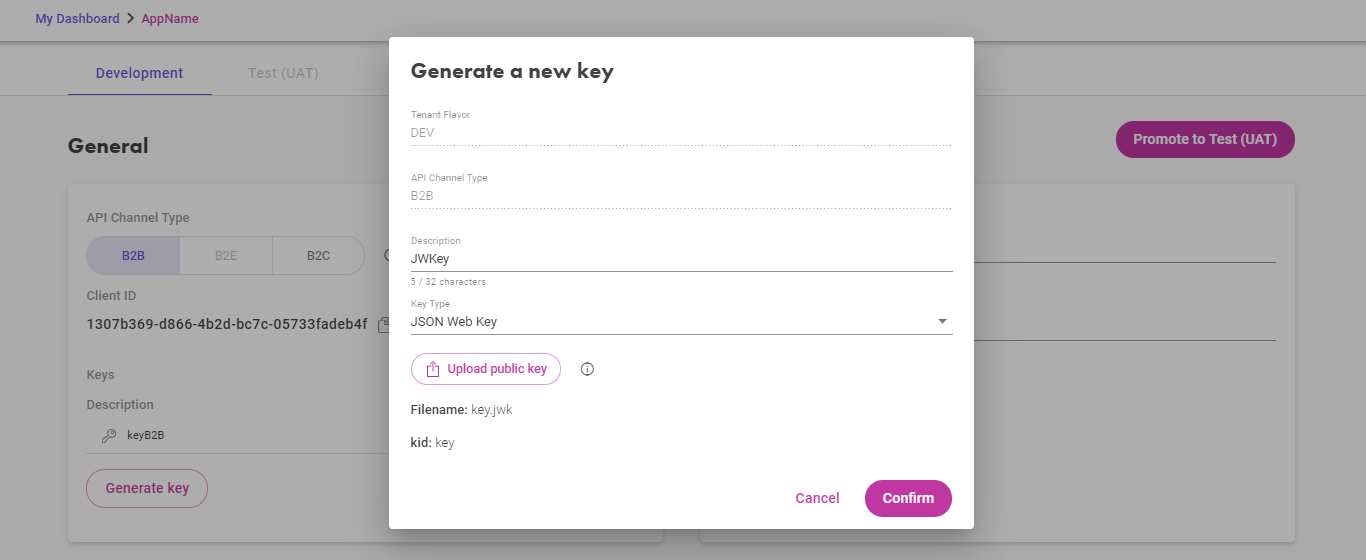
Upload your JWK file.
Once the key format gets validated, click Confirm to register the key. The JSON Web Key is now displayed on the Keys list with a new identification icon, different from the Secret key icon.
Recommended: When configuring the key in the Generate a new key dialog, enter a short relevant Description so you can later identify the new key easier on the Keys list.
For more information on the JSON Web Key, see the private_jwt_key details in the OpenID Connect 1.0 > Client Authentication.
To generate a JSON Web Key, follow the steps from Private Key Authentication.
IP Whitelist
Using an IP whitelist is optional, but if any entries are present, the application is only usable from the given IPs.
The following formats are supported: IPv4 for IPs and IPv4 CIDR for IP ranges.
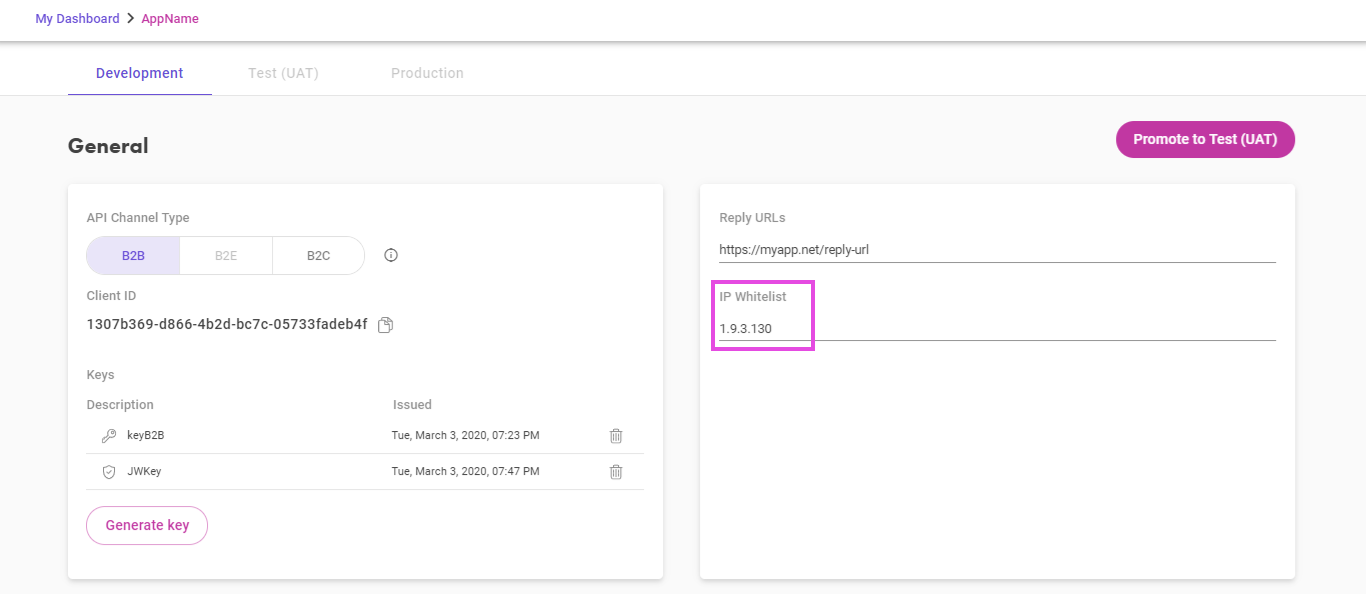
IPv4s and IPv4 CIDR ranges are supported on the whitelist.
Azure Data Share Connectivity
You can review the method of connection to the Azure Data Share you used during the integration of a dataset to your application:
- The email associated to the Azure account
- The Tenant ID and the Object ID of your service principal user, from Azure Active Directory
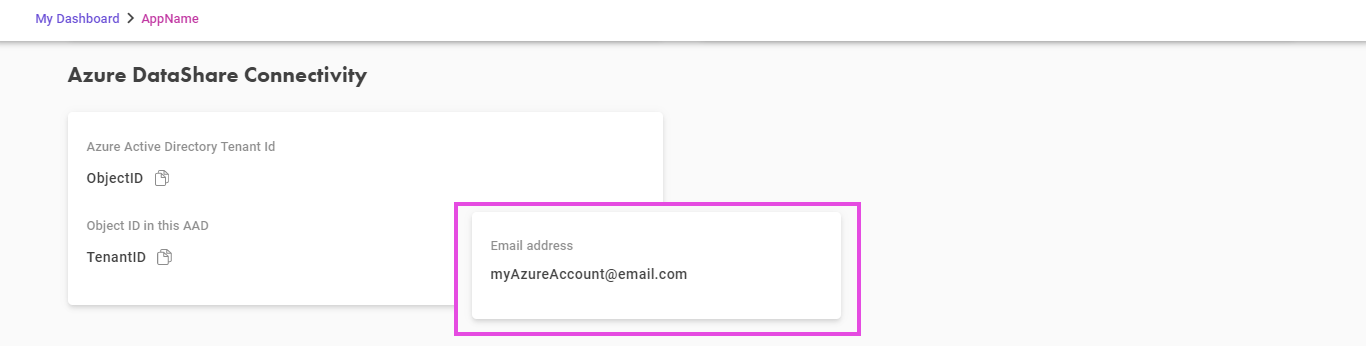
Azure Data Share Connectivity
Building Blocks List
The list of APIs, events, SPIs, and datasets that you subscribed to is displayed. If you want to modify the selection, click the edit icon.

Edit your application by adding or removing APIs and change events subscription.
UX Apps
UX Apps are interfaces that you can enable for your app so that they are listed on the customer app portal, named My Apps. This allows the future customers to enable SSO (Single Sign-On) access on all the apps they bought from FusionStore, including yours.
The authentication on My Apps customer portal is orchestrated by FusionFabric.cloud, by enabling customers - the financial institutions, to use their own IDP (Identity Provider). Two IDP channel types are supported, as follows:
| IDP Channel Type | Description |
|---|---|
| Consumer (B2C) | Aimed at enabling log-in from the final user consumer perspective. Allow this channel type if your app is designed to be used by the financial institution customers, but you want the financial institution users to use the app as if they were the final consumer. |
| Employee (B2E) | Enable this channel type if your app is targeted to be used by the financial institution employees directly. |
An UX app is defined by the IDP channel type, as described above, and by the URL. When you add UX apps, you define an URL template that must contain a placeholder that is resolved by FusionFabric.cloud for each tenant that your app is granted with consent.
To add UX Apps
- In the Application Details of your application click Add UX App.
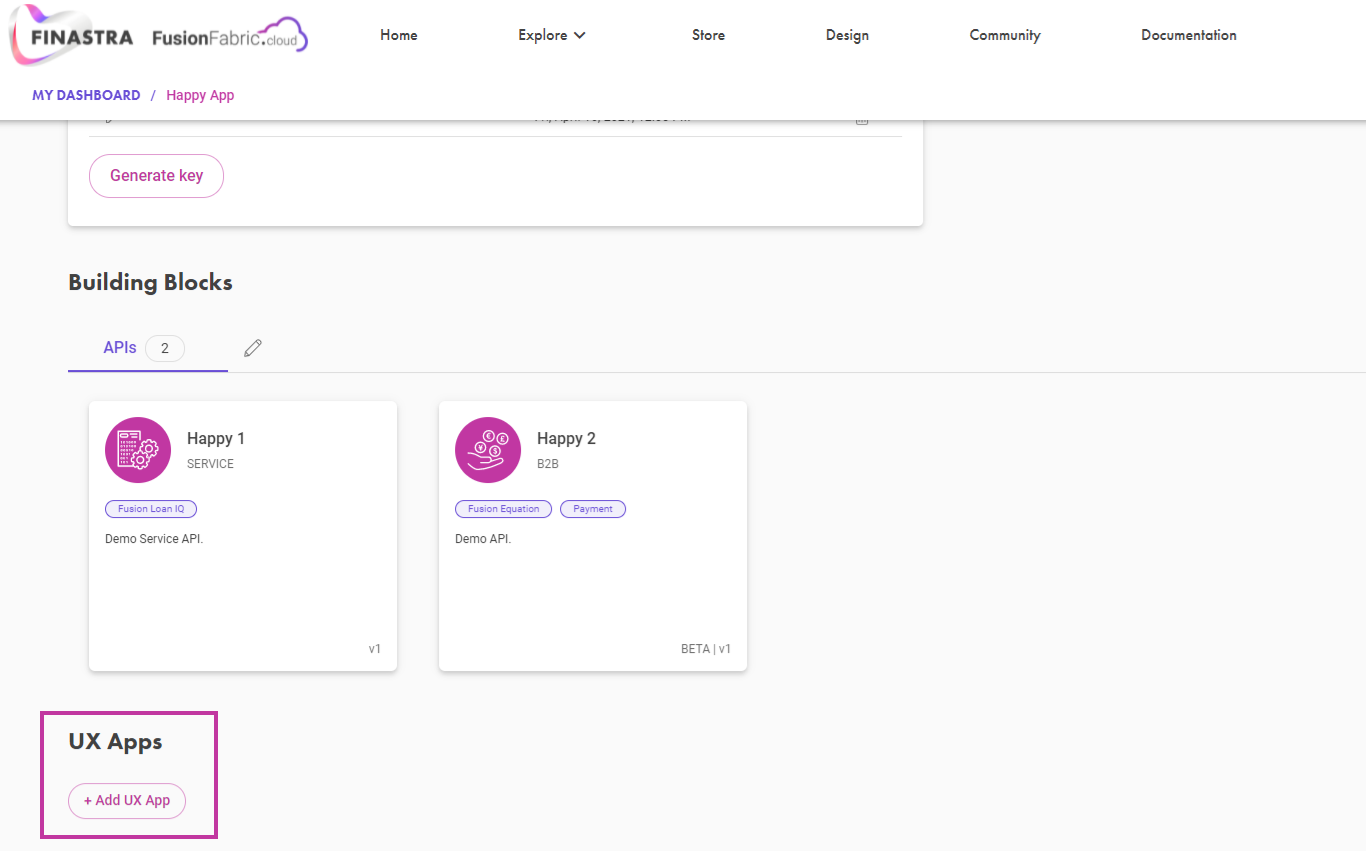
Add UX App
- Complete the form with the following details:
- UX App Name - display name for your app.
- Description - short description marking the purpose and features of your app.
- IDP Channel - select an option based on the purpose of your app.
- Icon URL - add an icon for your app.
- URL Template - choose the media type of your app and the URL template and then fill in the URL. Use the placeholder
{tenant}to allow FusionFabric.cloud to fill in the tenant ID corresponding to the financial institution that consumes your app, in the final URL on the financial institution My Apps portal.
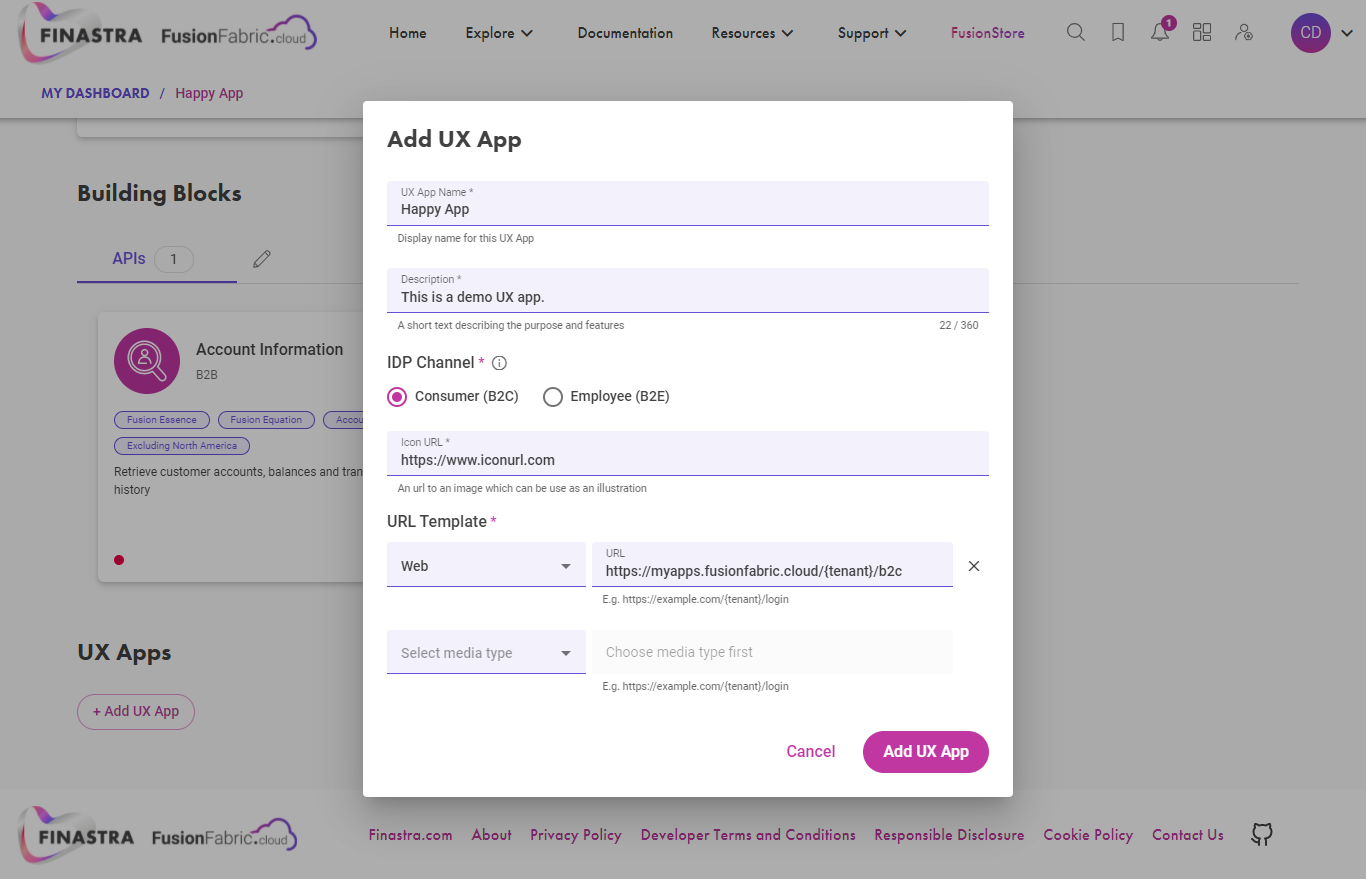
UX Apps Form
- Finally, click Add UX App.
UX Apps and Application Lifecycle
Your application is tied to a lifecycle in which, for each stage, it gets a promotion ID. This ID is also linked to the UX apps, therefore, each time you promote your application, you must re-submit the related UX apps.
For this reason, you are advised to submit your UX apps only after you promoted your application to the production stage.
Read more about application promotion in Application Lifecycle and Multitenancy.