Application Wizard
The application wizard allows you integrate all the APIs of a solution and/or datasets with your application.
Launch the Wizard
You launch the application wizard, through the Register Application button, that is located in several places:
- On a solution overview page - to integrate the solution APIs.
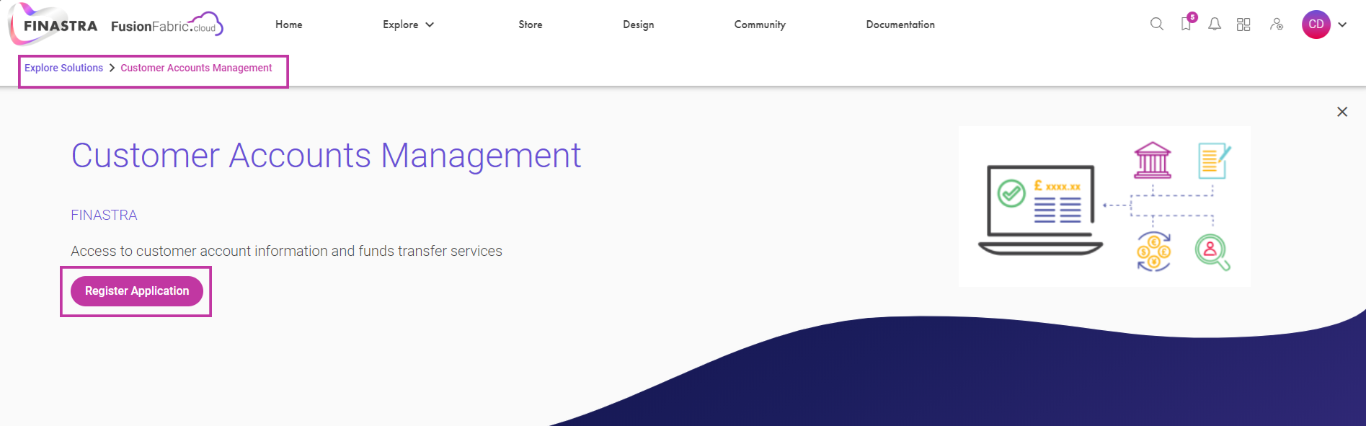
Register an application with all the APIs of a solution.
- On a dataset overview page - to integrate datasets.
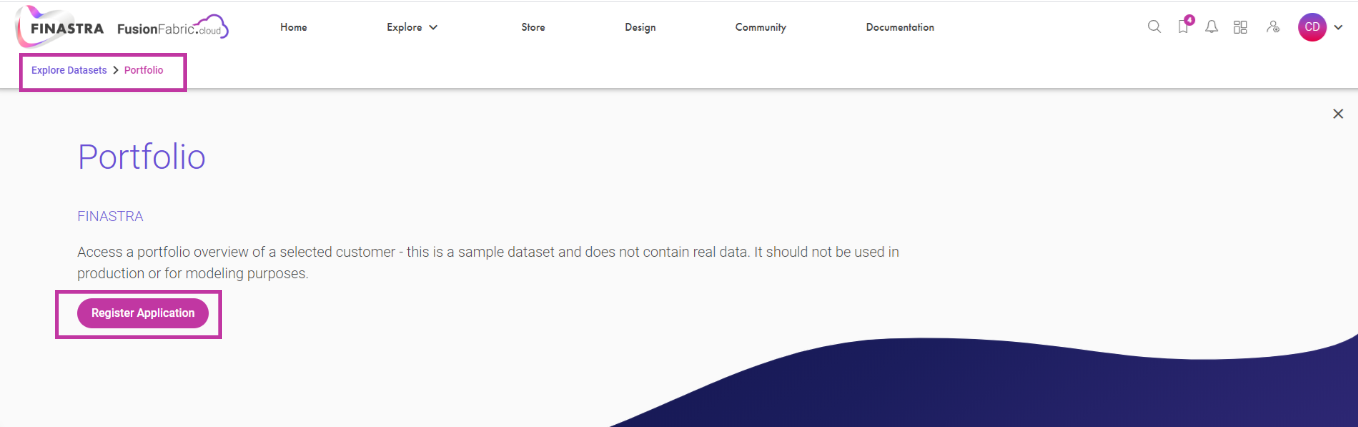
Register an application with a dataset.
- On your dashboard.
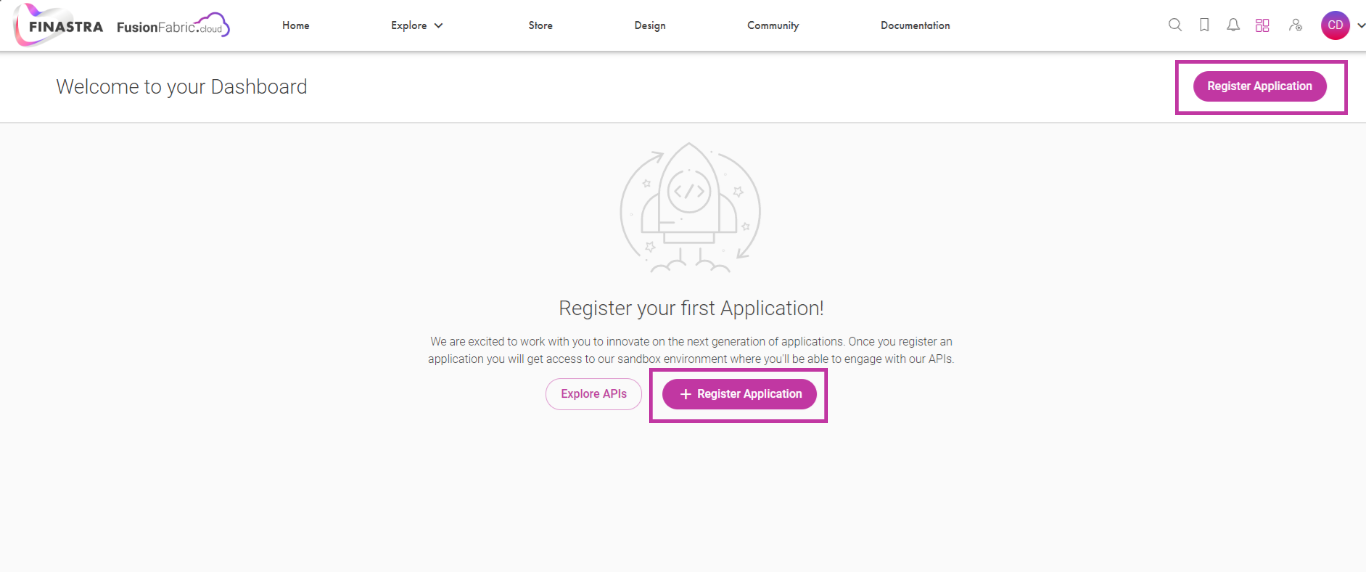
Register an application from your dashboard.
- In the list of bookmarked APIs, SPIs, and/or datasets.
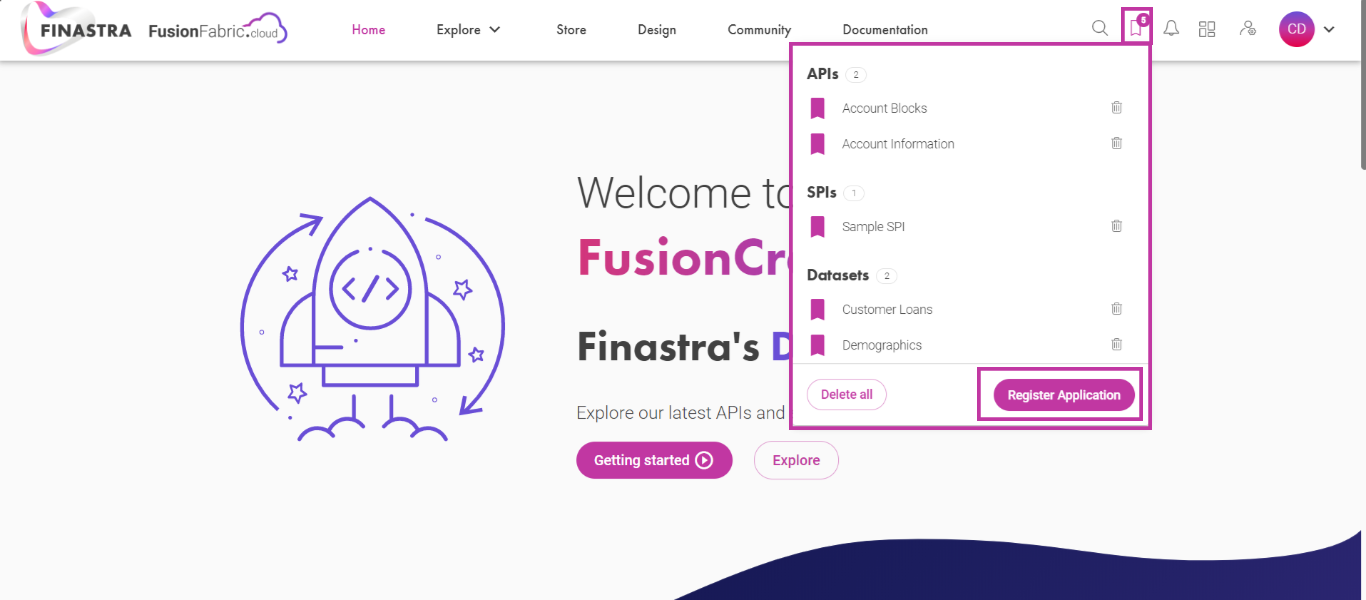
Register an application with the bookmarked APIs/datasets.
If the Register Application button or card is not available, you are not entitled to register an application. Read more on User Entitlements section.
Application Details
This is the first screen of the wizard. You enter the application details, such as name, description, and tags.
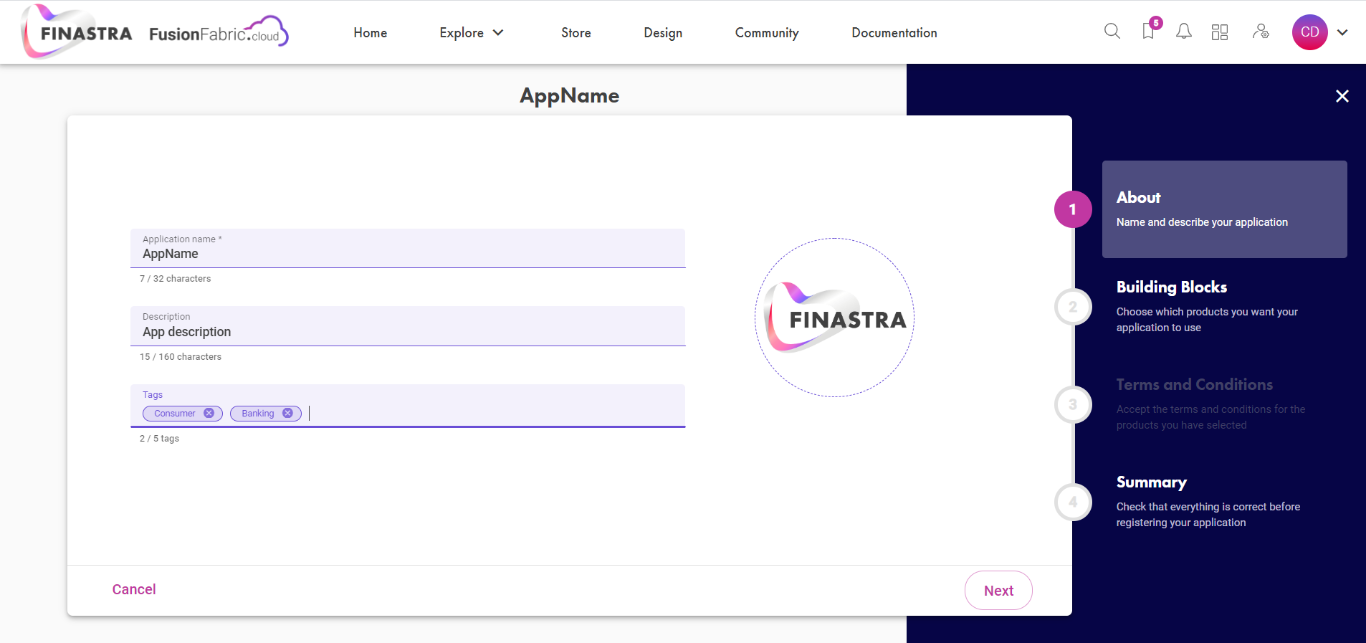 In the next step you will choose which building blocks you want to use in your application. Use the top buttons to switch between APIs, SPIs and datasets.
Building Blocks - APIs
In this building block you select or deselect the APIs. For more details about an API, click the documentation icon on each card to open the API reference documentation. The features of the API building block are presented below:
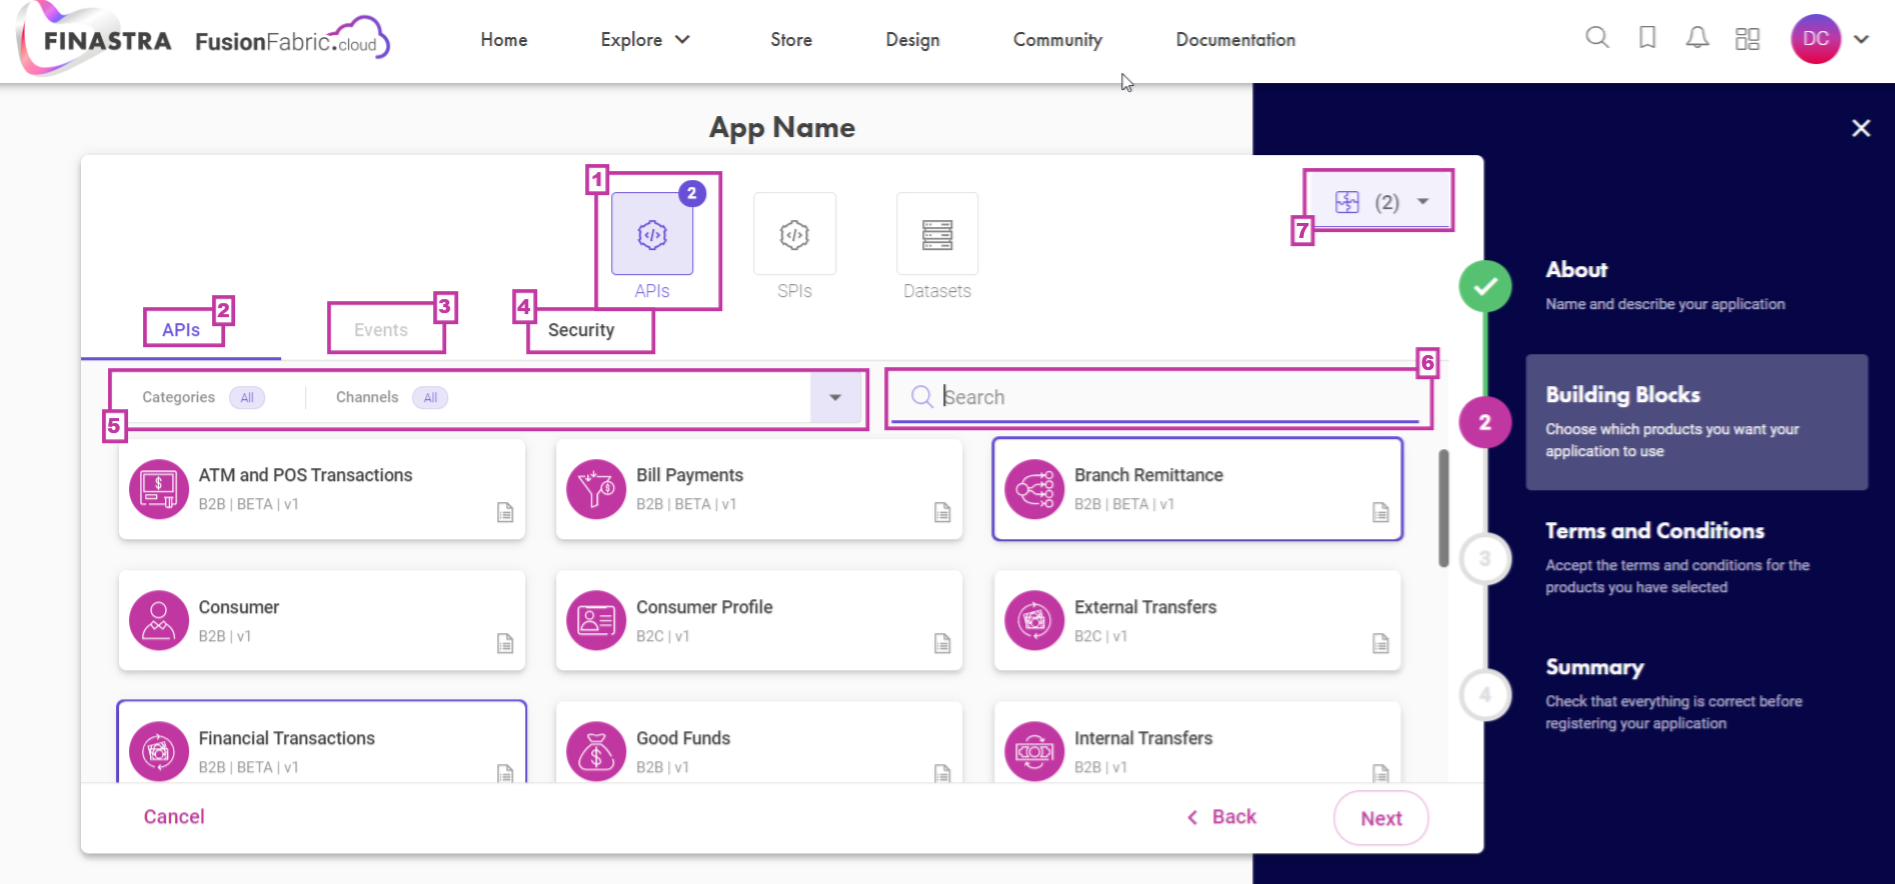
Select the APIs.
The API building block and the total number of selected APIs.
The API tab - displays the list of all available APIs.
The Events tab - is enabled when you select an API that has events associated to it. An API with an event is recognized by the lightning icon on its card.
The Security tab - here you provide the reply-url and, optionally, an IP whitelist which restricts the application usage to the provided IPs. The tab becomes mandatory when a B2C API is selected. Otherwise, you can skip entering the details.
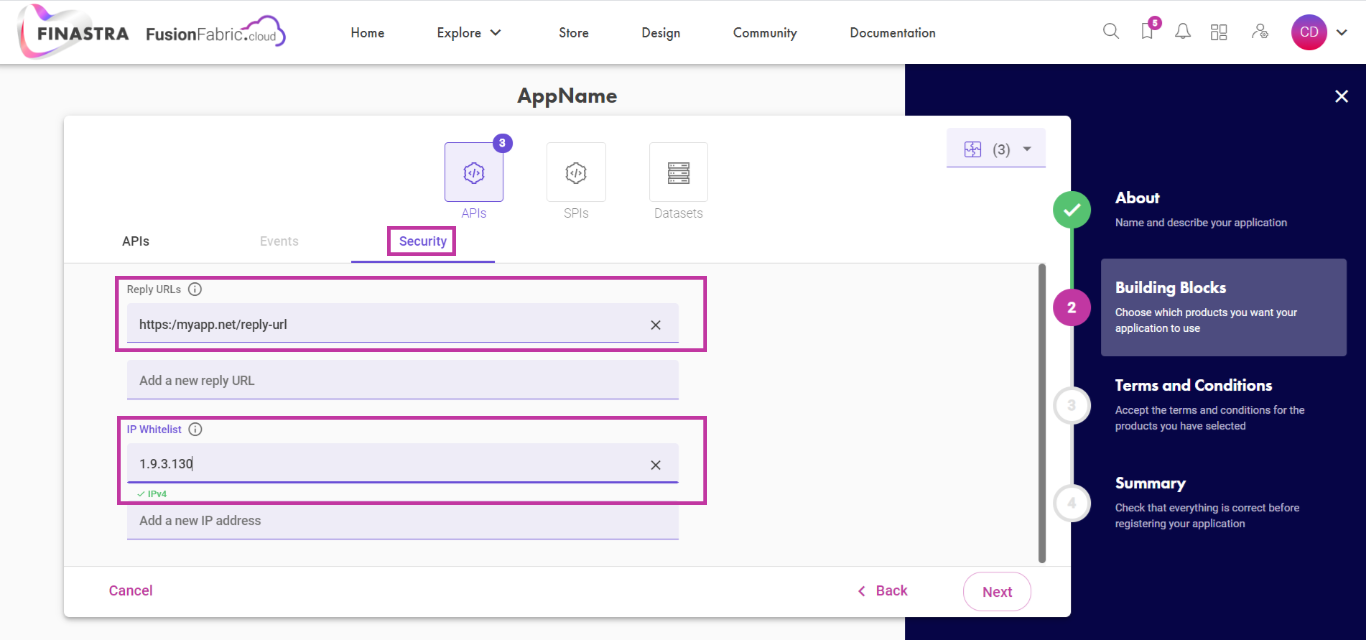
Security tab.
The Category and Channels filter - helps you narrow down the list of available APIs by certain criteria.
The Search bar - helps you find specific APIs.
The list of selected APIs, SPIs and datasets - displays all the building blocks items selected for your application.. If you don’t want to use an item anymore, you can remove it from here.
Click Next when you are ready or select another building block.
Subscribe to Events
The events associated with the APIs you selected are displayed by API, at this step. Subscribe to the events and enter the base URL of the service that you will implement to comply with the API Events specification. Click Next when you finished or select another building block.
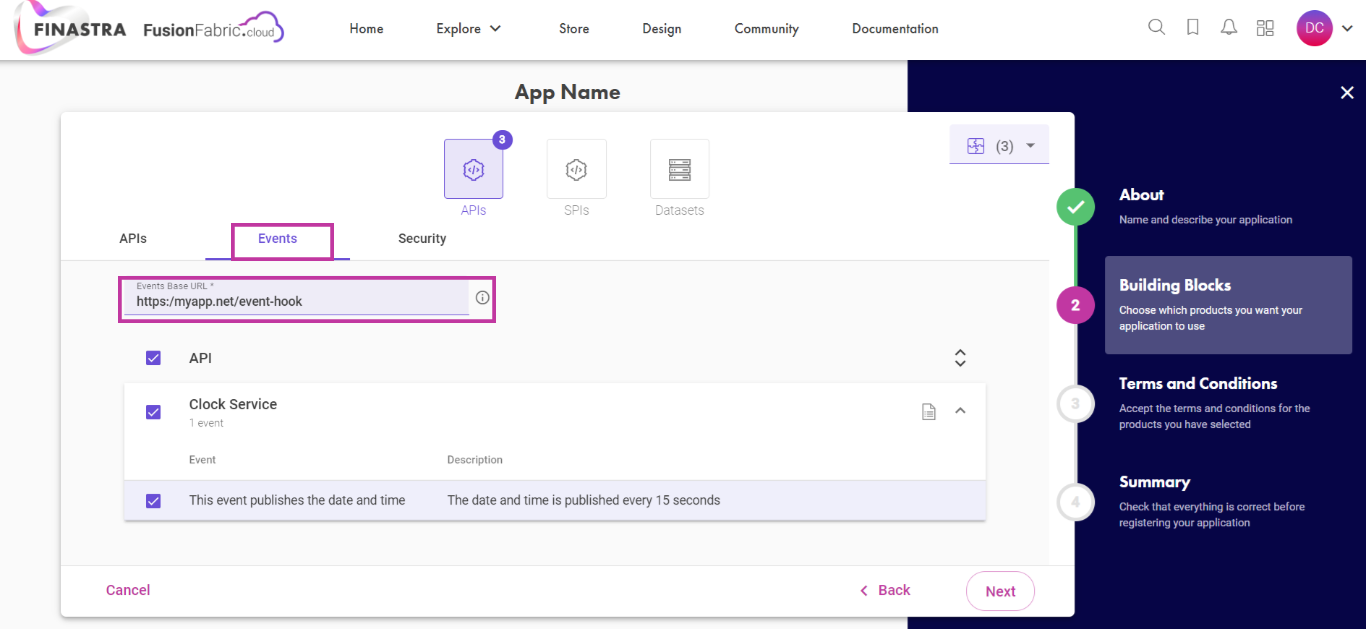
Select the events.
Building Blocks - SPIs
In this building block, you select the SPIs that you want to implement. Click the documentation icon to read the SPI reference documentation. The features of the API building block are presented below:
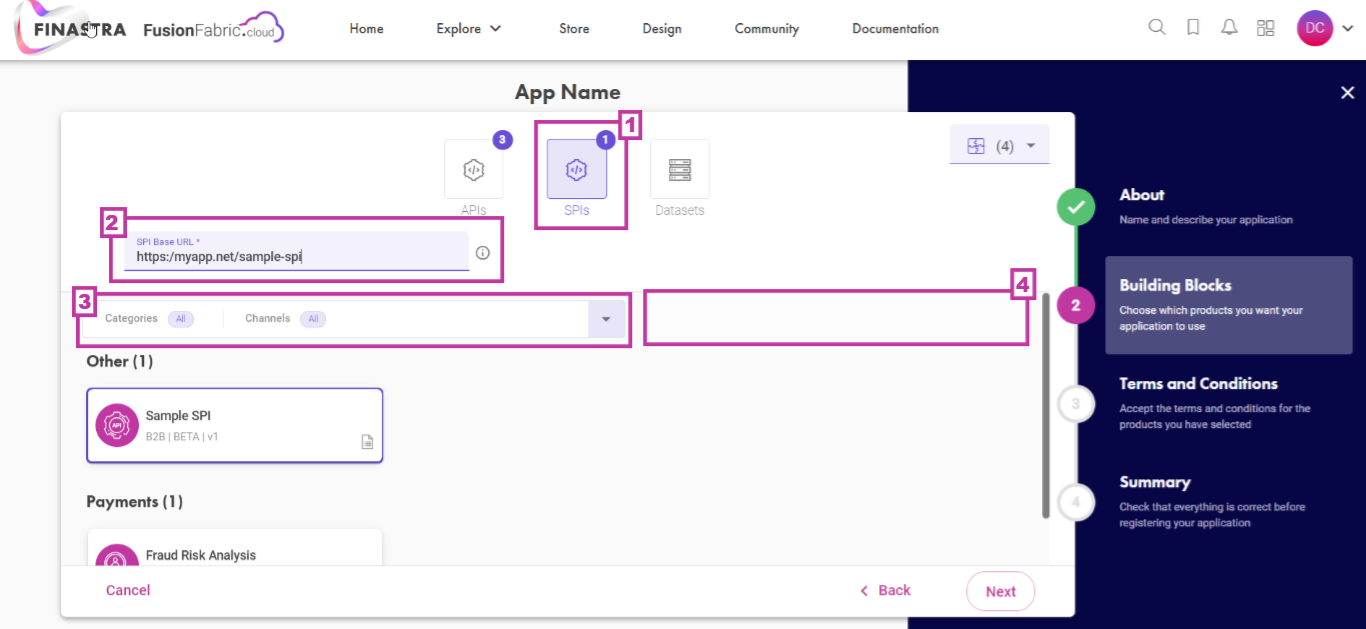
Select the SPIs
- The SPI building block and the total number of selected SPIs.
- The SPI base URL - enter the base URL of the service that you will implement to comply with the SPI specification.
- The Category and Channels filter - helps you narrow down the list of available SPIs by certain criteria.
- The Search bar - helps you find specific SPIs.
Click Next when you are ready or select another building block.
Building Blocks - Datasets
To be able to use a dataset, you need to have a BlockBlobStorage on the Azure portal. Read the Dataset Subscription section to learn how to create an account.
In this building block, select the desired datasets. The features of the dataset building block are presented below:
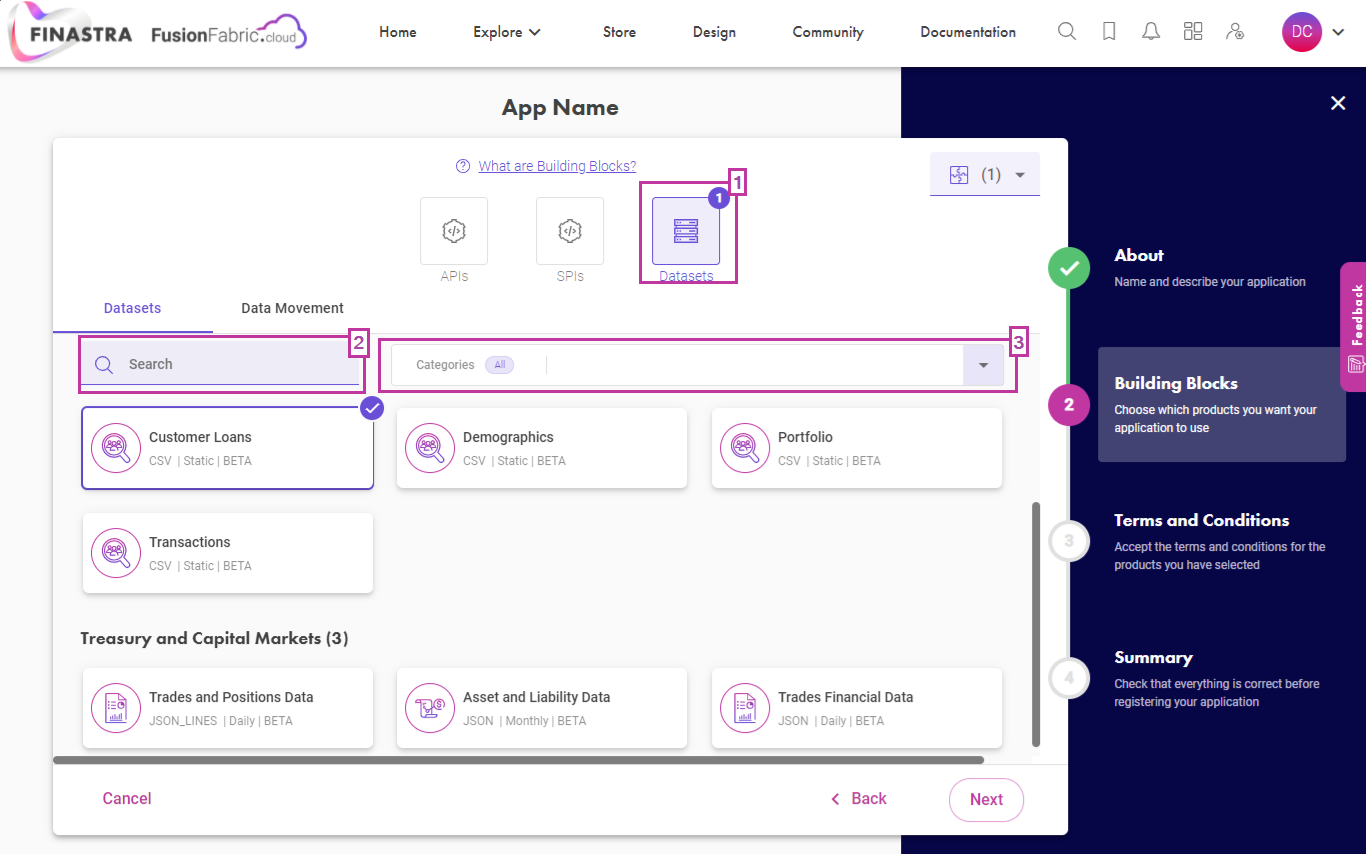
Select the datasets
- The Dataset building block and the total number of selected datasets.
- The Search bar - helps you find specific datasets.
- The Category and Channels filter - helps you narrow down the list of available datasets by certain criteria.
Data Movement
In this tab you select the desired way on how to use datasets. You either ingest or consume data.
Ingest Data
Data Ingestion represents the process of feeding the data into the FusionFabric.cloud Data Lake, using Microsoft Azure storage technology.
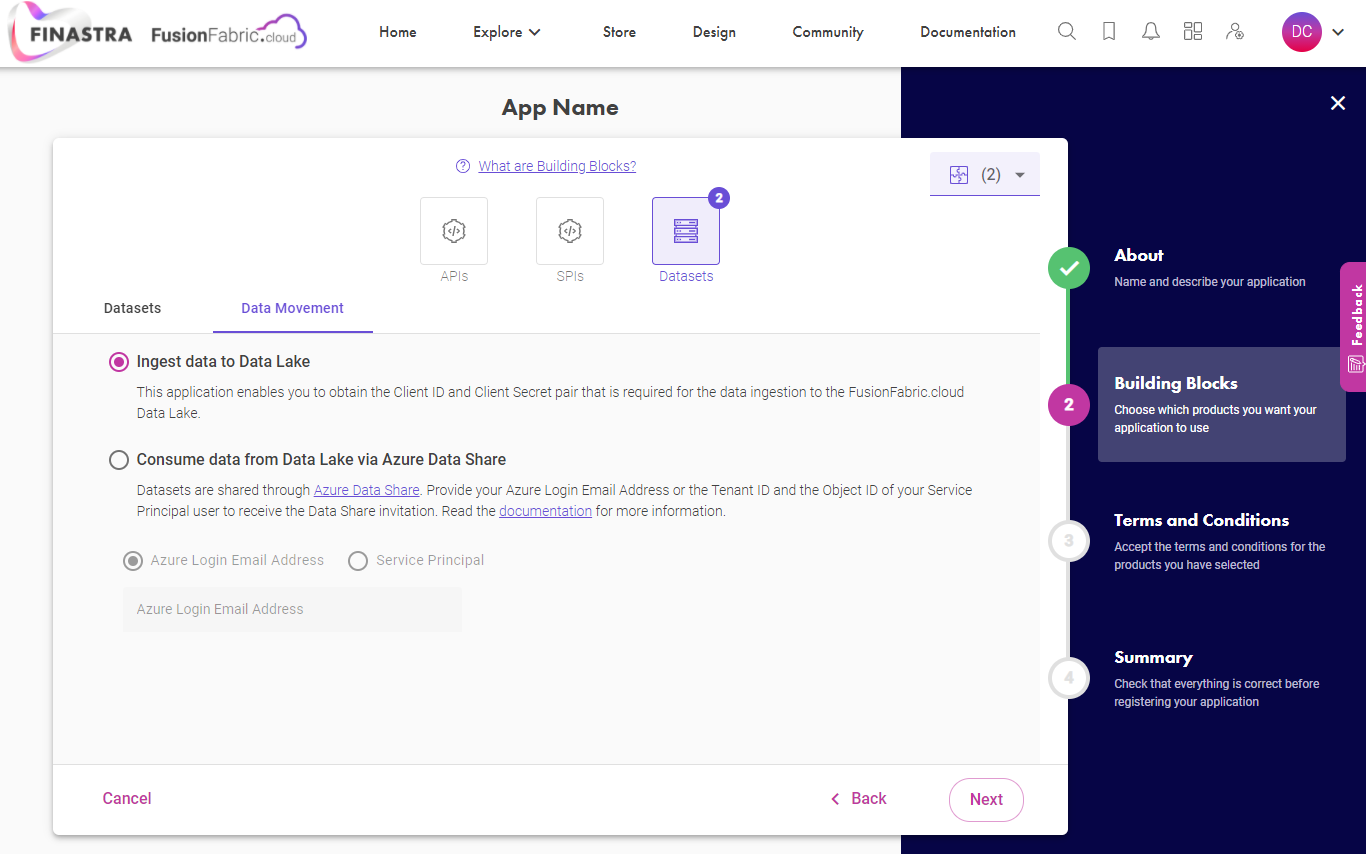 The client ID and Client Secret must be used during the data ingestion process.
Consume Data
Consuming data from Data Lake allows you to use datasets that are shared through Azure Data Share.
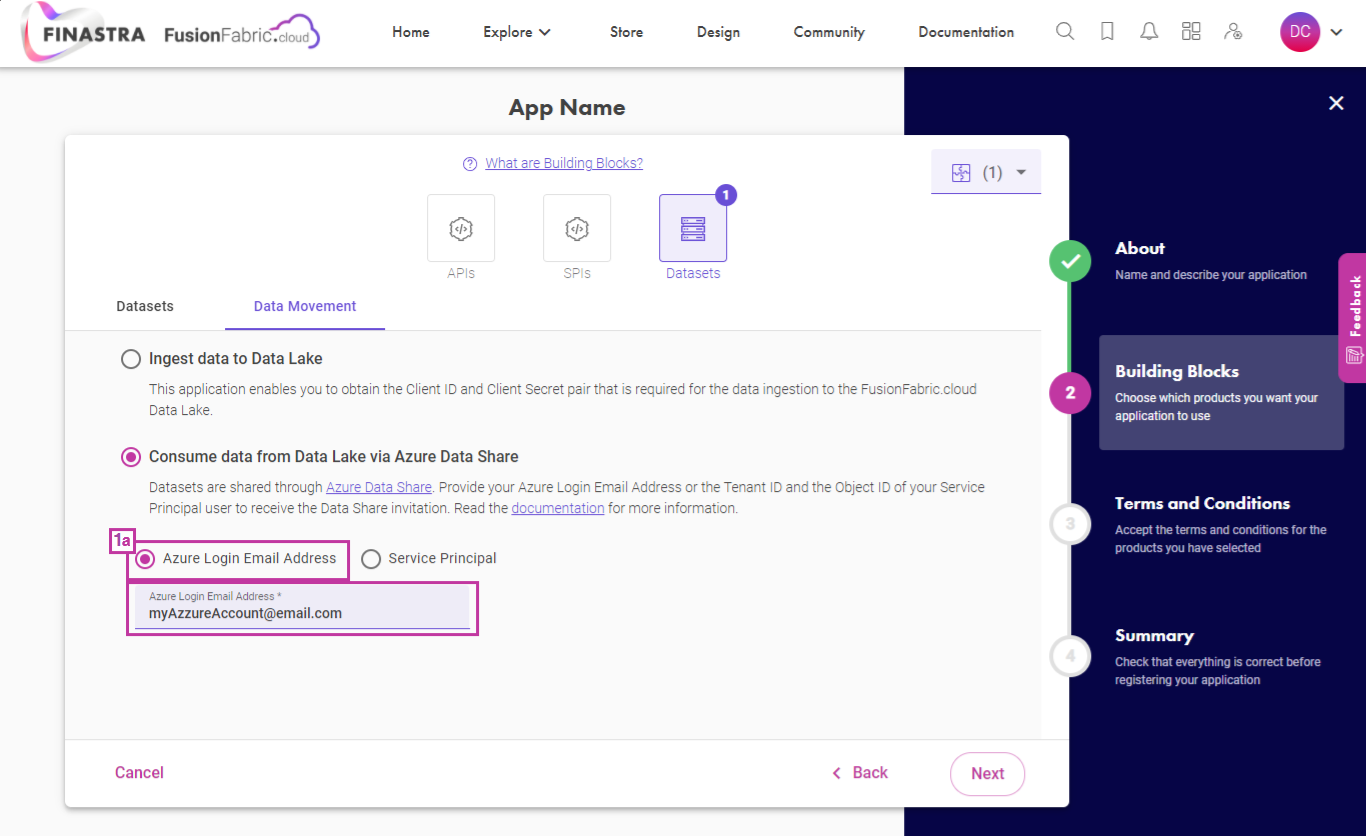
Consume Data
- The method of accessing the datasets in the BlobStorage account:
1a. Enter the Azure Login Email Address attached to your BlobStorage account. After that, you will receive an invitation on your Azure account to access the Azure Data Share. To accept the invitation and access the data, read the Azure Documentation.
1b. Enter the Tenant ID and the Object ID of your service principal user, from Azure Active

Enter the TenantID and the ObjectID associated to the Azure account.
To find the tenant ID and object ID you need to
- Search for Azure Active Directory in the Azure Portal. The Tenant ID is on the Overview Page.
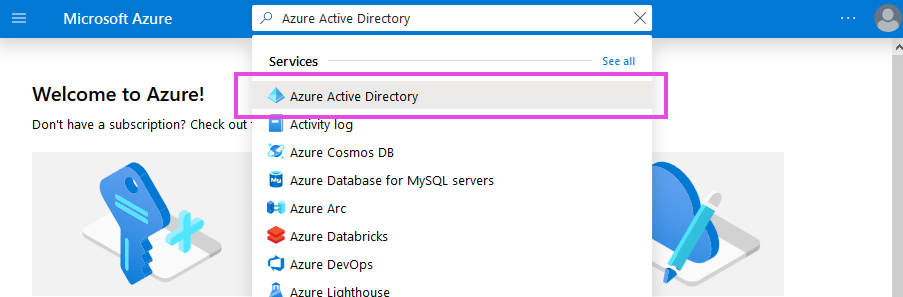
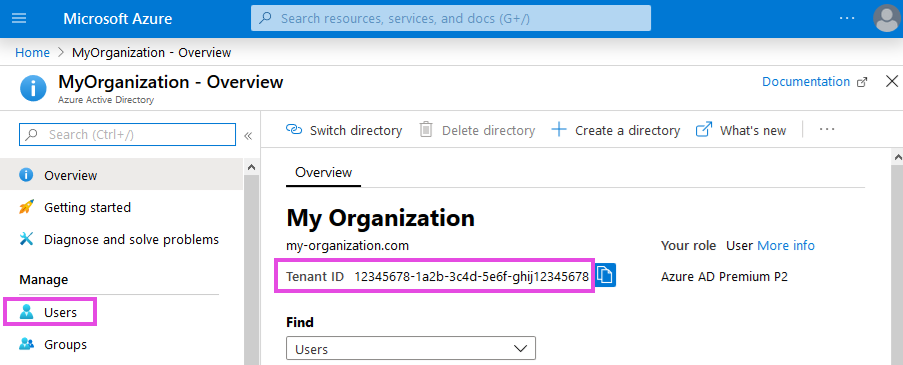
Tenant ID on Azure Active Directory Overview Page.
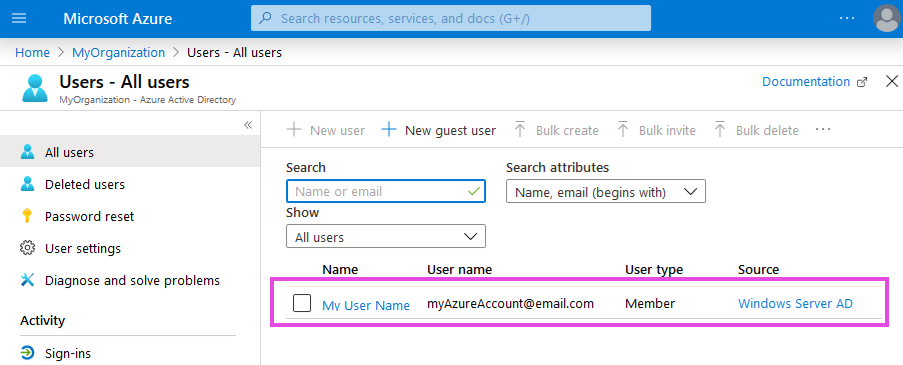
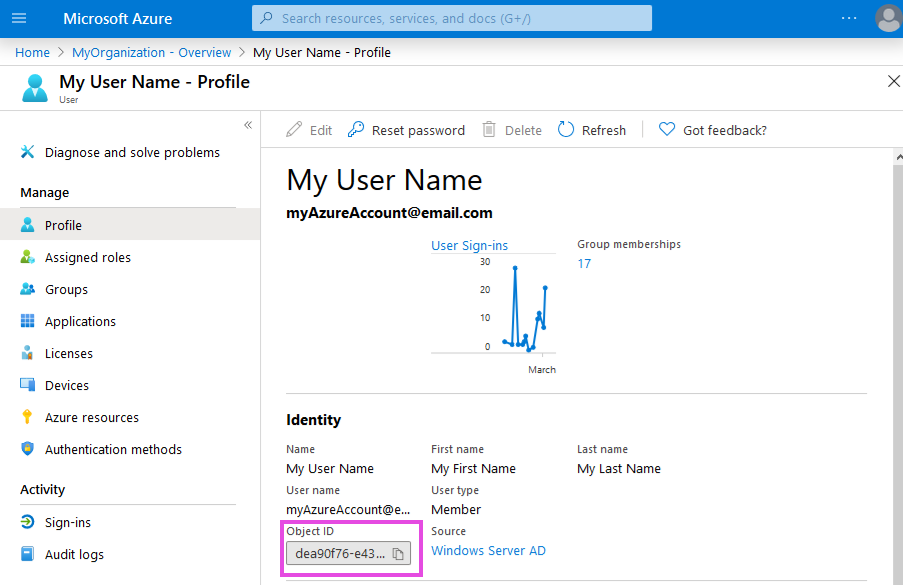
- On the Azure Active Directory Overview page, select Users from the left menu. Search your profile by name or email and select it. The Object ID is under Identity section.
Click Next when you are ready to read the terms and conditions of the building blocks items.
Agree the Terms and Conditions
Finally, review the selected APIs, SPIs and datasets that are displayed with their terms and conditions. Click the Terms and Conditions of any item to read and acknowledge them. When ready, click Next.
Read the Terms and Conditions of an application item.
Application Summary
The application summary is displayed. After you inspect all the details and the APIs/ datasets selected, click Register Application to finalize the application registration process.

The application summary where you inspect the details of your application.
Your application is now available to view on your dashboard.