Get Started with FusionCreator
Welcome
| Get Started with FusionCreator | |
| 3.0.0 | 15 December 2020 |
Welcome to the Get Started guide!
Build Application
To get started with FusionCreator you need a valid account. Head over to the Registration section to find out how to obtain your access credentials.
Watch the following video tutorial to learn how to build an application by registering APIs on FusionCreator.
Tutorial Transcript
For your convenience, the video tutorial transcription is available below.
What is an Application?
A FusionCreator application is your custom way of working with the FusionFabric.cloud APIs from FusionFabric.cloud. You group one or more APIs into an application that gives you the credentials to access the APIs.
After signing in to FusionCreator, you have several ways to register an application.
Register an Application from My Dashboard
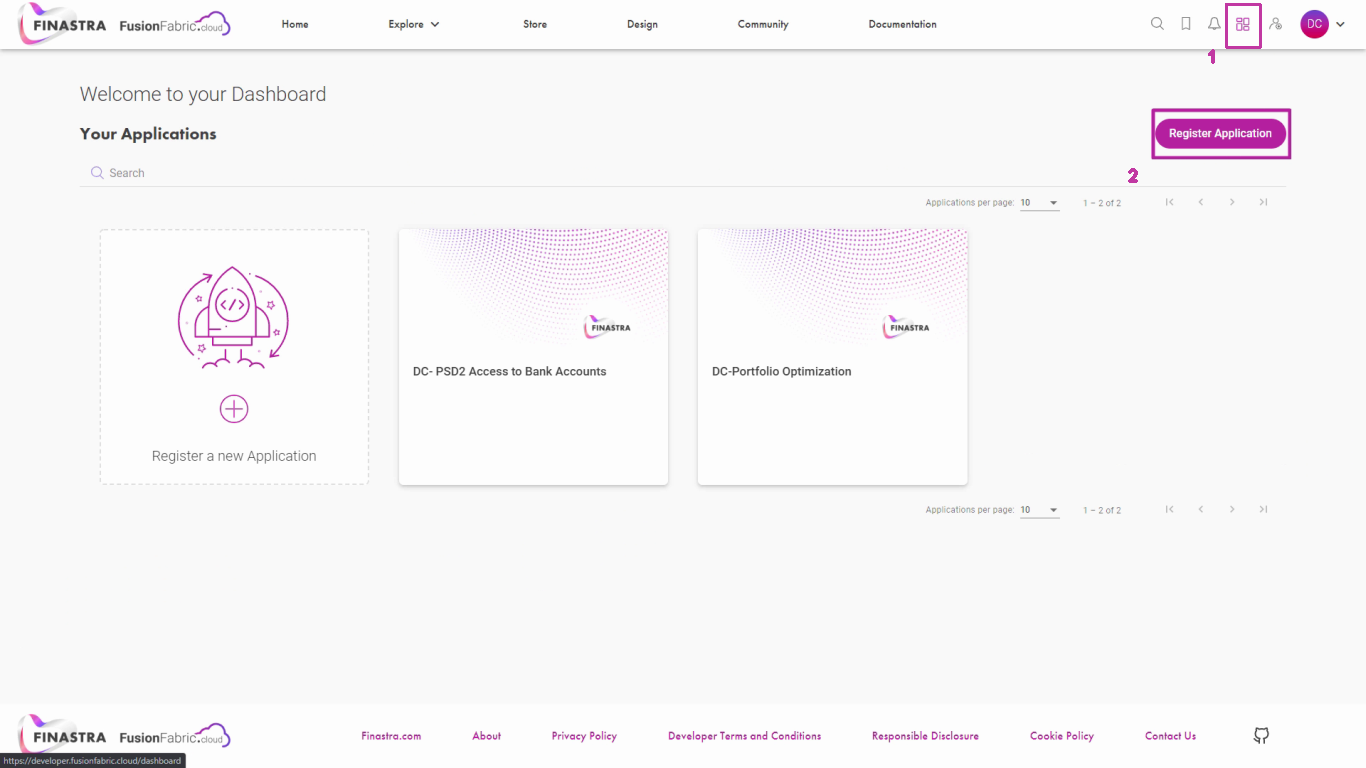
Register an application from My Dashboard.
One way of registering an application is by accessing My dashboard from the top right navigation bar [1]. Click Register Application to open the application wizard [2]. We will it explore later in this tutorial.
Register an Application from the Bookmarks
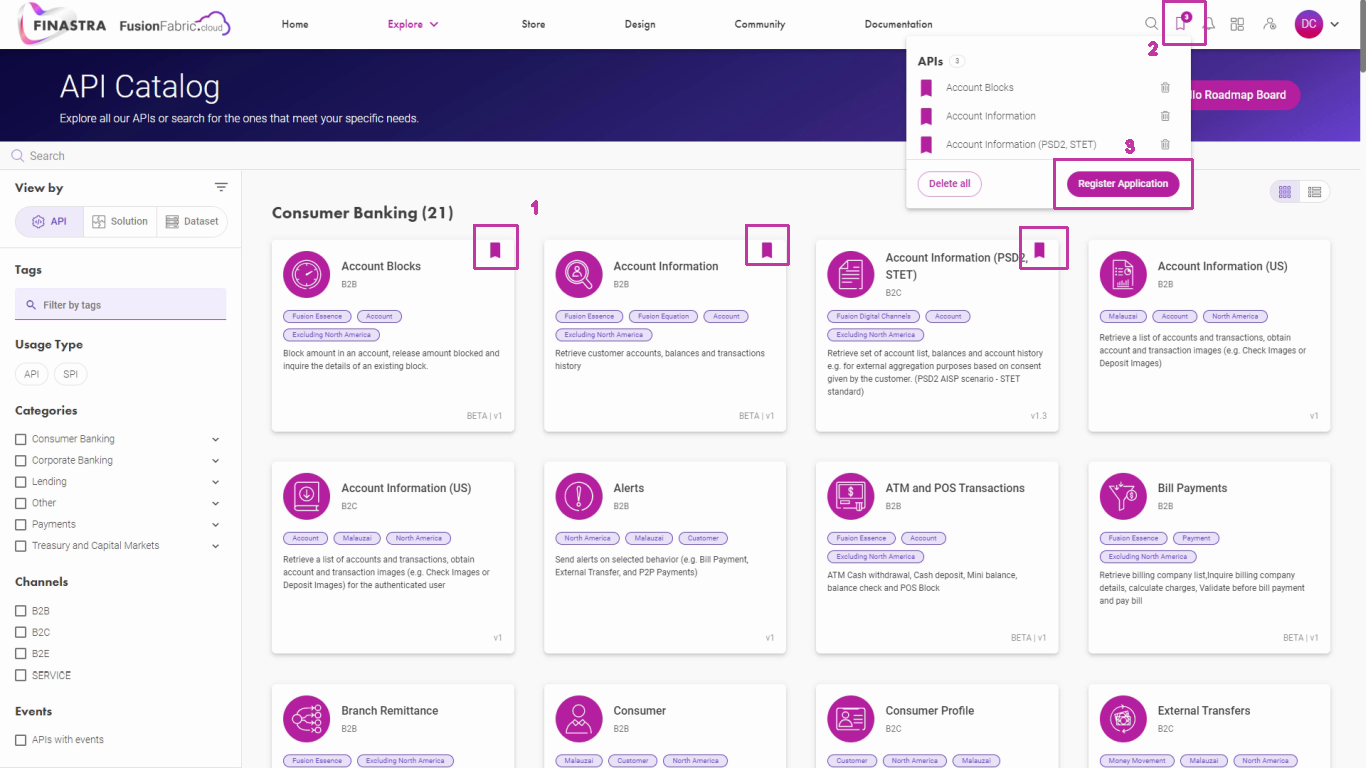
Register an application from the bookmarks.
The second way of registering an application is by bookmarking the APIs in a list [1].
After that, in the Bookmarks section [2], you will see the selected APIs and you can register an Application with them [3].
Explore the Solutions
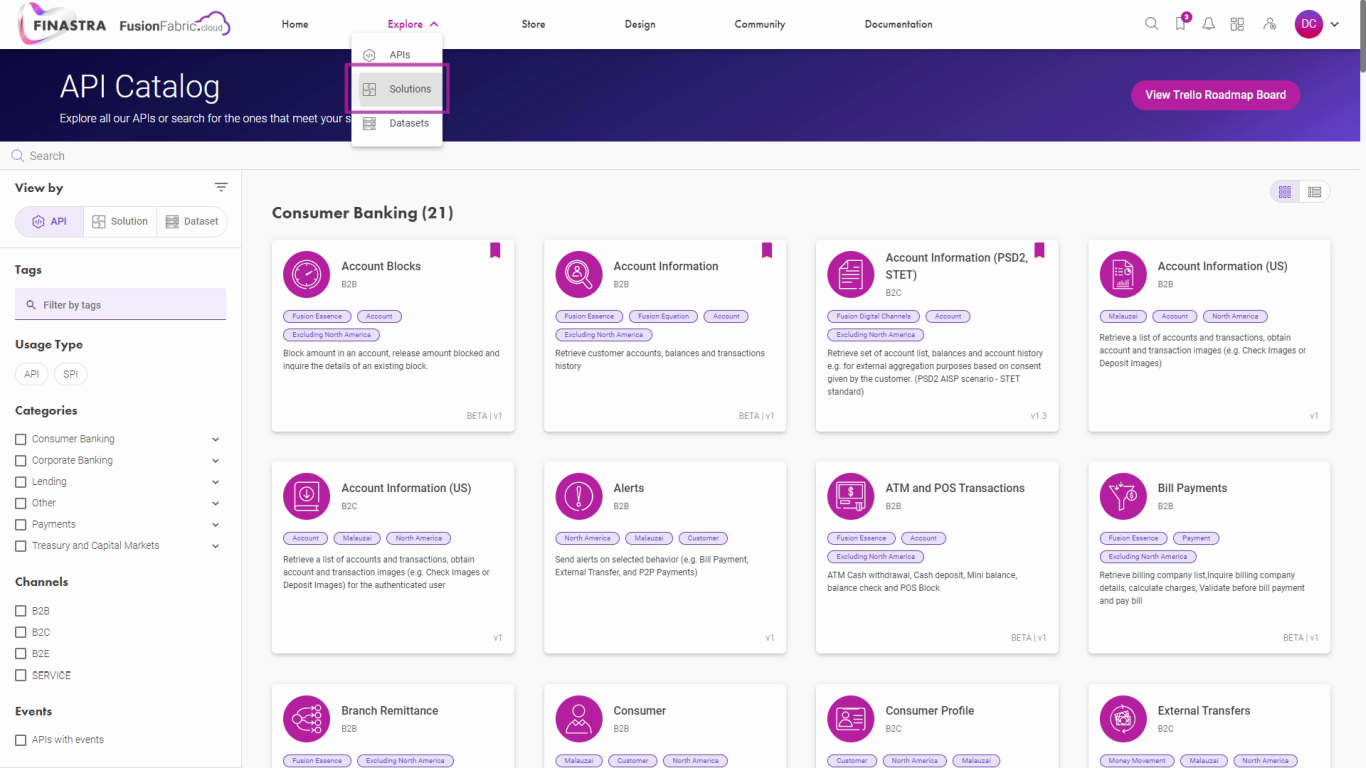
Explore the solutions.
The other way of registering an application is by accessing the Solutions Catalog.
A Solution groups several APIs allowing you to consume related services.
Browse a Solution Overview Page
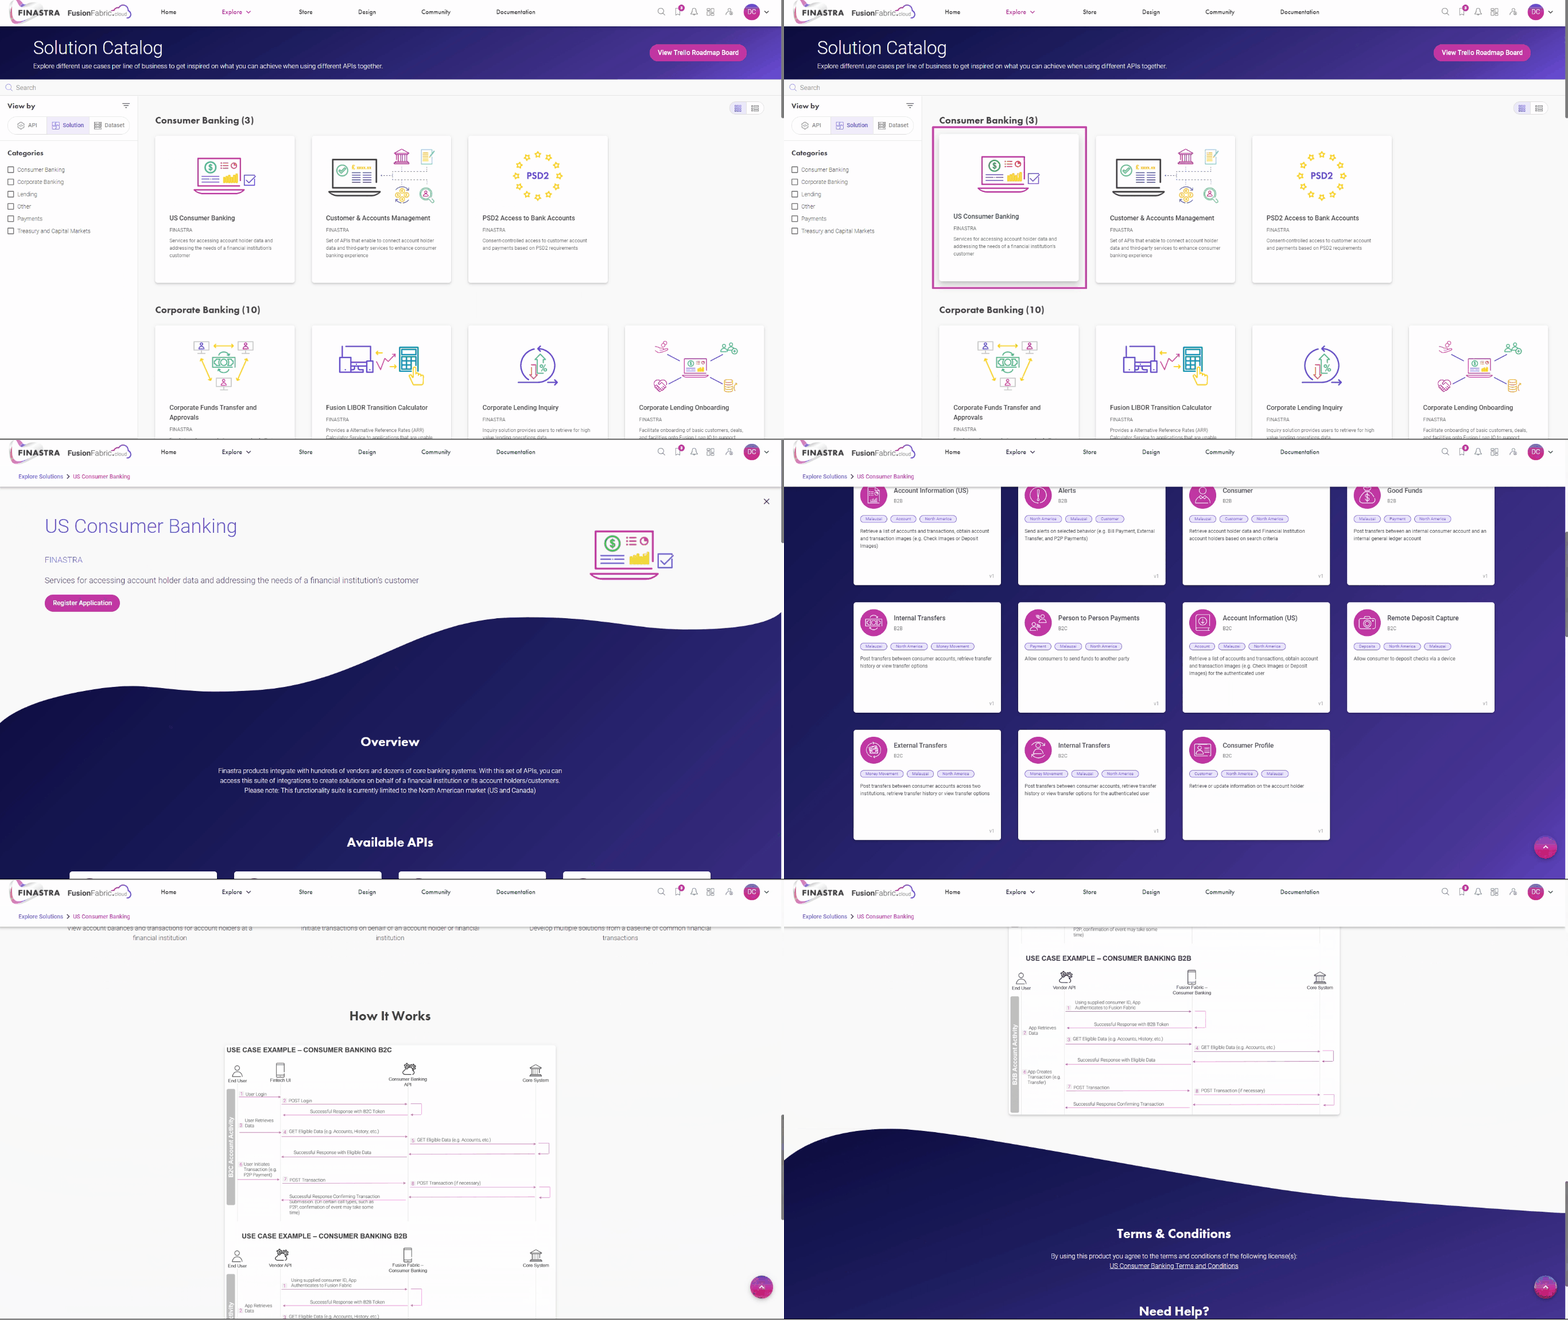
Browse a solution overview page.
For example, choose US Consumer Banking from the Consumer Banking category.
This will display the Solution overview with the available APIs, its key features, how the solution works, and the terms and conditions you need to agree to before using the APIs.
Browse a Dataset Details Page
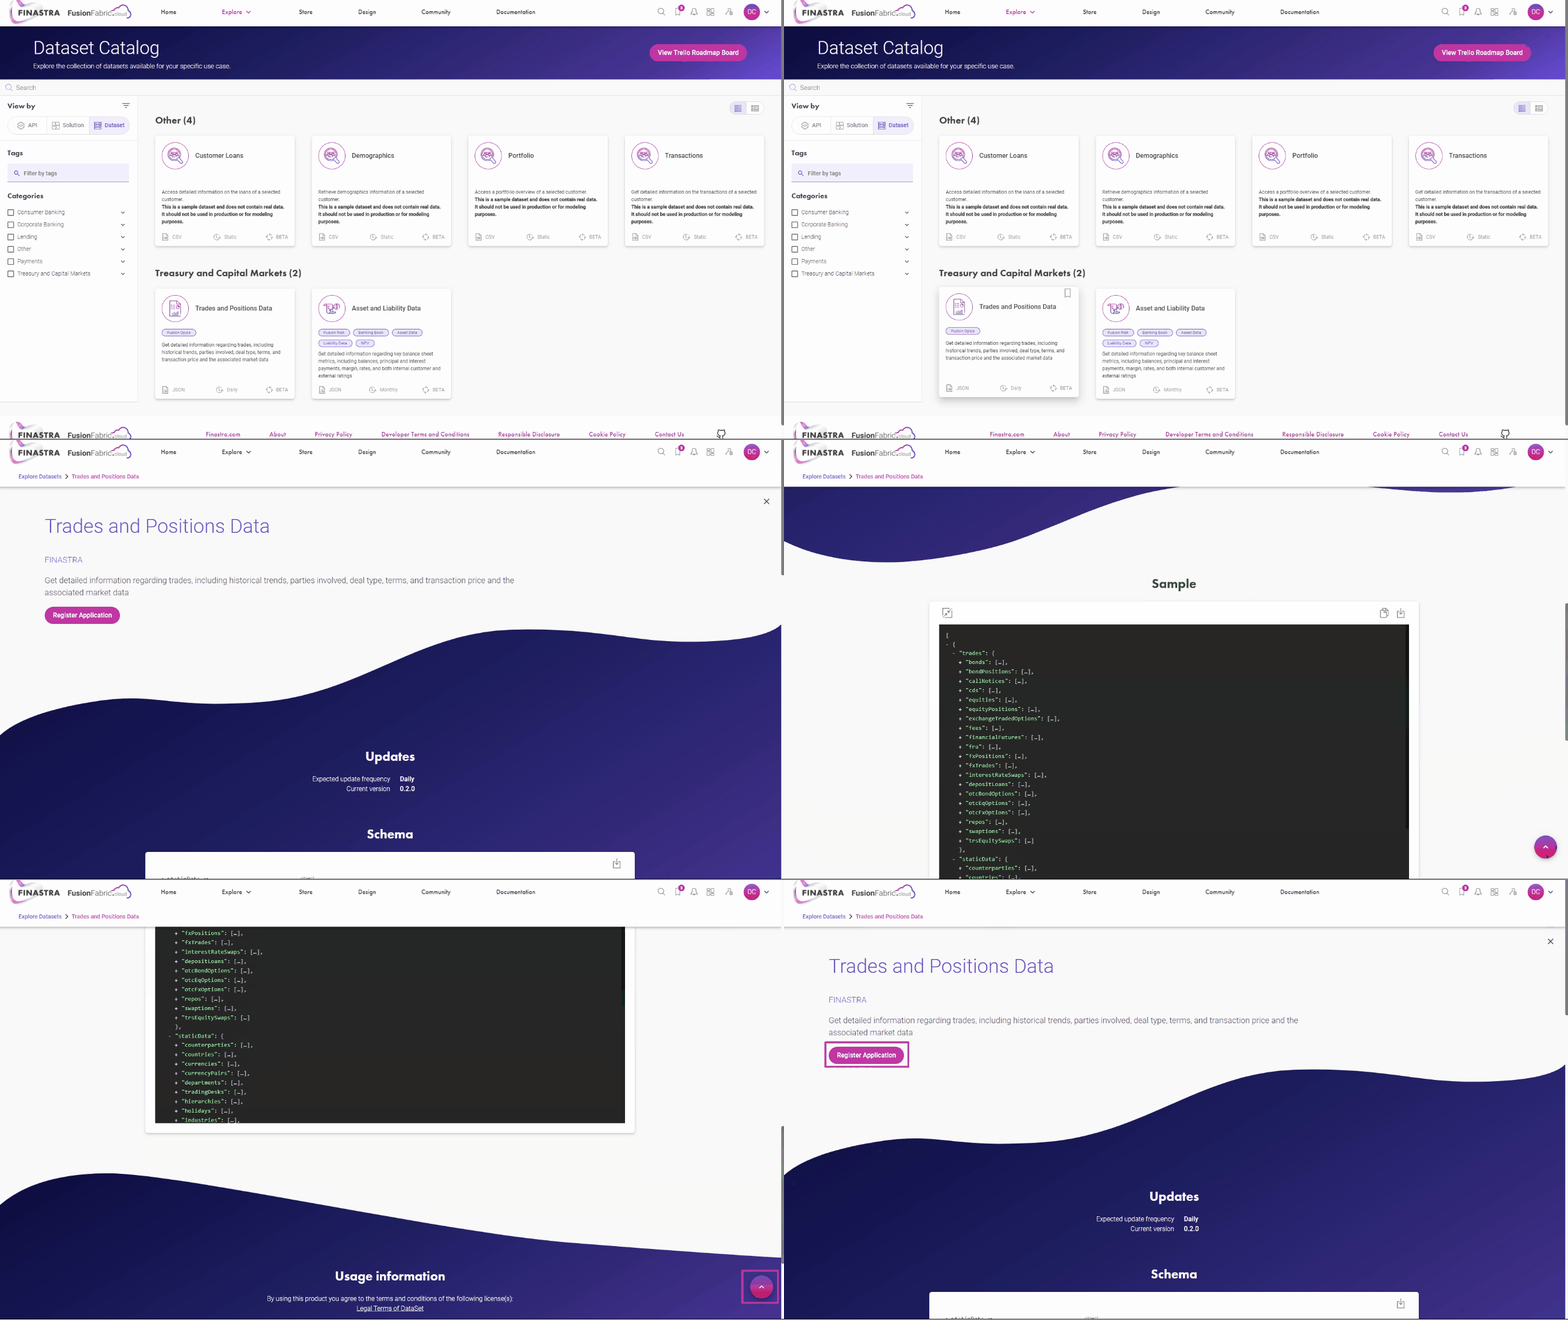 In the case of datasets, follow the same steps. Clicking on a dataset card redirects you to the dataset details page, where you can see its update frequency, schema and a sample of the dataset.
Jump back to the top of the page to register an application using that dataset.
Register an Application with all the Solution APIs
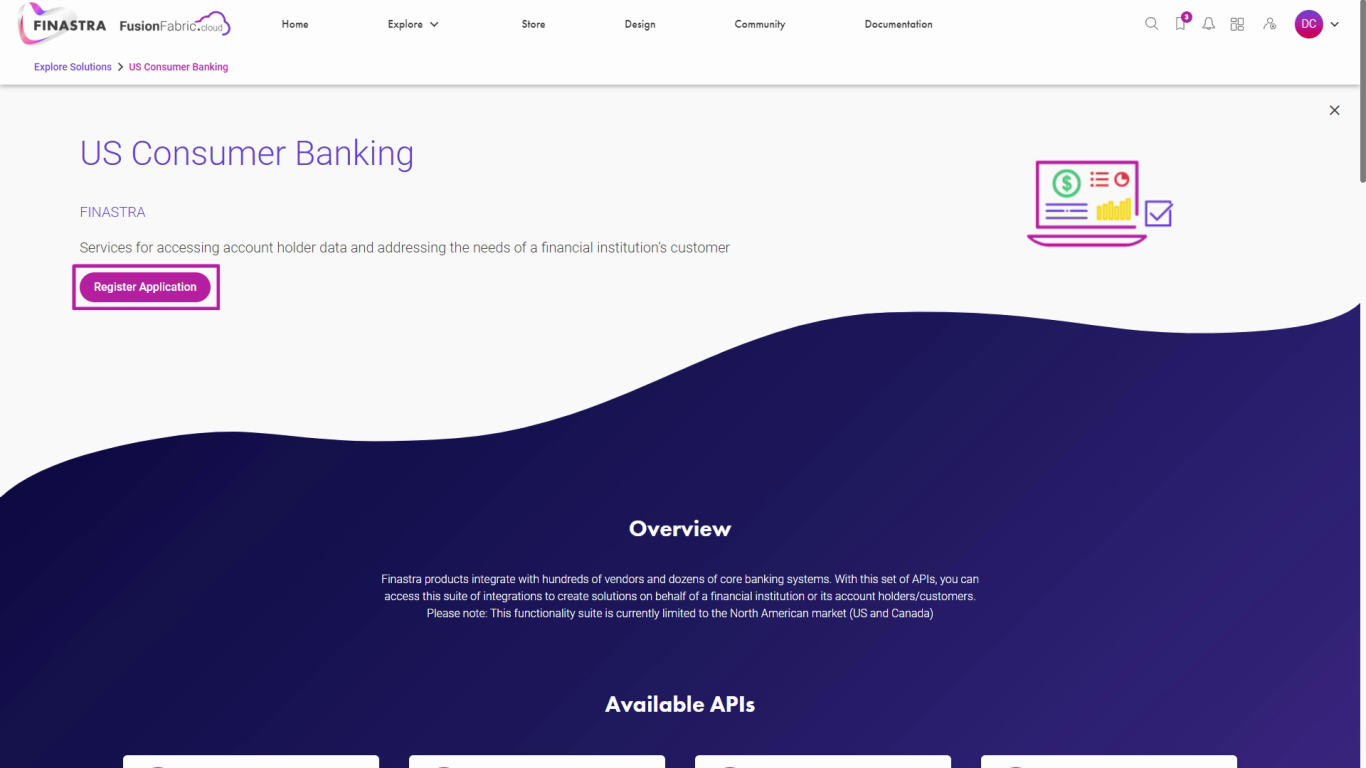
Register an application with all the solution APIs
The app registered in this tutorial shows the use case from the US Consumer Banking solution.
To integrate all the Solution APIs into your application, jump back to the top of the the page and click Register Application.
The application wizard opens. Let’s explore it.
Enter the Application Details
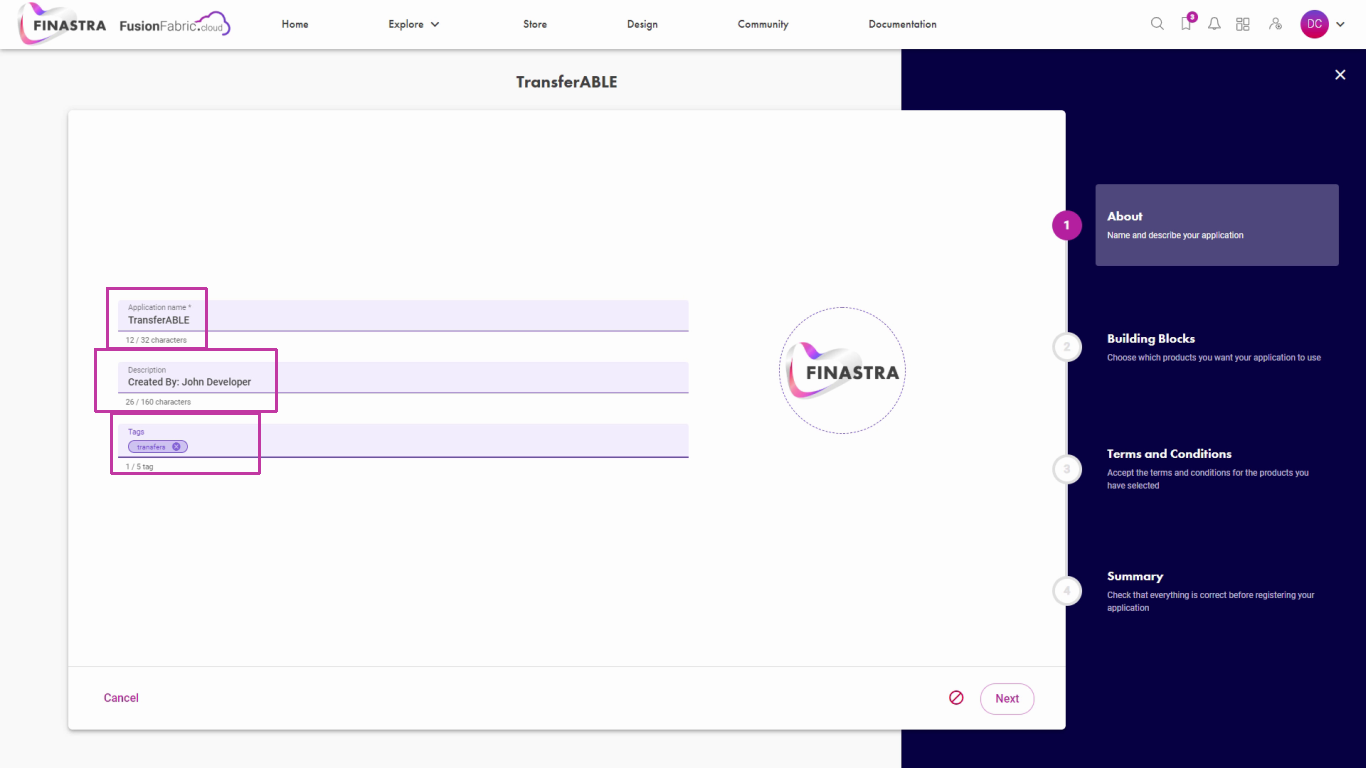
Enter the application details.
At the first step you edit your application details. Enter the name, a short description, and some category tags to help you track your application.
Application Building Blocks
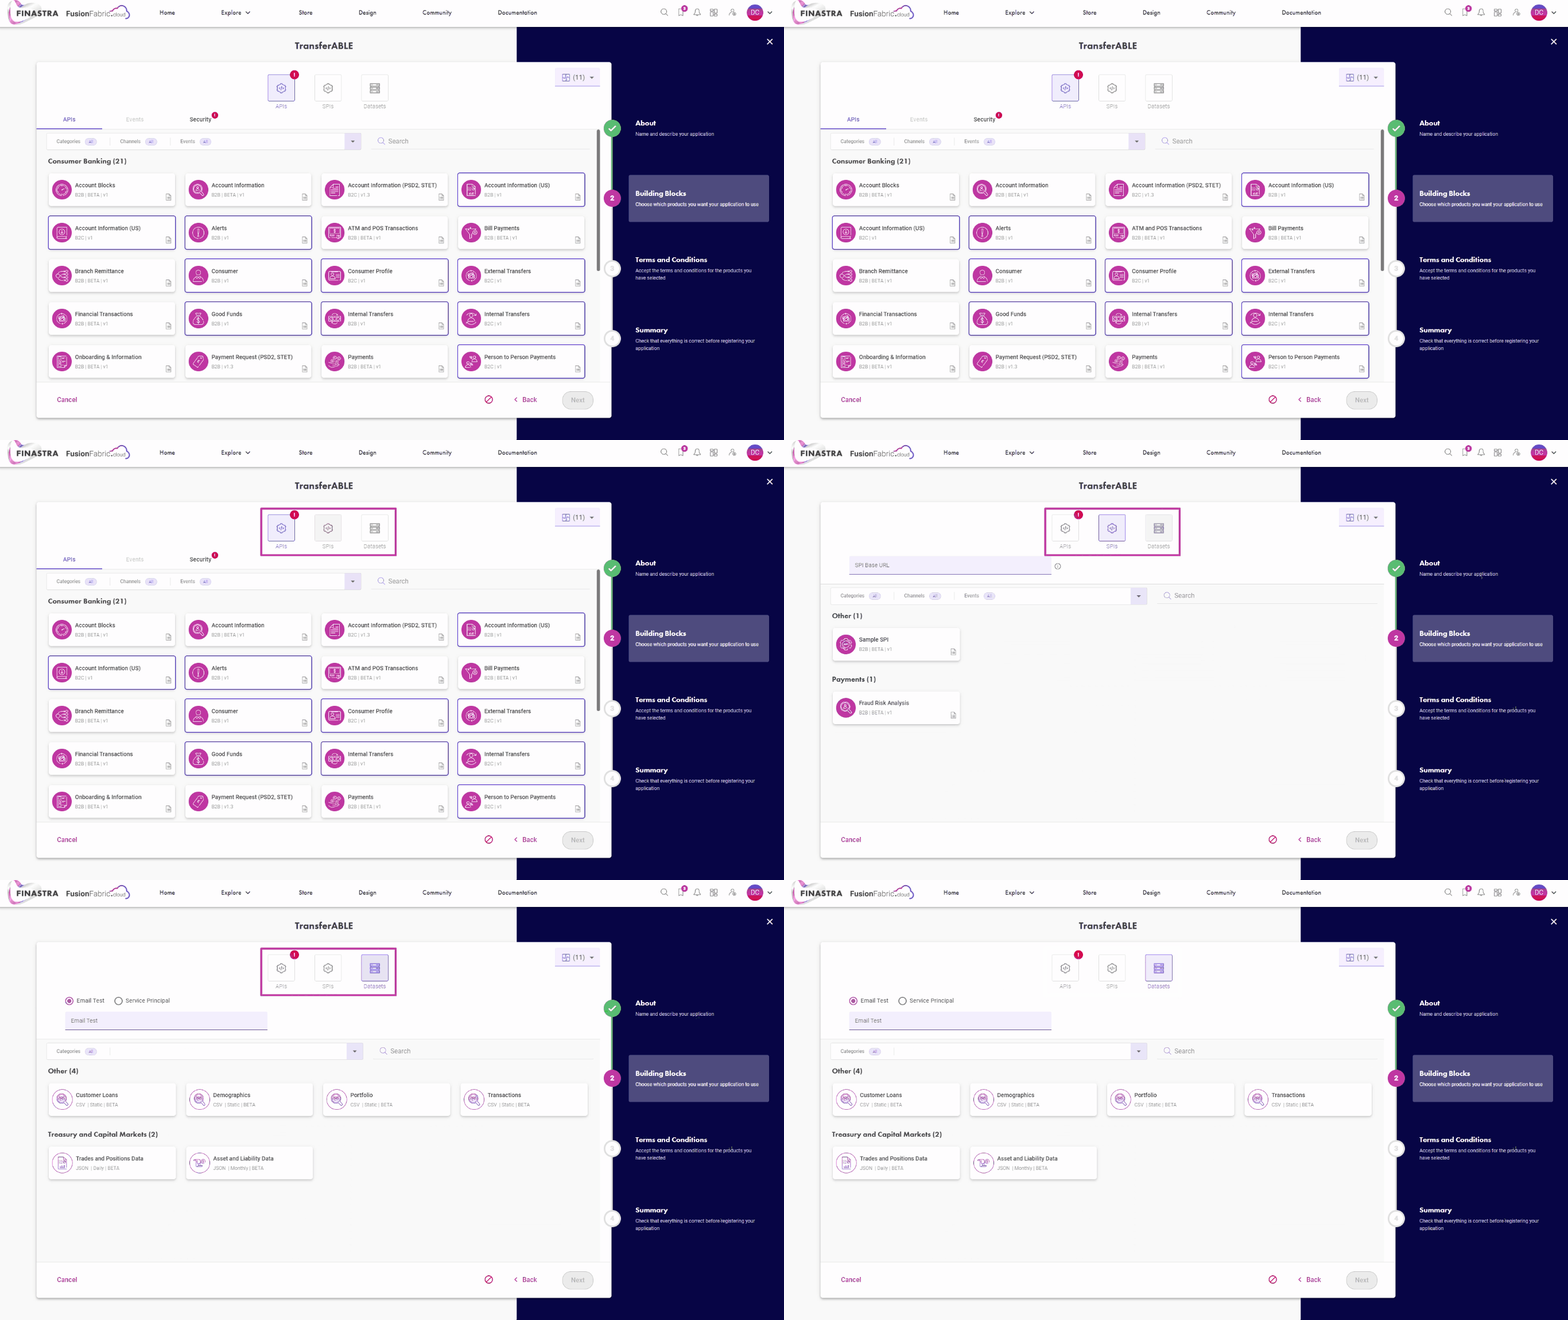
Application building blocks overview.
At the second step you select the building blocks that you want to register with your application. The building blocks are grouped into three categories: APIs, SPIs and datasets. You must include at least one building block in your application.
Check out the SPIs
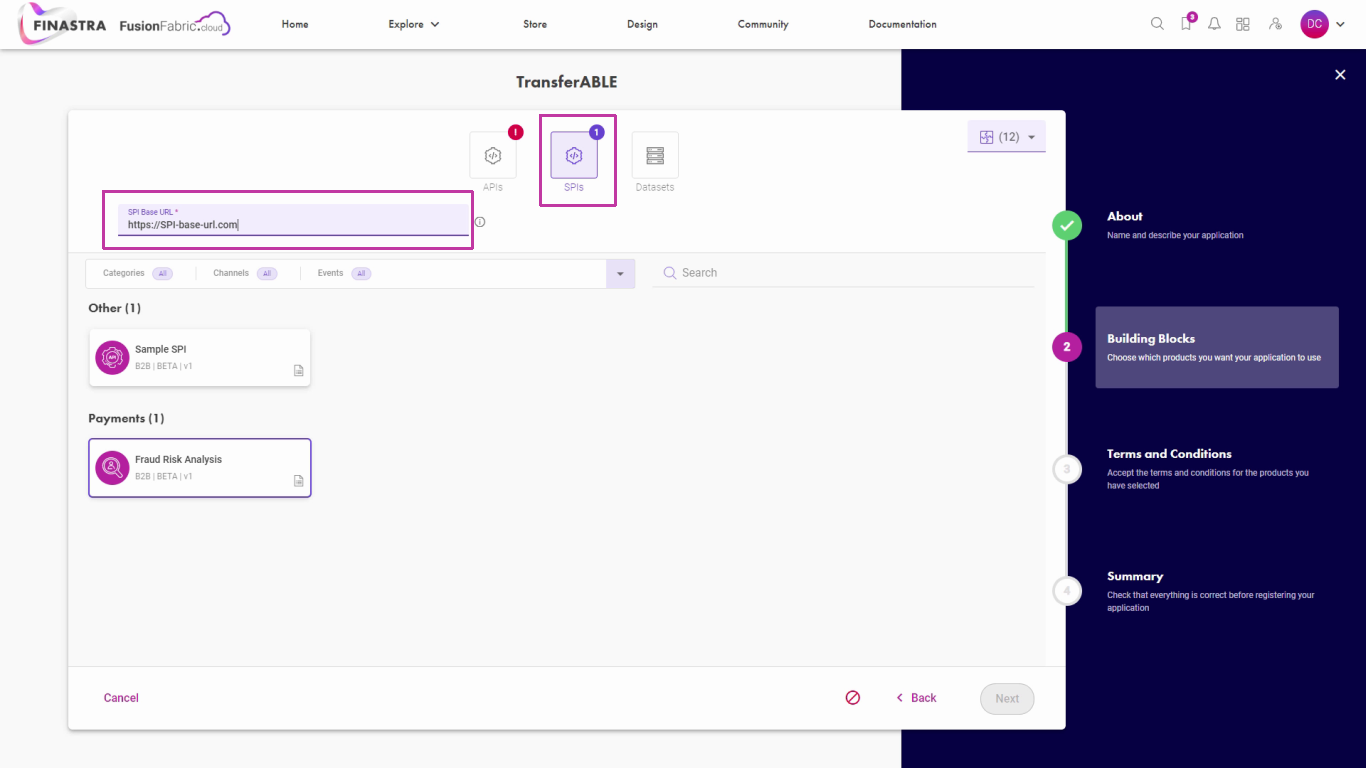
Select SPIs.
If your app requires an SPI, you select the desired SPI, and you provide the base URL. When your SPI implementation will go live, this URL must be reachable over the internet.
Select Datasets
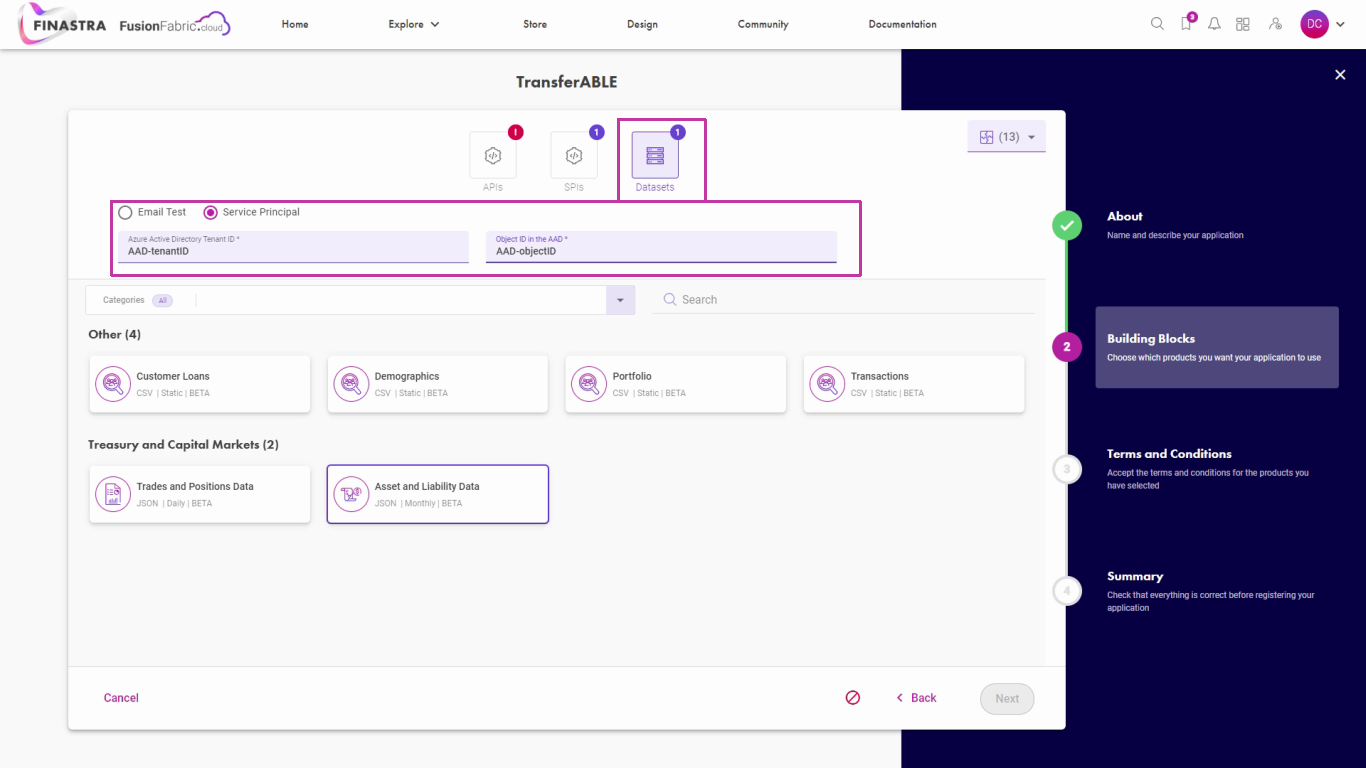
Select datasets.
Also, if you want to attach datasets to your application, you select the desired datasets.
After you register a dataset, you will receive the invitation to use it, either at the email address attached to your Azure Active Directory account, or by the Tenant ID and Object ID of your service principal user, from the Azure Active Directory.
Select the APIs
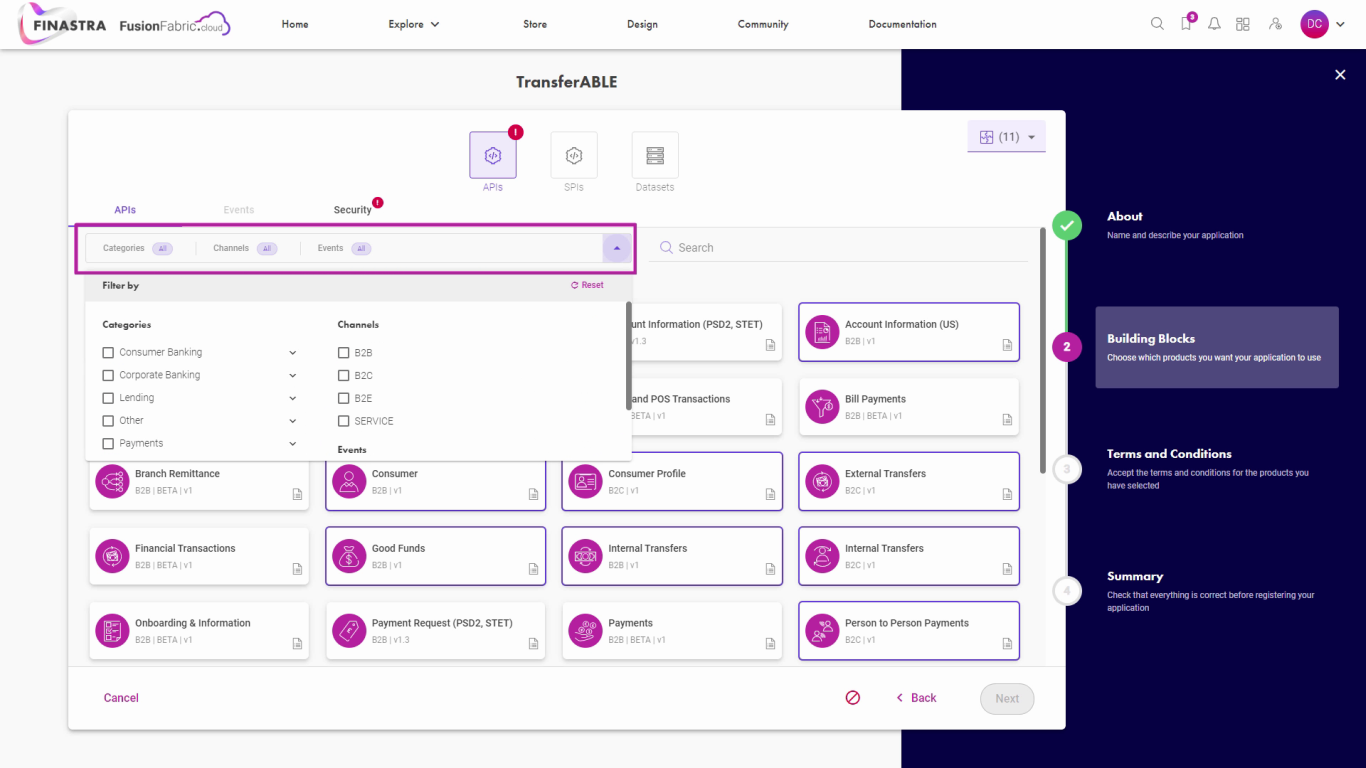 In this tutorial application, only APIs are used.
For the API building block, select the desired APIs from the APIs tab. You can filter the search by Category or by Channel type.
Enter the Security Details
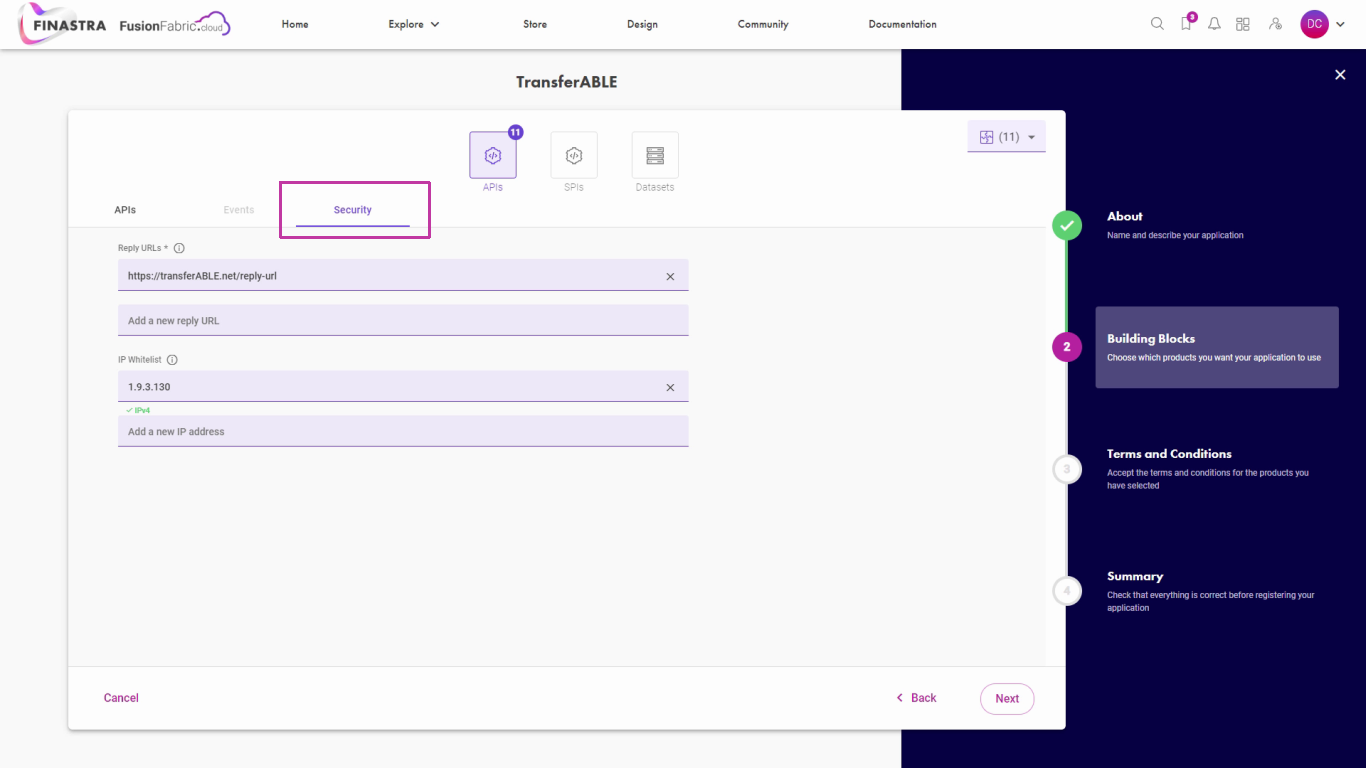
Enter the security details.
Remember that for the B2B Channel type APIs, the fields of the Security tab are not mandatory. However, for B2C channel type APIs, the Reply-URL is mandatory.
Optionally, you can enter one or more IPs for white-listing in the same tab.
Watch Out for API Events
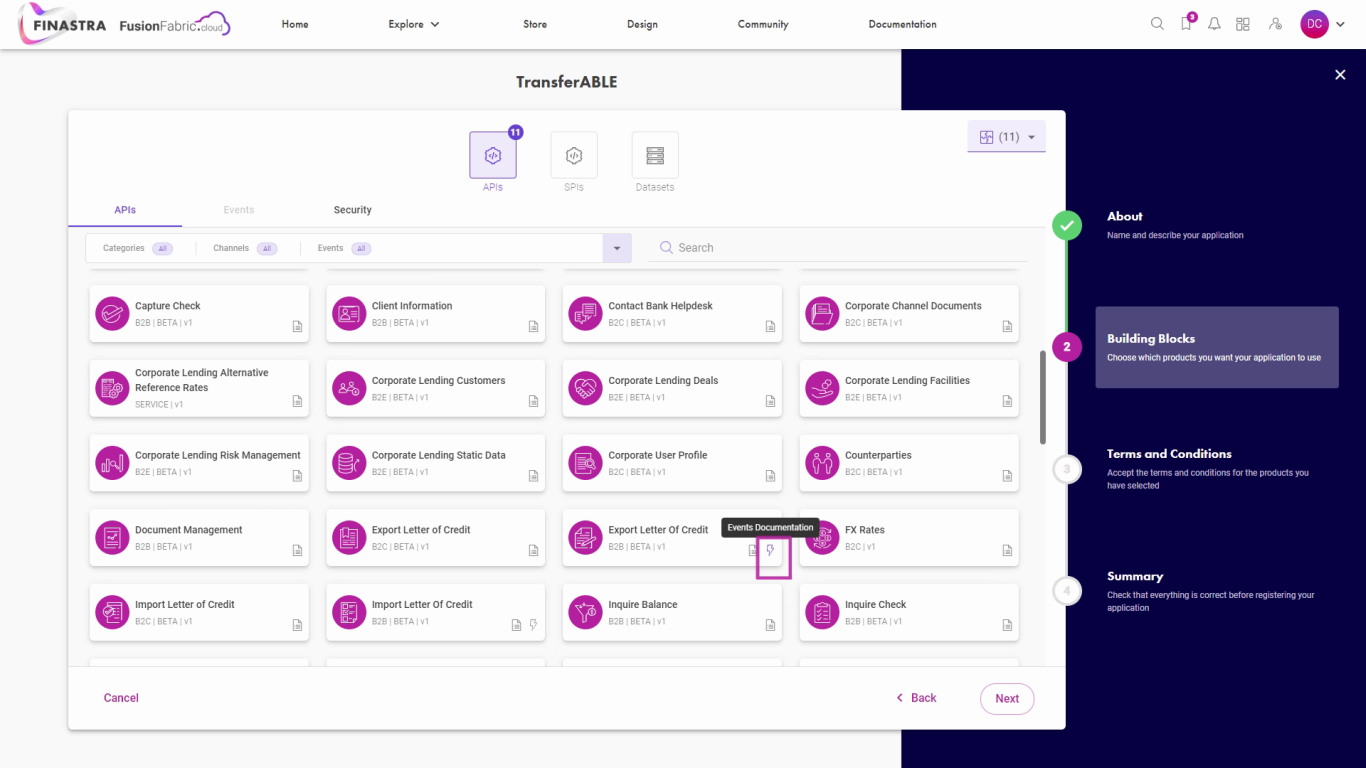
Watch out for API events.
The Events tab turns on when you select an API that has associated events. You can identify these APIs by the lightning icon that is displayed on their cards.
Subscribe to API Events
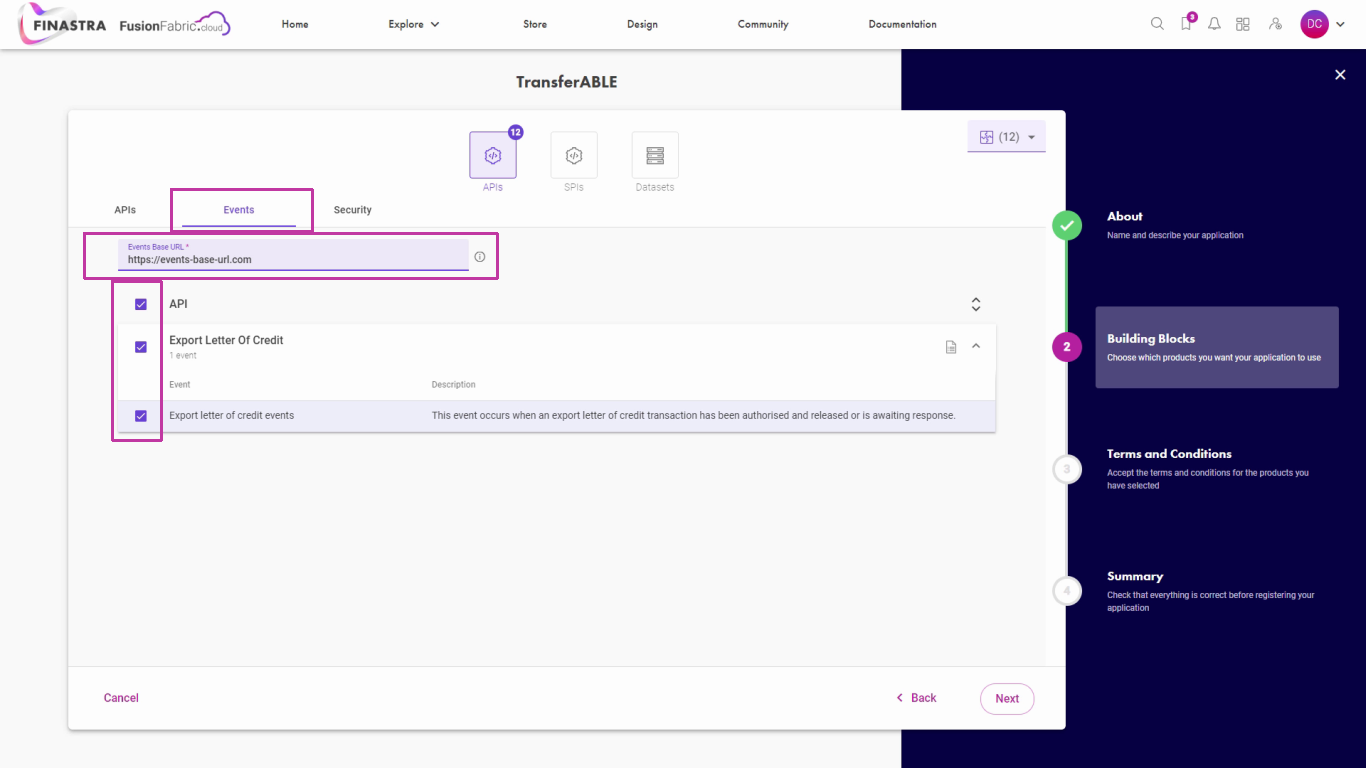 If you select an API of this type, in the Events tab you are prompted to subscribe to the events in order to receive notifications any time they occur.
Review Your Building Blocks
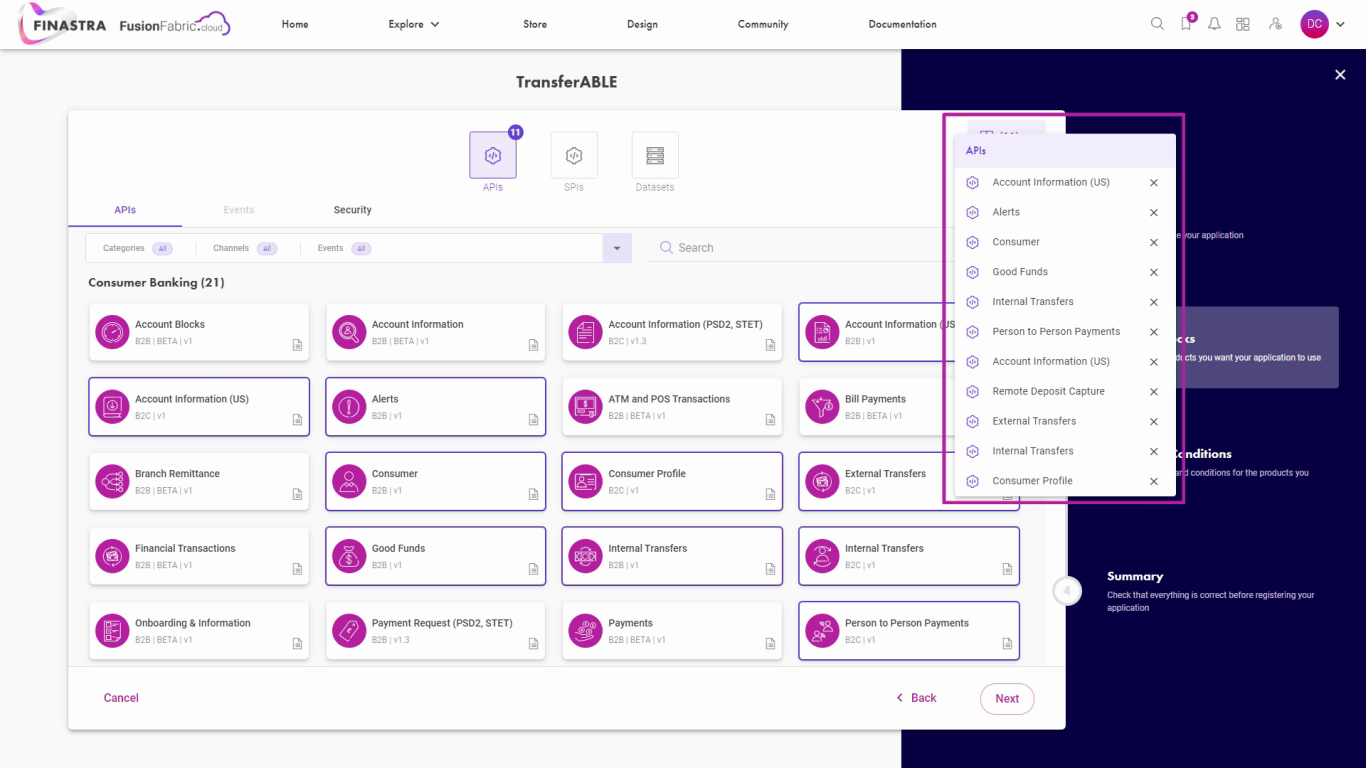
Review your selection.
All the selected building blocks are displayed at the top. Review them, and if you change your mind you can remove or add some more.
Acknowledge the Terms and Conditions
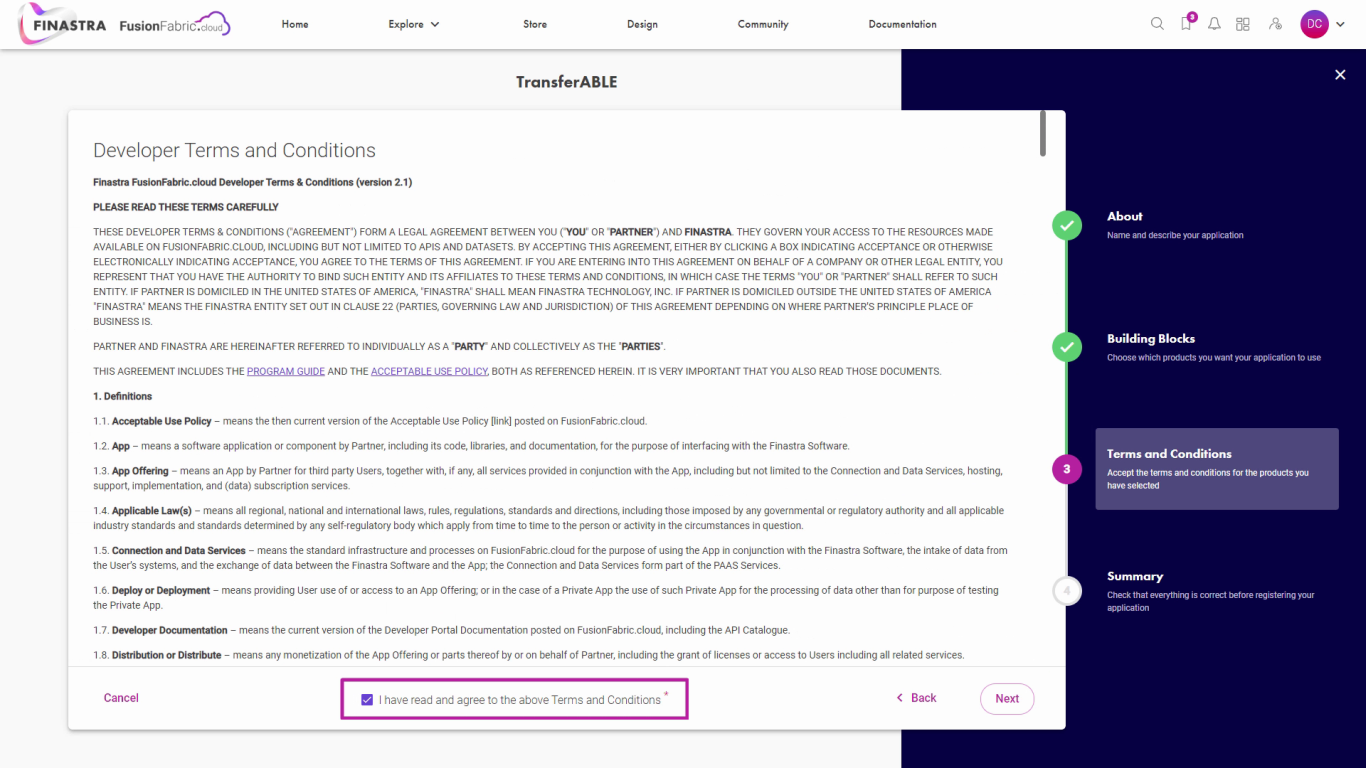
Acknowledge the terms and conditions.
When you are happy with your selection, click Next to acknowledge the Terms and Conditions for your selection.
Review the Application Summary
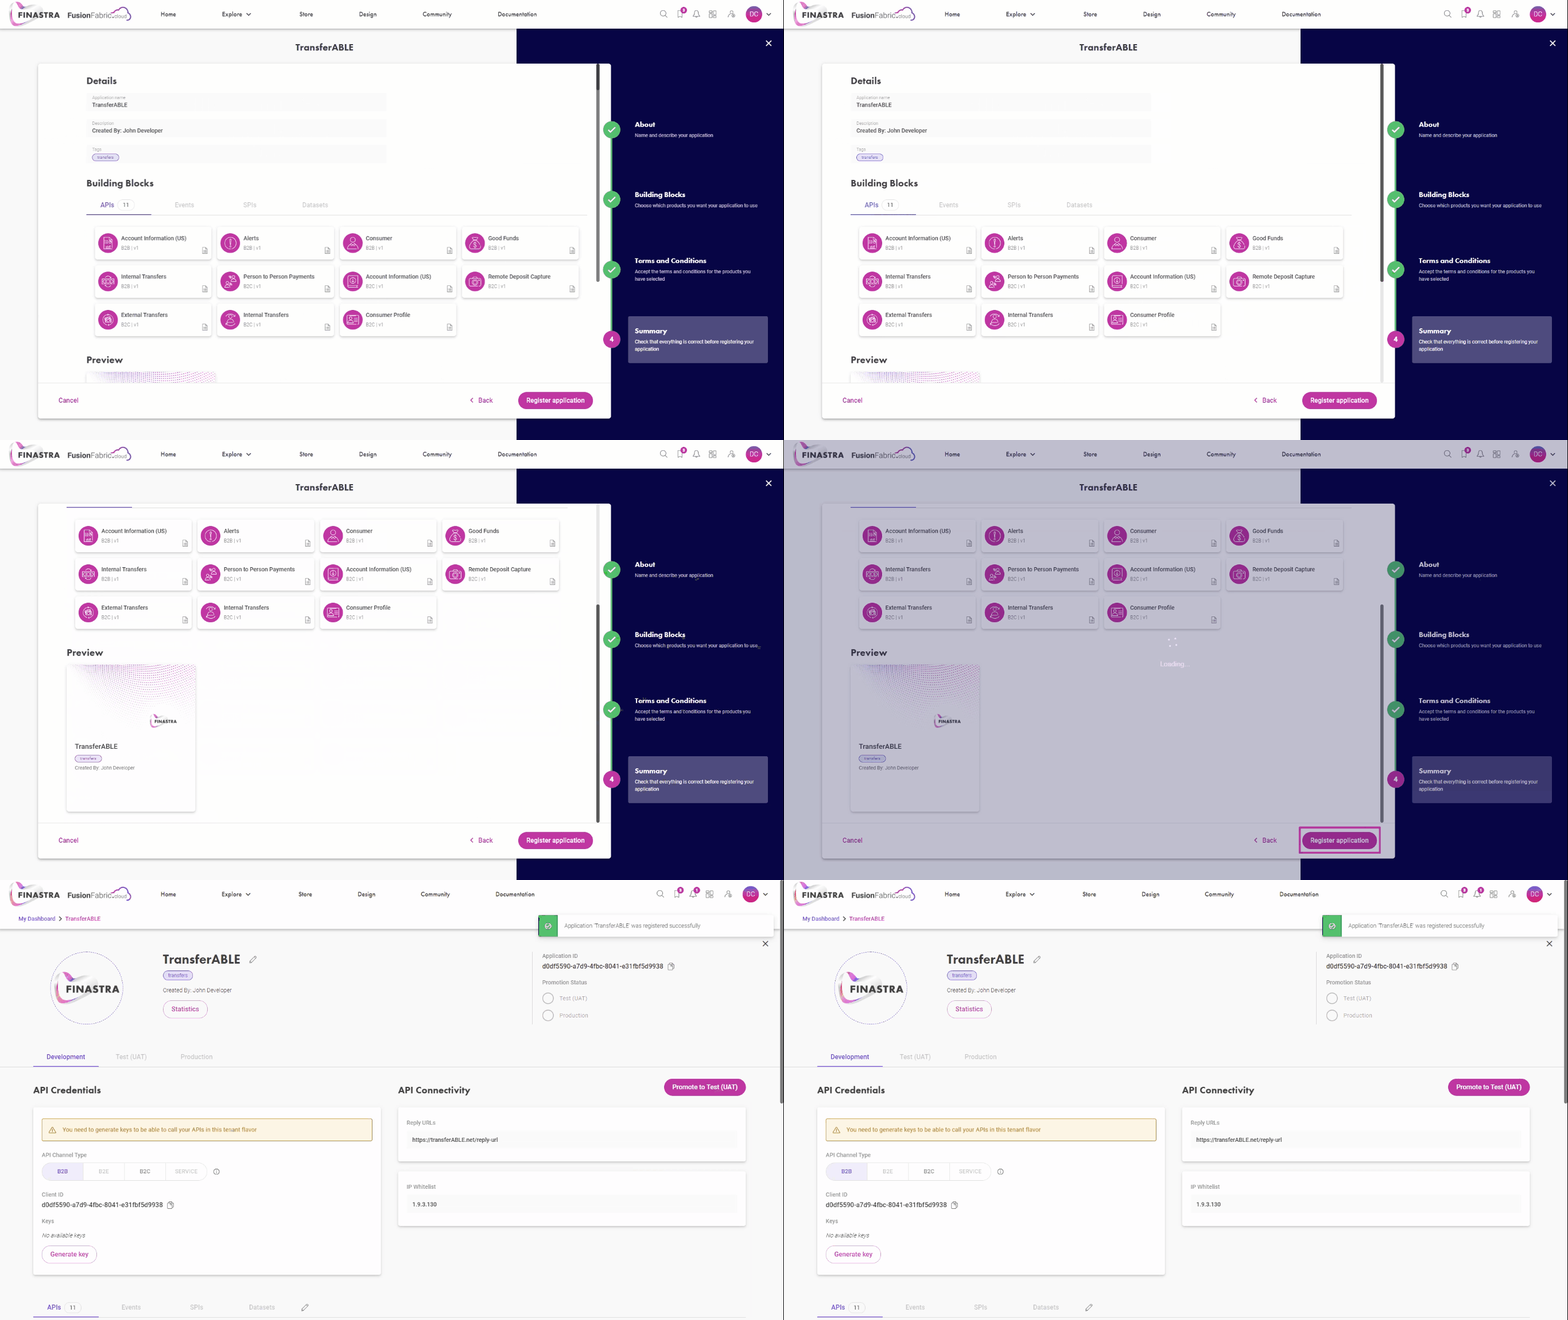
Review the application summary.
Here is one short stop at the summary page before registering the application.
View the Application Details in My Dashboard
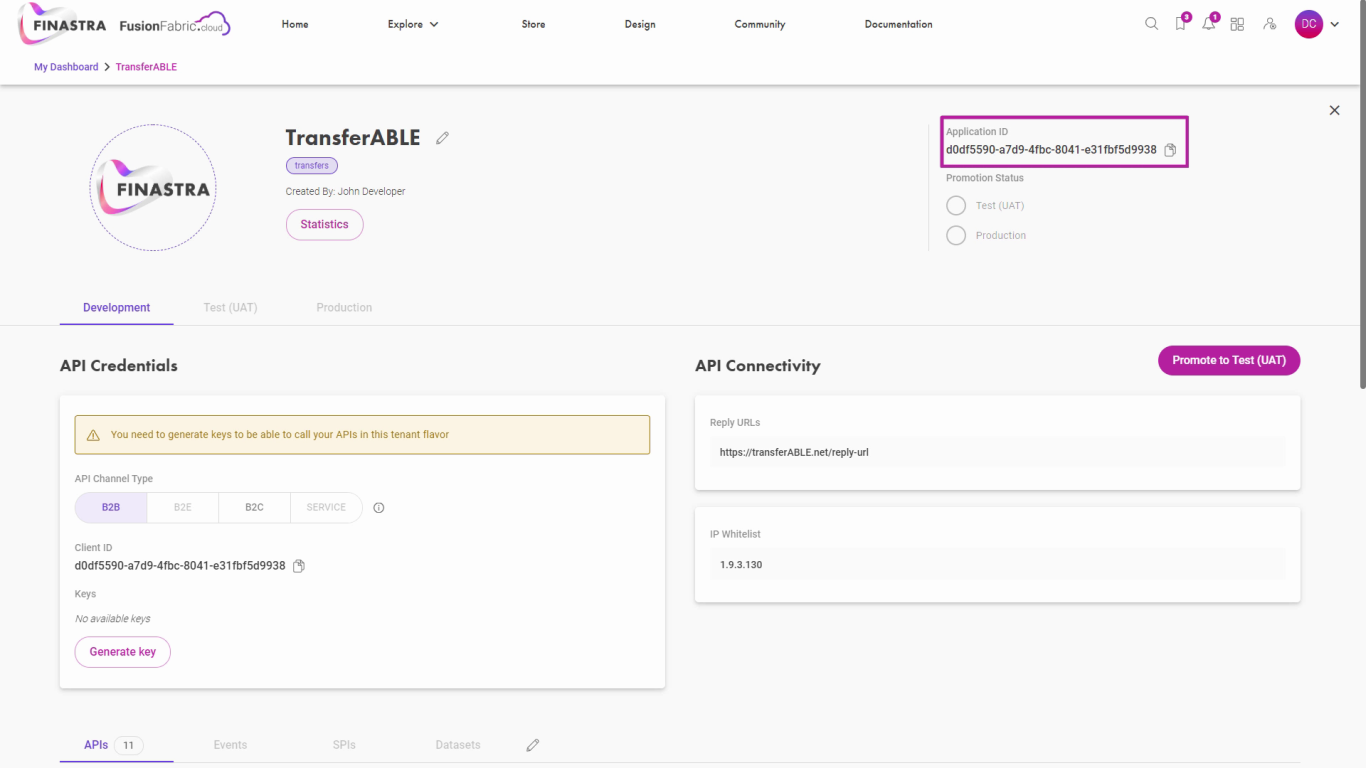
View the application details in My Dashboard.
Once registered, your application starts in development stage with a unique identification number that you can see here.
Generate OAuth2 Credentials
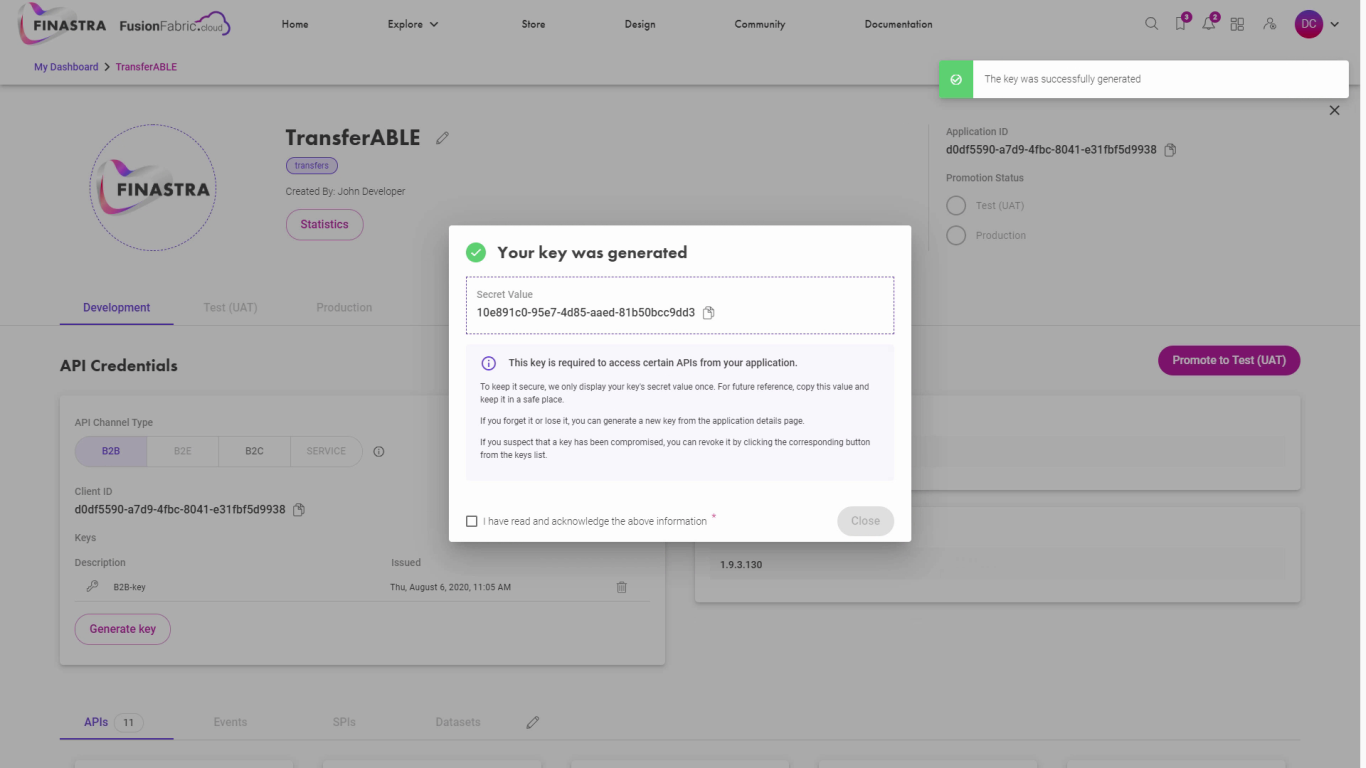
Generate OAuth2 credentials.
Depending on the type of the authentication grant flow you intend to implement on your client application, you need to generate different credentials for each API channel type.
Note that the B2B APIs support Client Credentials grant flow while B2C and B2E Channel types support the Authorization Code grant flow.
For security reasons, the Secret Key is generated only once, so make sure to copy its value somewhere safe. Otherwise, you must generate another key and update your client application accordingly.
Review the Application Details
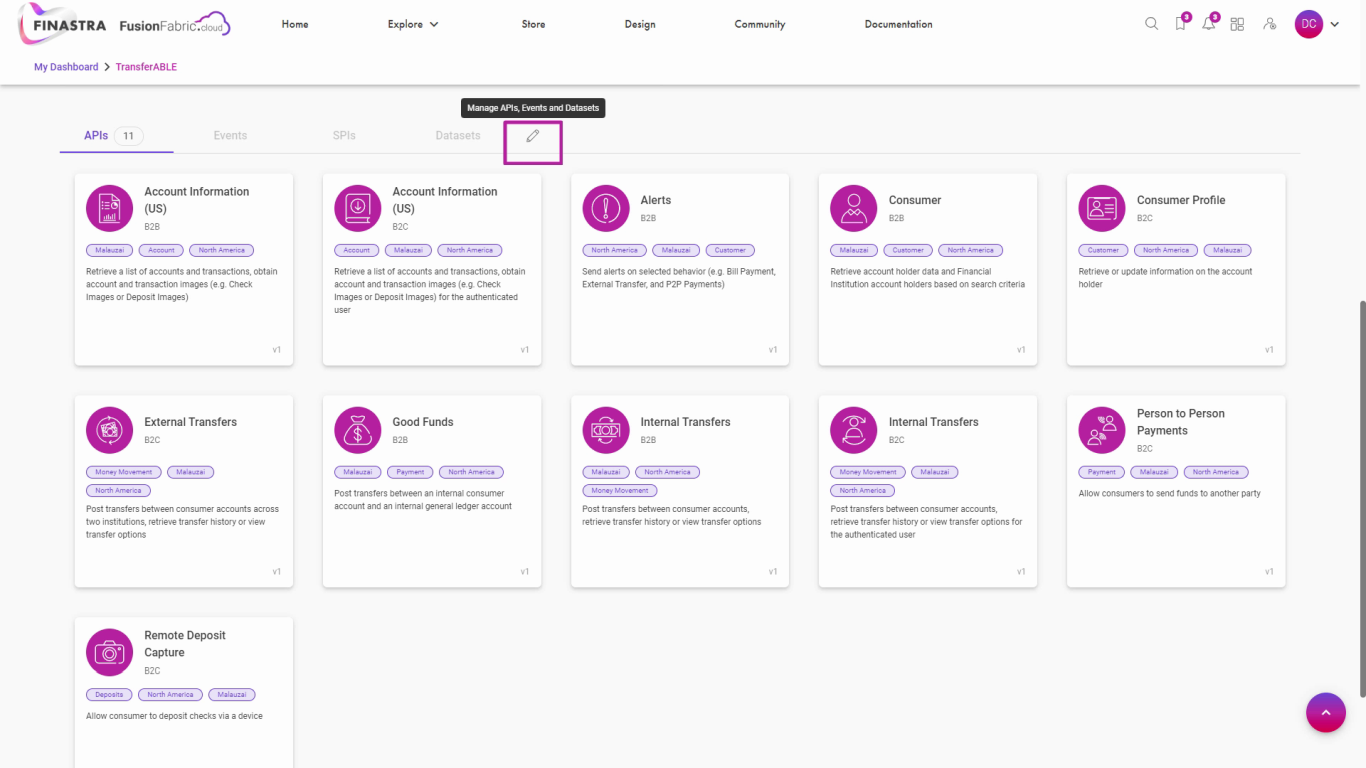
Edit the application details
Scroll down in the app details page to review the URLs for SPIs, Events or datasets. You can modify these fields and even add more building blocks to your application by using the Edit buttons.
Modify or Delete the Application
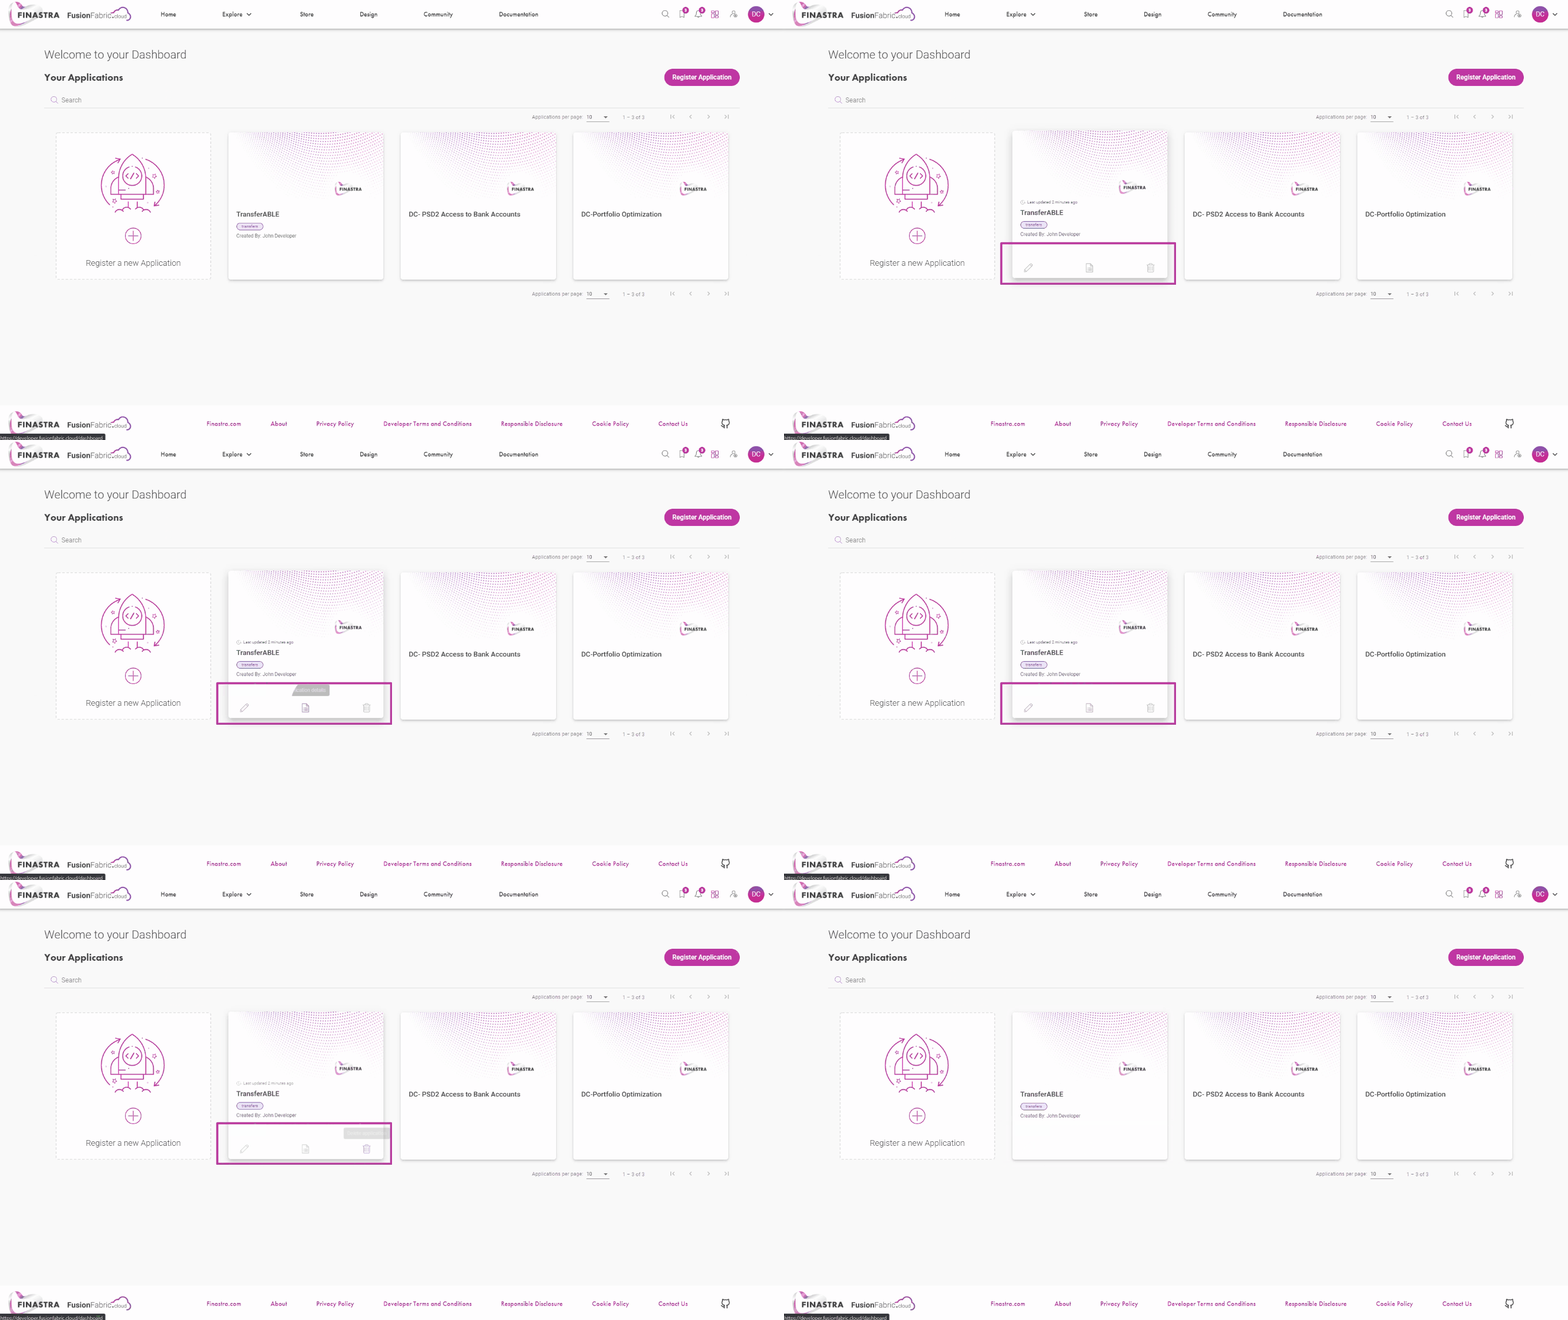
Modify or delete the application.
Remember that you can always return to an application to edit, view its details, or to delete it from My Dashboard.
Learn More
In this tutorial you were guided through the steps of the Application Wizard. You are now ready to explore the APIs with Postman tutorials.
If you want to learn more about the FusionCreator applications, see the dedicated section in the Platform Deep Dive documentation.